I remember nearly ruining my veil placement at my cousin's wedding because I jammed a too-tight elastic into the wrong spot. That day I learned which low buns actually hold a veil and which ones collapse under pressure. If you want low bun wedding hair elegant without the salon markup, these are styles I have tried on myself, my friends, and a few strangers who needed a quick fix before the ceremony.
These ideas work best for medium to long hair, including fine, straight 1B through curly 3B textures, with notes for coily 4A hair in a few sections. Expect most looks to take 10 to 35 minutes depending on complexity. Budget ranges from under $10 for tools to a $150 tool splurge for one smoothing iron. Most are DIY friendly, a handful are worth booking for extensions or color work.
Sleek Low Knot With Invisible Pins
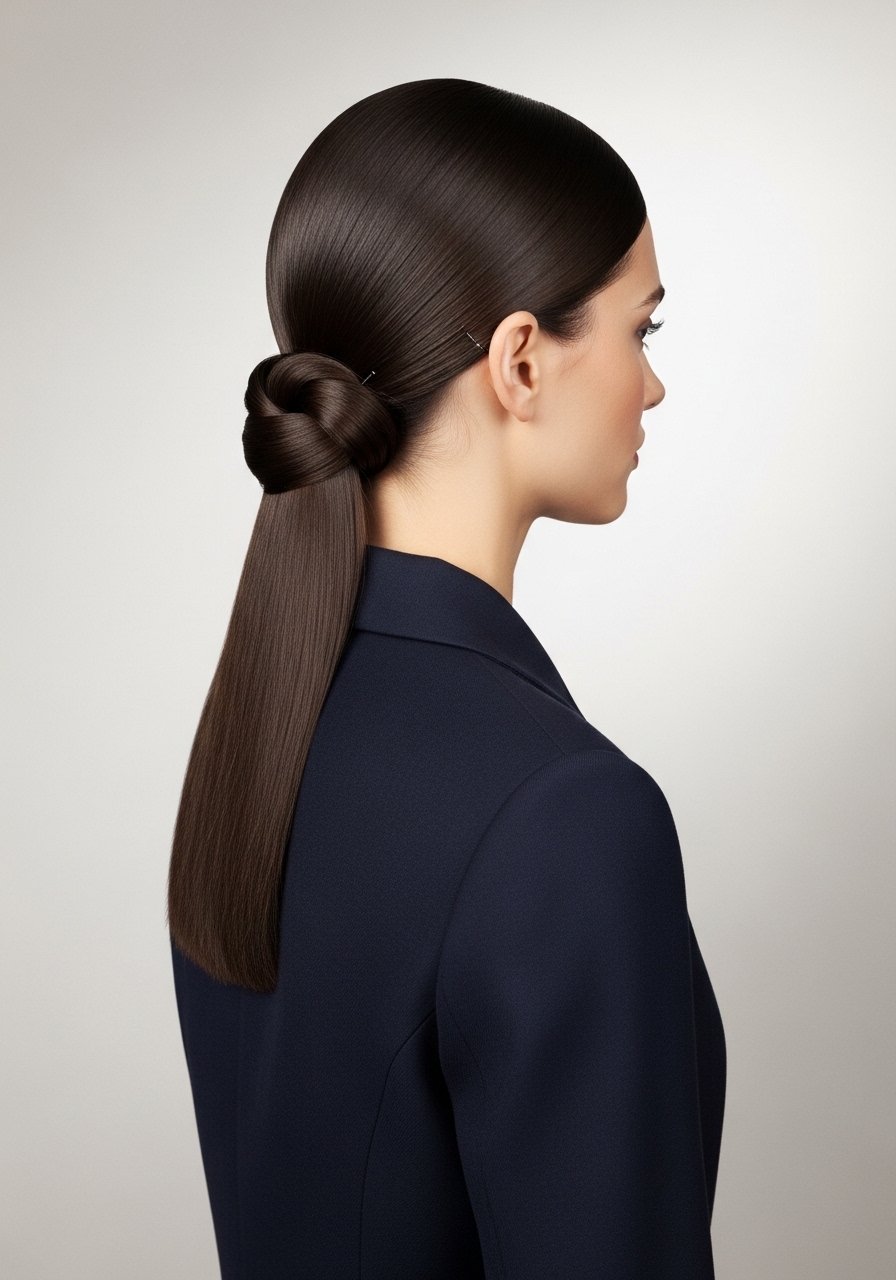
If you want classic wedding polish, aim for a low knot held with invisible pins across three anchor points. I divide hair into a center part and two 1-inch sections by the ears, then smooth each side with two pumps of a weightless cream. Pull into a low pony, twist once, and pin the twist flat with five to seven U-shape pins placed at 45 degree angles for grip. Fine hair benefits from a light mist of a texturizing spray at the roots so pins do not slide. Heat protectant is required if you blow dry or iron, especially before any iron over 300F.
Messy Low Bun With Face-Framing Tresses
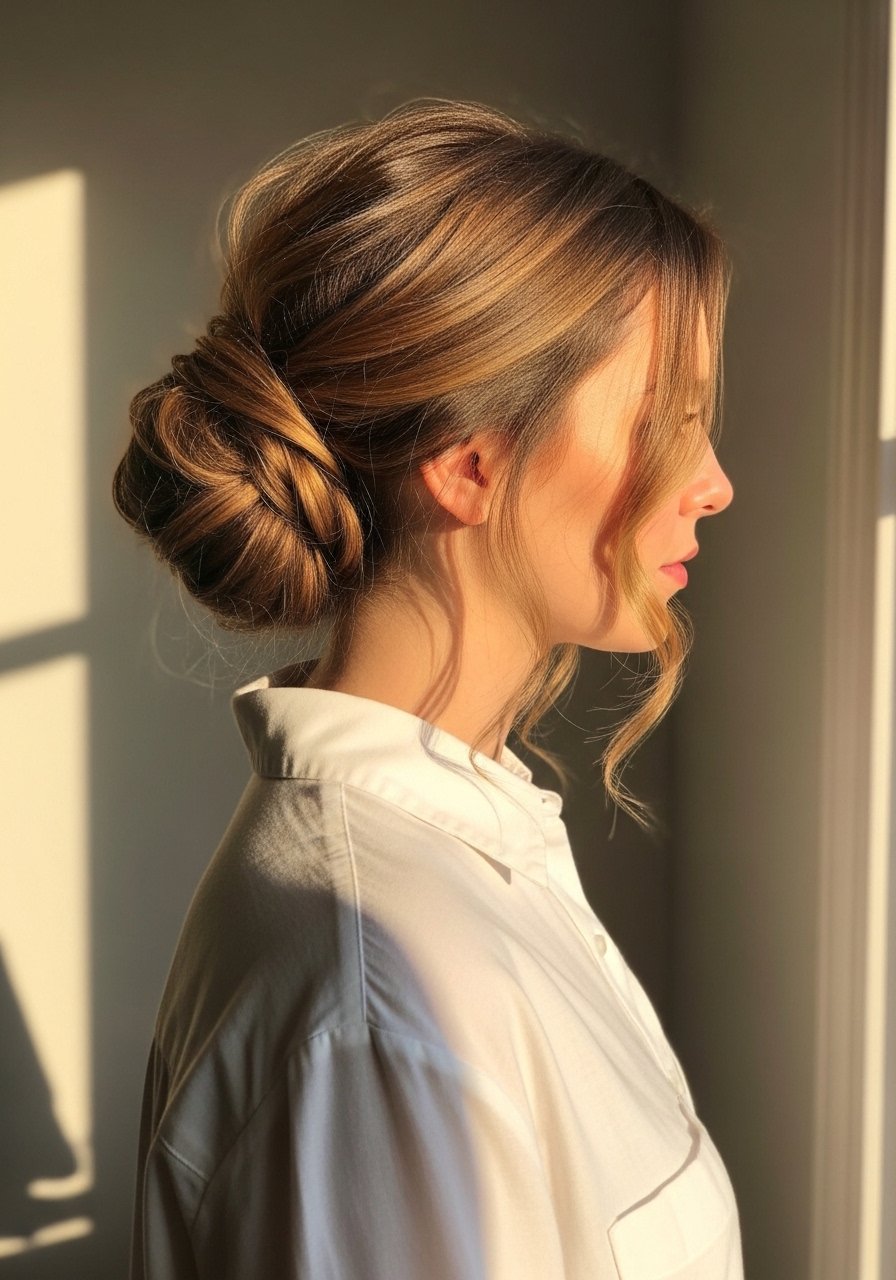
This is the one I reach for when a bride wants casual romance. I curl 1-inch sections at 320F on the outer face of the hair for loose texture, finger-comb once, then gather at the nape and wrap loosely into a bun, pinning four to six sections so nothing is taut. For 2C and 3A hair, skip heavy oils before pinning or the bun will flatten. A common mistake is spraying everything with hairspray before pinning. Spray after you pin so pins catch hair, not sticky residue. This holds for roughly four hours with a light setting spray.
Braided Low Chignon With Ribbon Accent
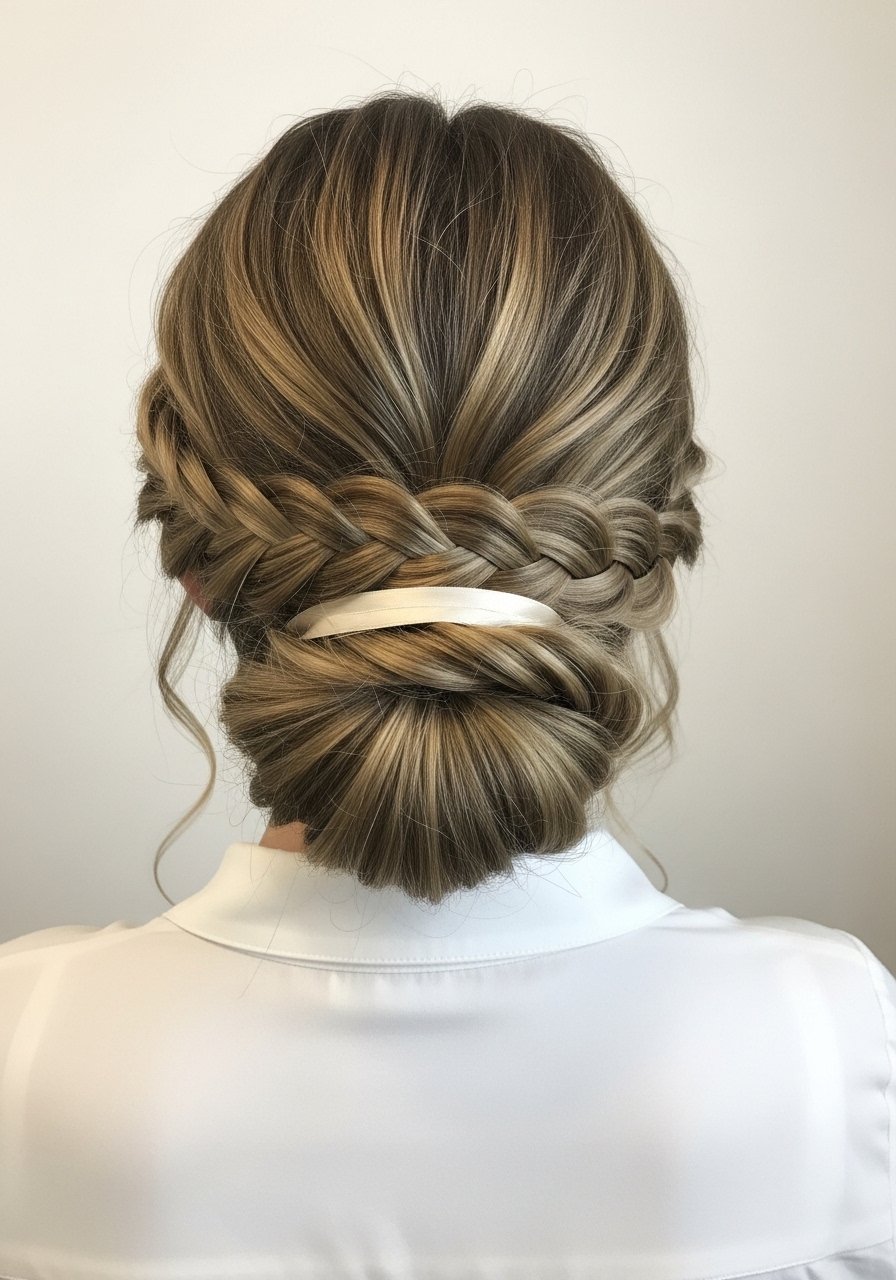
If you want texture plus elegance, braid two side sections into loose three-strand braids, then sweep them into a low chignon and secure with pins. For thicker 3A to 3B hair, make the braid looser, using large 1.5-inch sections so it reads soft in photos. Ribbons hide a messy base and add structure, use a 1/2-inch satin ribbon tied once, then tucked under a pin. A mistake I see is over-braiding tight at the start. Keep the first three inches near the roots loose so the braid blends into the bun without a thick band of hair.
Low Bun With Pearl Pins For Fine Hair
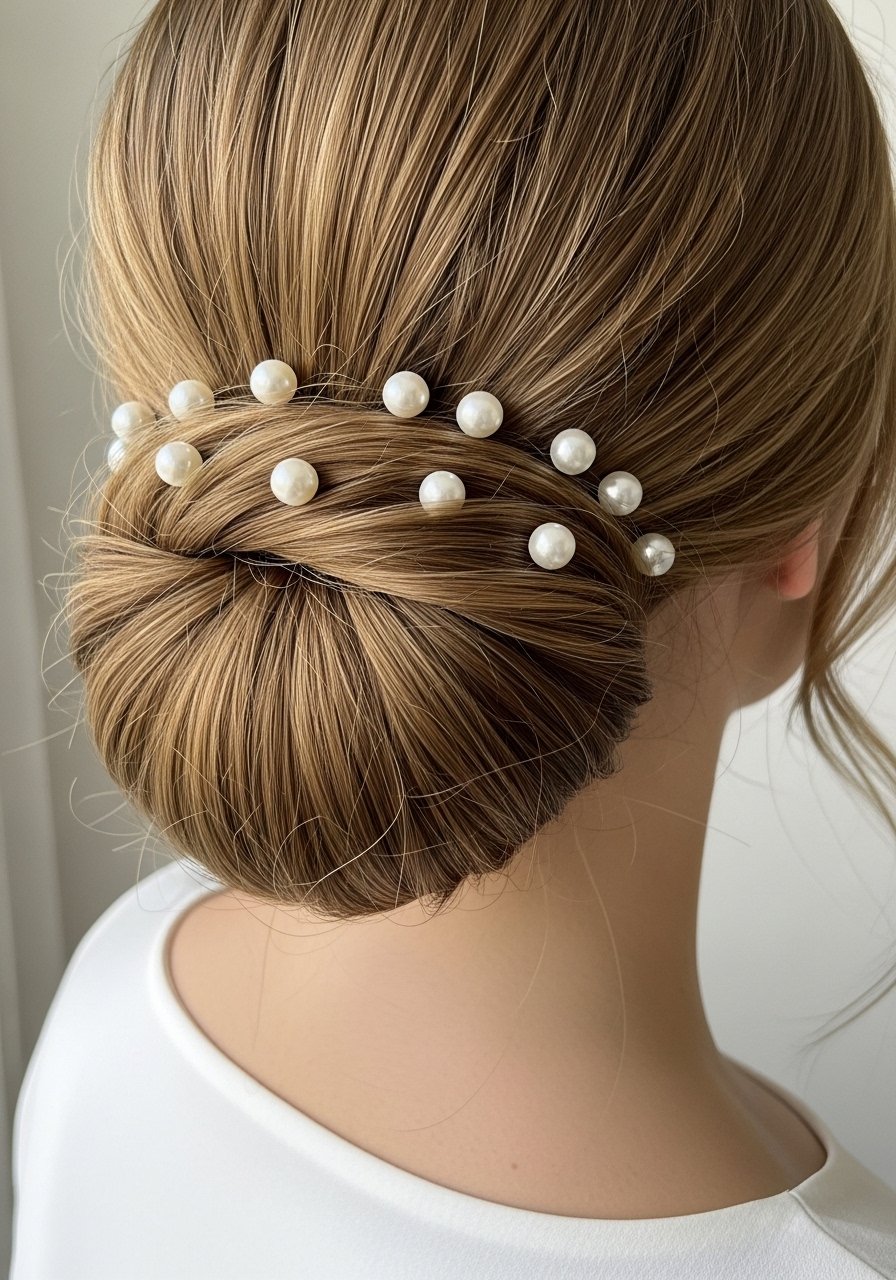
Fine hair can look weighted and flat if you pile it into one tight knot. My trick is a donut padding no larger than 2 inches, placed at the base to create volume without extensions. Tease the hair over the padding with ten quick backcombing strokes in three vertical sections, then smooth the top layer with a soft brush. Secure with bobby pins crisscrossed for security, then press pearl pins into visible areas to hide larger pins. If your pins keep slipping, swap cheap hairpins for U-shape pins and place them with their curve hugging the skull for grip.
Low Bun With Veil Securement Technique
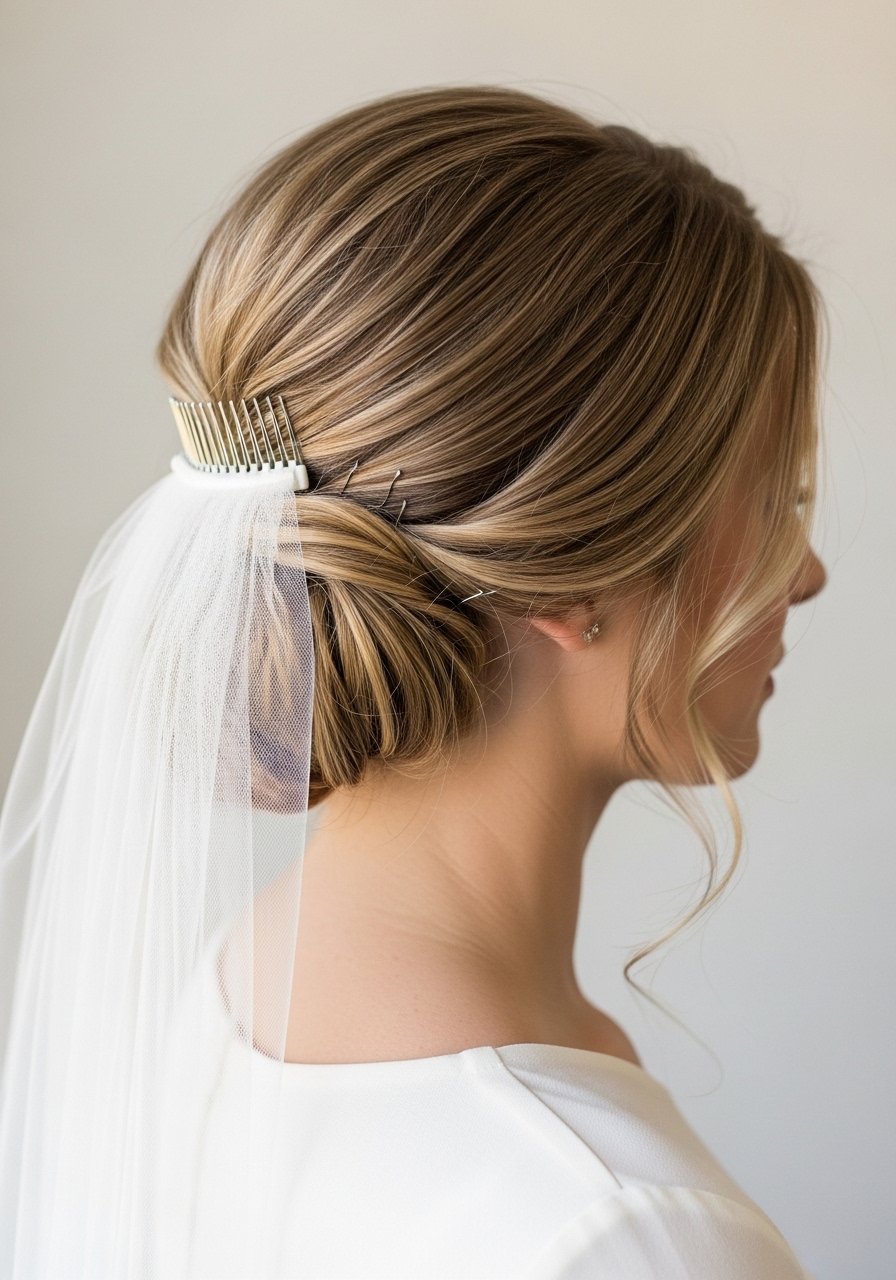
Veils are heavy and can pull down a delicate bun. I learned a three-point anchoring method from a stylist friend. First, sew or use a small comb in the veil with two sewn loops. Place the comb at the top of the bun and secure with two U-shape pins through the comb teeth into the bun. Then, add a hidden cross pin behind the comb to prevent forward tilt. For any veil heavier than a fingertip, reinforce with a small elastic loop tucked under the bun. If you are nervous, book a 15-minute veil test run at the salon with your actual headpiece.
Twisted Low Bun For Curly And Coily Hair
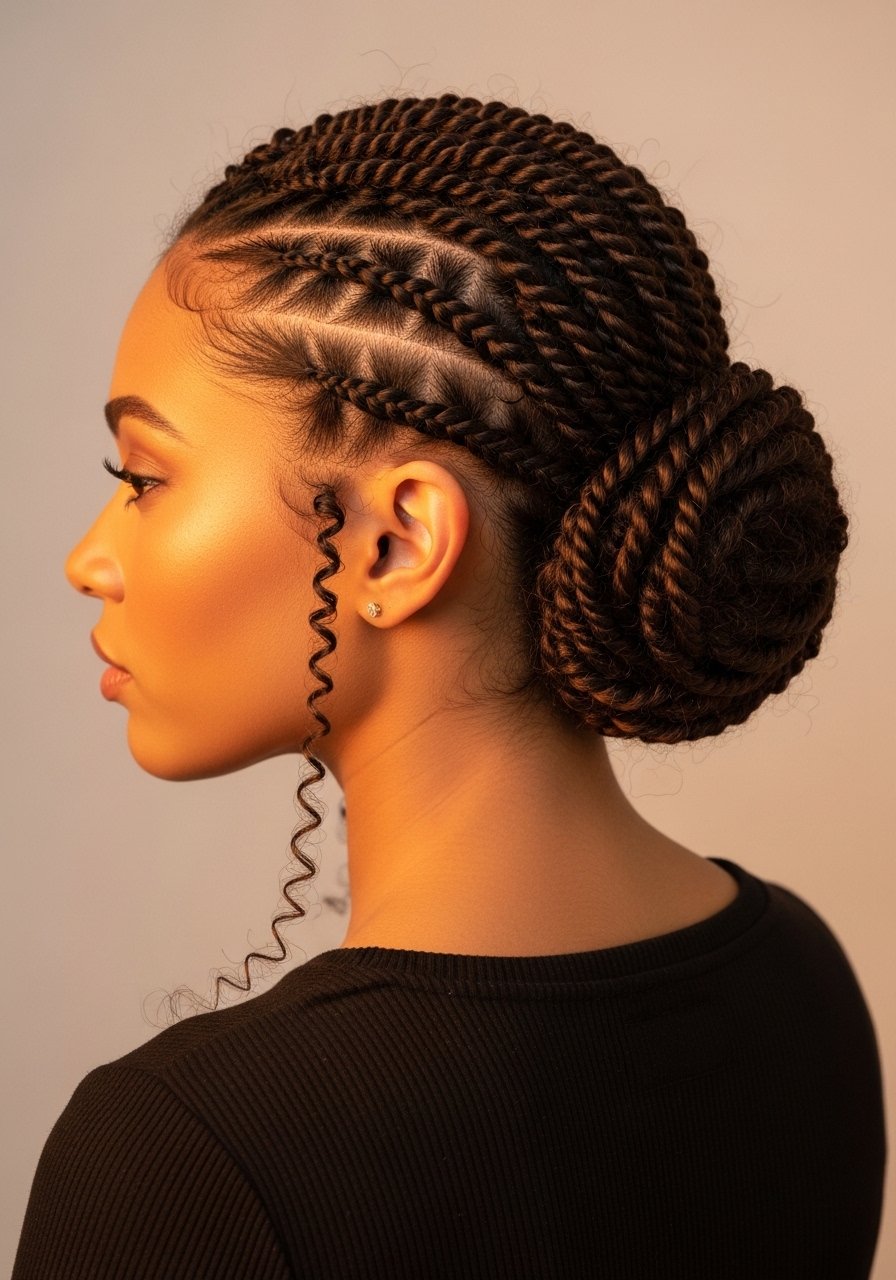
Coily and curly textures need structure without losing definition. I detangle in sections and use the LOC method when styling. Apply a lightweight leave-in, then a cream for hold, then a thin gel to the ends. Divide hair into four larger vertical sections, twist each toward the nape, then wrap the four twists into a low bun and secure with pins. Low porosity curls sometimes resist product absorption. If you are unsure of porosity, try this: drop a clean strand into room temperature water. If it floats for four-plus minutes, low porosity. For more grip, warm a small towel and hold it against the bun for one minute to help set.
Sleek Low Bun With Center Part For Straight Hair
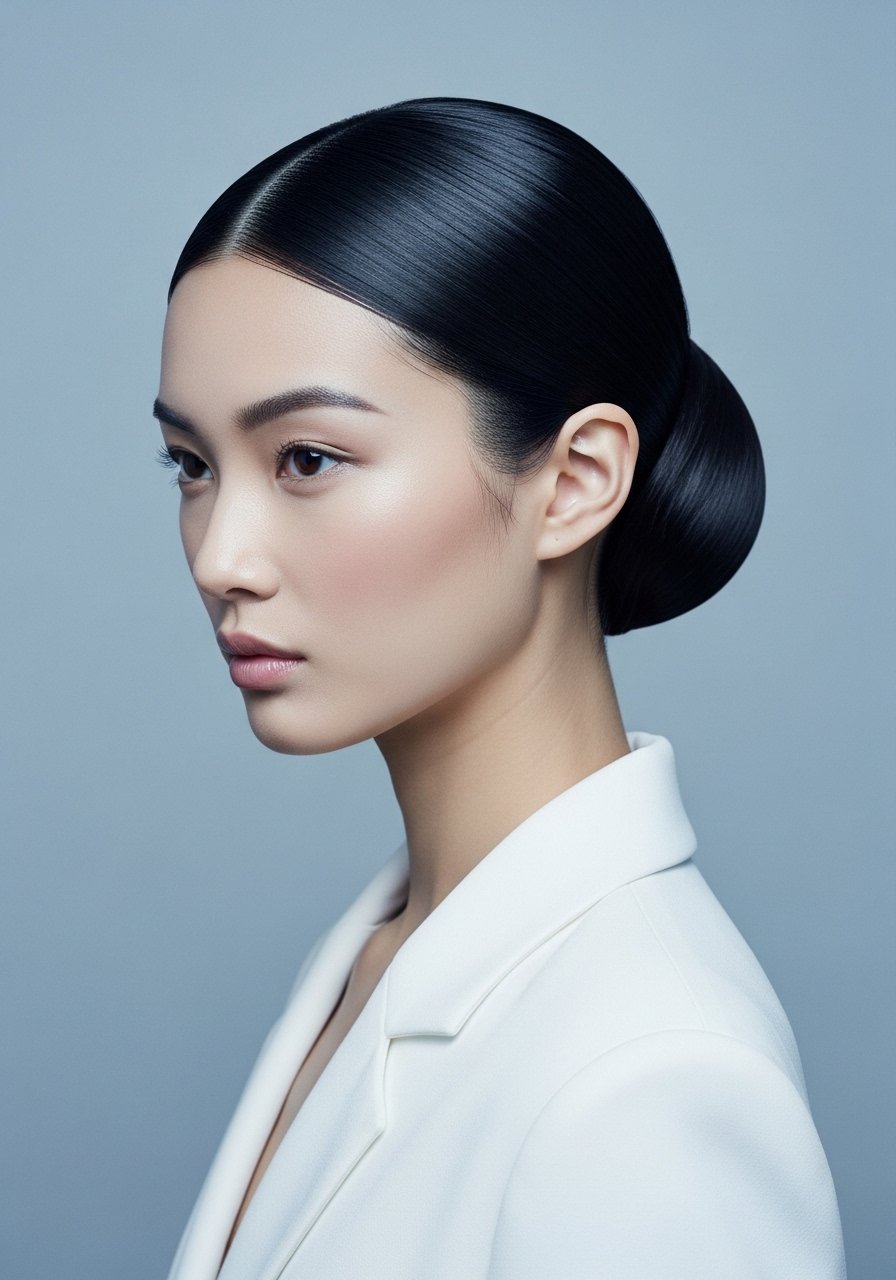
A clean center part and a low sleek bun read very editorial in photos. Work on dry hair, flat iron in one-inch sections at 340F for stubborn kinks, always with a heat protectant applied to slightly damp hair first. For hold without gummy residue, smooth a pea-sized amount of weightless serum over the part and sides, then use a boar bristle brush to lay the hair flat before tying. One common mistake is over-spraying lacquer at the start. Spray only after the bun is pinned so the pins bite hair, not sticky product.
What I Actually Buy For Low Bun Wedding Hair Elegant
Honestly there are three things I keep in my bag for every wedding day low bun. For grip I use a pack of matte U-shape pins that never show in photos. U-shape hair pins come in counts of 50 and save the day far more than pretty pins. For padding I use a small foam donut about two inches across that is covered with hair before ceremony. Small hair donut tool costs under $8. For finishing I like a reliable light hold spray that does not glue down tendrils. Flexible finishing spray in a 6oz bottle lasts through a long reception.
Low Chignon With Floral Clips For Destination Weddings

Destination weddings mean humidity and wind. I secure a low chignon using braided base anchors so the style survives travel and ceremony photos. Braid the nape into two horizontal plaits, roll them into a chignon, then add floral clips where the braids meet for disguise and hold. For humid climates, a light anti-humidity spray applied after the bun sets helps. Keep in mind fresh real flowers wilt, so I prefer small artificial fair-trade clips that look real and stay put through sand, salt, and movement.
Low Bun With Soft Pompadour For Round Faces

Round face shapes often need a little lift to balance proportions. Create a soft pompadour by backcombing three thin one-inch subsections at the crown for two to three strokes each, then smooth the top layer. Pull hair to the nape and secure a low bun as usual. If you overdo teasing, the bun will look boxy, so keep teasing conservative and smooth with a natural bristle brush. A 80/20 product placement helps here. Put most of the product at the roots and mid-lengths, not the ends, so the bun looks controlled and not greasy.
Low Bun With Textured Ribbon For Vintage Vibes
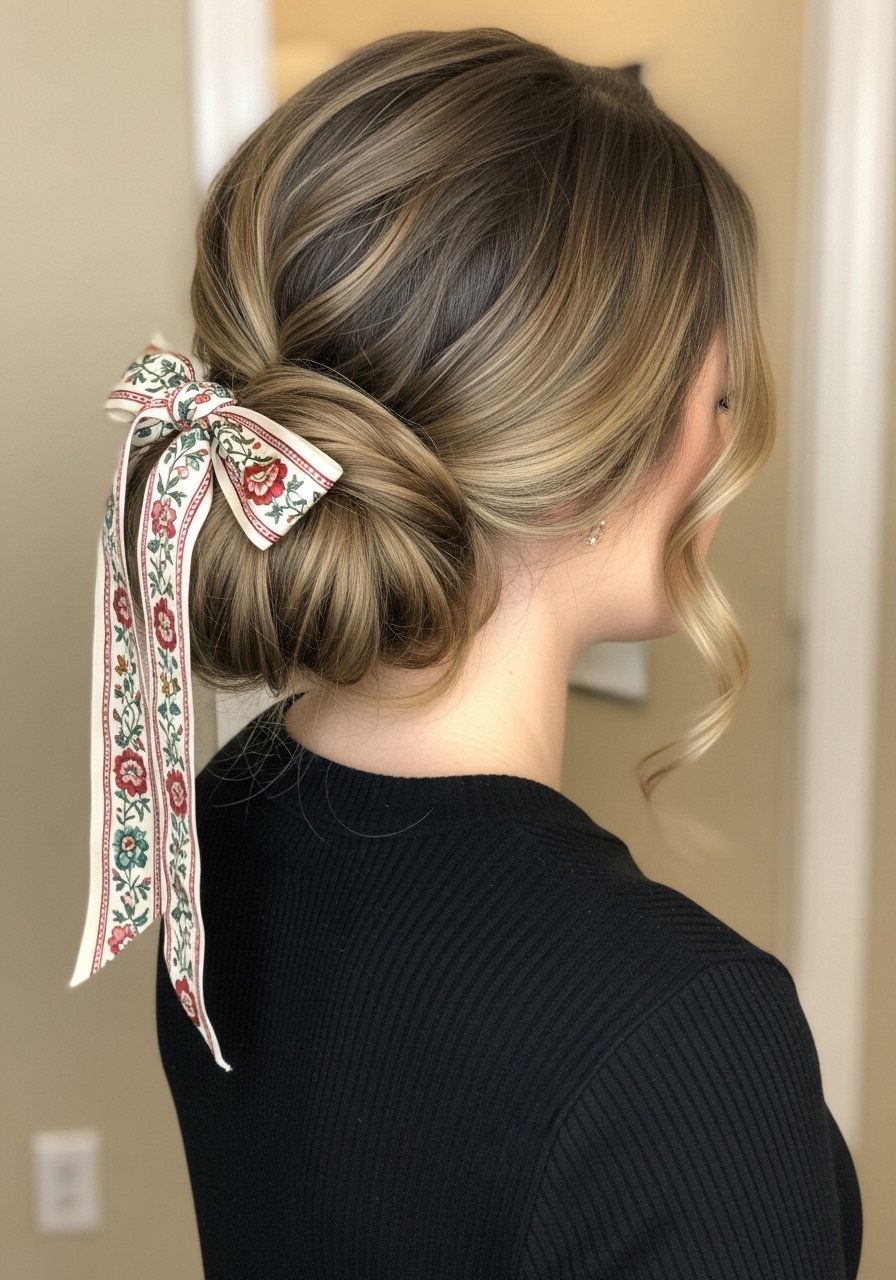
If you love vintage wedding photos, a textured low bun with a wide ribbon tells a story without being fussy. Before pinning, lightly rake a salt spray through damp hair and diffuse on low heat for six to eight minutes to set texture. Use three large section twists around the base to create movement, then slip the ribbon beneath one twist and tie once. The mistake here is tying the ribbon too tightly so it flattens the bun. Keep it snug but soft and let the tails hang for movement in photos.
Low Bun That Works With Extensions
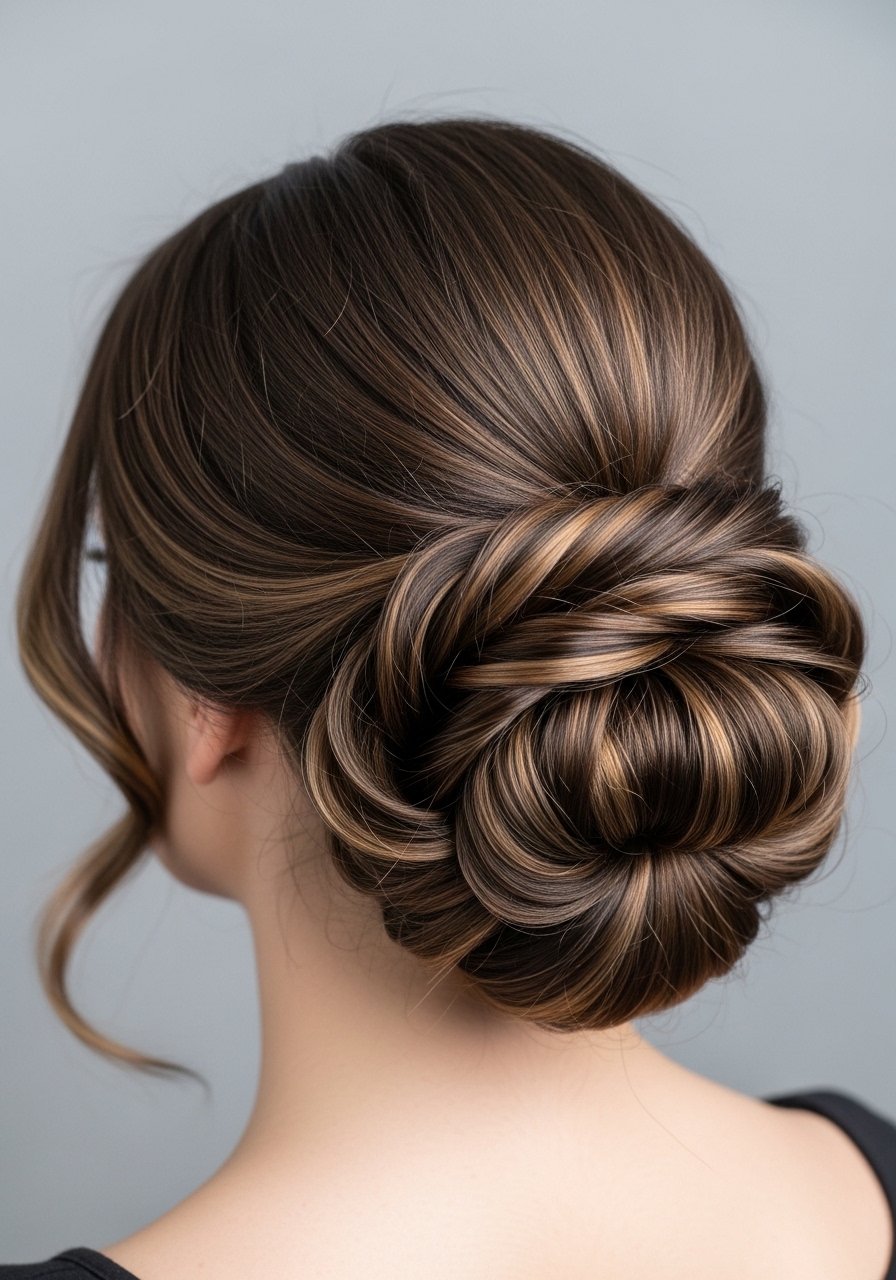
Extensions add volume and length but need careful blending to avoid visible wefts. Pin natural hair over the top of the extension tracks in three sections so the join is covered. Use two small elastics to create a low pony with the combined hair, then wrap into a bun and pin through natural hair and extensions together. Beware heat on tape extensions. If you use irons set at 320F, avoid contact with tapes and clamps. For color-matched extensions, a salon consultation is worth the cost rather than a DIY shade guess.
Low Twisted Bun With Vintage Hair Comb
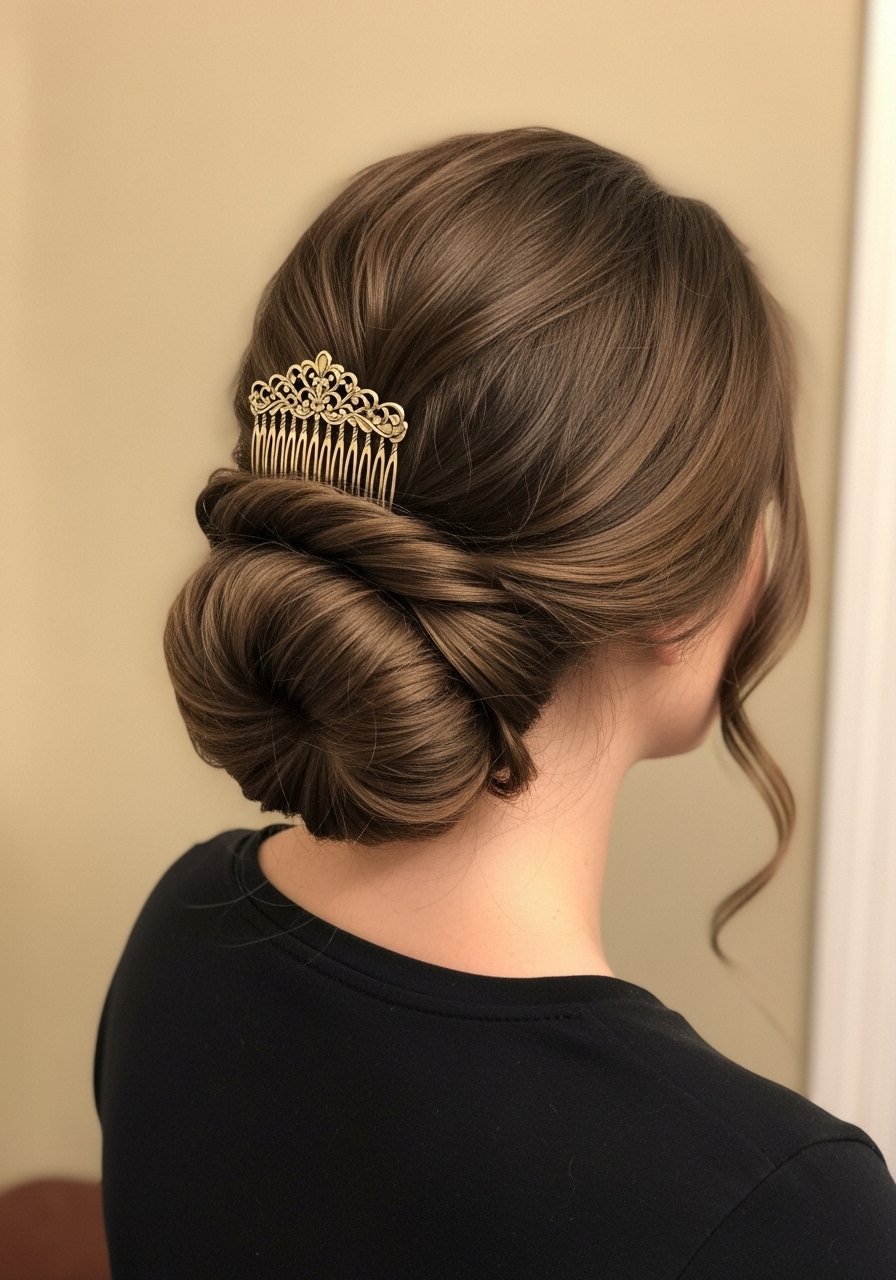
A vintage comb can be a focal point and an anchor. Tuck the comb into the bun so the teeth catch the inner twist, then pin two U-shapes behind it for safety. If the comb feels like it will slide, anchor it on the side of the bun rather than the top where gravity pulls. When pinning around a metal comb, use plastic-coated pins to prevent metal-on-metal sliding which loosens the grip over time.
Soft Low Bun For Thick Long Hair That Sits Light
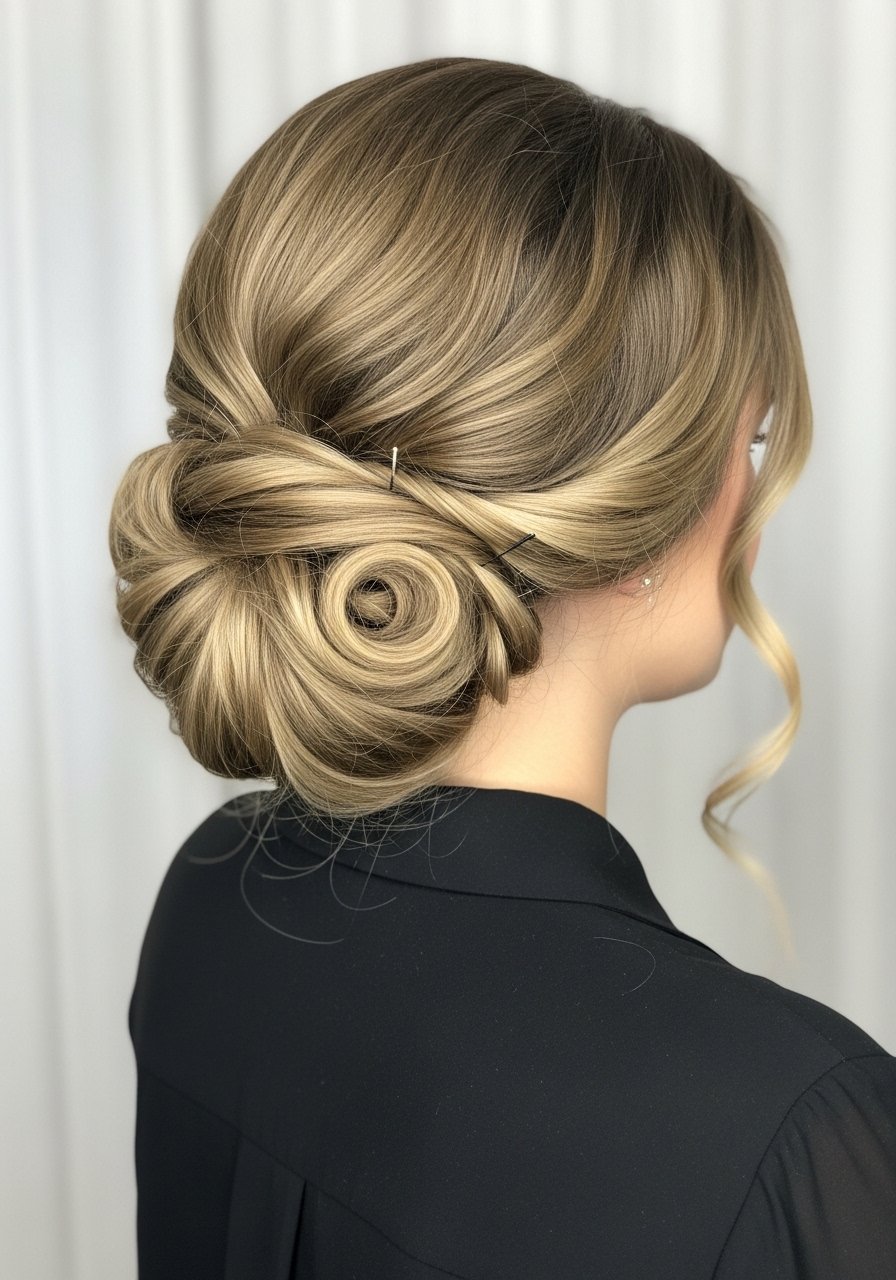
Thick long hair can become heavy fast. My solution is to create an internal rope braid base that takes the weight and then tuck the remaining length around it so the photographed bun looks full but feels light. Make the rope braid in two vertical sections tied with a small elastic, then coil that single rope into the bun. This reduces tension at the scalp and keeps the nape comfortable through a long night. For extra comfort, add a soft hair cushion pad under the rope braid at the base to prevent digging.
Heatless Low Bun For Sensitive Scalps
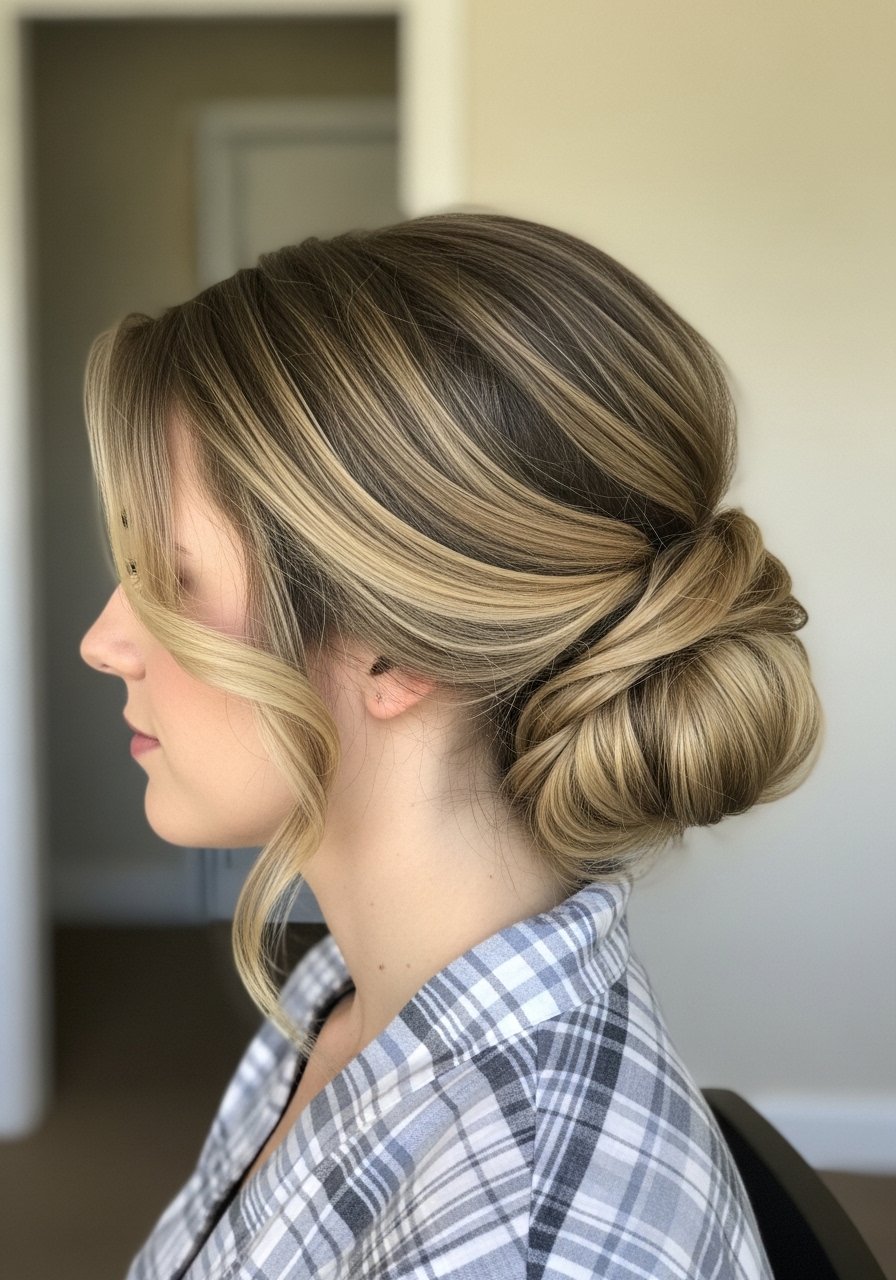
If heat flares your scalp or you are dealing with recent color, a heatless low bun is lifesaving. Wrap damp hair around a robe tie or fabric sash in four sections, sleep on it and unroll in the morning, then gather into a low bun. For best results, leave the sections wrapped for at least six hours. Most heat protectants you spray on dry hair before flat ironing barely work. They need to absorb into damp or just-dried hair to actually shield the cuticle. This method avoids any iron at all and still gives long-lasting shape.
The Small Things That Make Low Buns Last
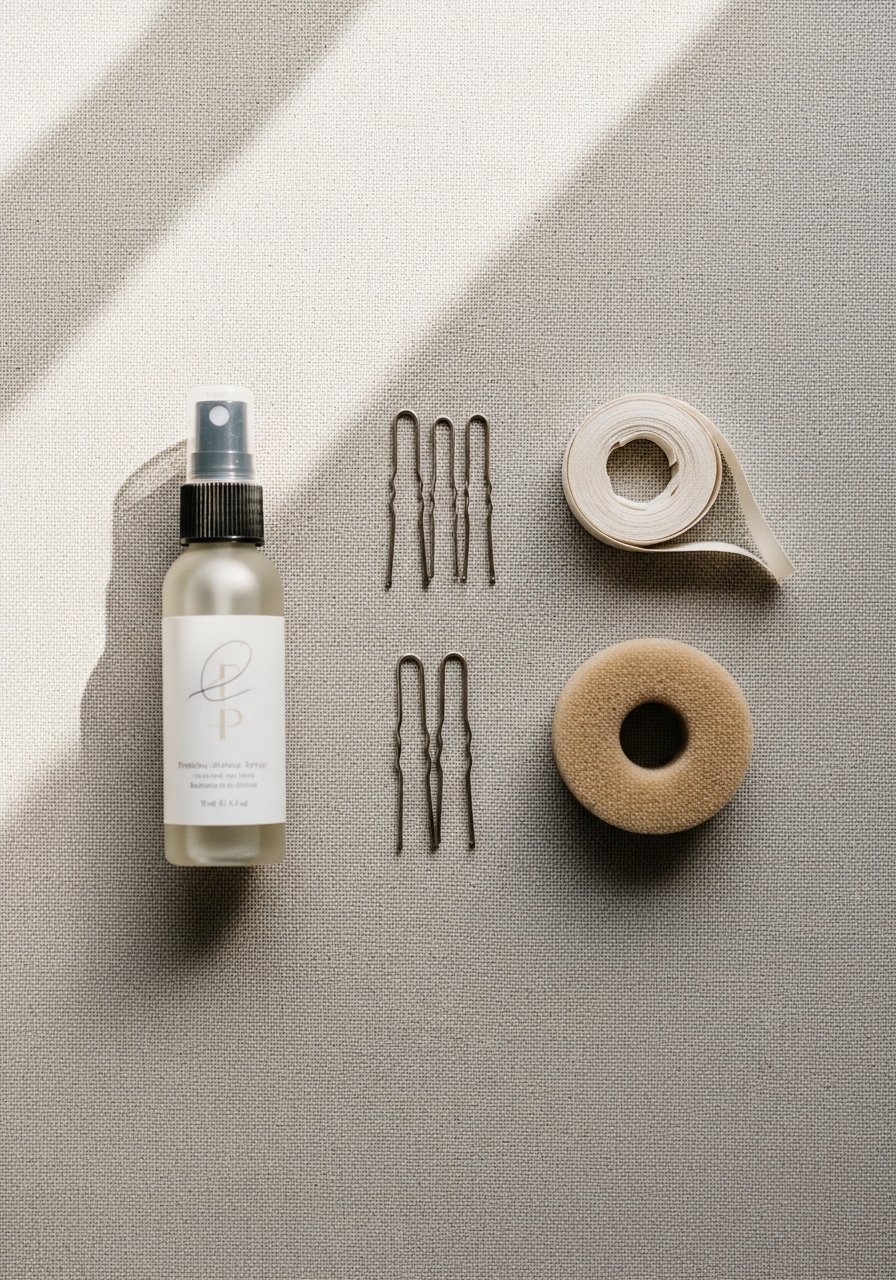
I always pack a tiny emergency kit. Two to three extra U-shape pins, a travel-size finishing spray, and a small comb for smoothing keep a bun intact through photos and toasts. For pins I prefer matte black for dark hair and gold for blonde tones so they blend. A single extra elastic is the easiest fix for a snapped band. If you have a long reception, a lightweight finishing spray retouch after the first dance brings a bun back to life without stiffness.
What I Have Learned About Products And Prices For Low Bun Wedding Hair Elegant
For weddings I mix drugstore basics with one splurge item. A flexible finishing spray in a 6oz bottle is a wallet-friendly staple and lasts multiple events. Flexible finishing spray works across textures and is under $15. For shine and hold balance, a 2oz lightweight serum applied as a pea-sized amount smooths the top without weighing curls. Lightweight hair serum in a 2oz pump bottle is useful to tuck in your bag. If you buy Olaplex or K18 on Amazon, buy from the official store or get it at Sephora to avoid counterfeits.
What I Wish Someone Had Told Me Before Doing Low Buns For Weddings
- Heat protectant goes on damp hair, not dry. The cuticle is more open and the product actually absorbs. A reliable heat protectant applied before blow dry and any flat iron prevents unnecessary damage when you set smooth buns.
- Grab a pack of matte U-shape pins for about $8. They hold better than the cheap rounded ones and do not flash in photos.
- Hair grows about half an inch a month at most, regardless of what biotin gummies promise you. If you want length for extensions, plan ahead.
- Swap heavy gels for a cream-plus-gel layering method for second day hold. Gel-only routines often leave hair brittle by the third wash.
Frequently Asked Questions
Q: How do I keep a low bun from falling apart during dancing?
A: Anchor with three secure pins in a triangle pattern and finish with a flexible spray after pinning. If you expect heavy movement, tuck a small elastic around the base of the bun as a hidden backup. For curly hair, refresh with a light mist of water and a dab of cream on frizz-prone tendrils.
Q: Can I use Olaplex No. 3 before a wedding if my hair is slightly damaged?
A: Yes, using Olaplex No. 3 once a week for two to three applications before the wedding smooths the appearance of damage and helps with styling. Buy from the official Olaplex store on Amazon or grab it at Sephora to avoid counterfeits. Olaplex No. 3 hair perfector
Q: My fine hair looks limp in low buns. What actually adds volume?
A: Use a small foam donut for padding and tease in three vertical sections under the bun. Place most product at the roots and mid-lengths, not the ends, so hair looks airy and not greasy.
Q: How often should I test veil placement with my chosen bun?
A: Do a run-through with your veil at least once, ideally during the hair trial. If the veil is heavier than expected, add an extra pin anchor or a hidden elastic loop to the base.
Q: Can coily hair hold a low bun the same way as wavy hair?
A: Yes, but use the LOC method and twist instead of smoothing. Divide into larger sections, twist each, then wrap the twists into a bun. If you have low porosity hair, warm a towel against the bun for a minute after pinning to help products set.
Q: Is it worth paying for a salon to pin a low bun if I can do it at home?
A: If the look involves extensions, custom color matching, or an heirloom veil, a short salon booking is worth the cost. For most simple low buns, a trial run and practice at home with the right pins will get you a professional result.