
I bleached my own hair in my kitchen last January and the face-framing layers I thought would hide the damage just made the breakage obvious. After one salon fix and a lot of product testing, I learned which long layered looks actually help hide regrowth and which make thin ends scream for a trim. This list is the stuff that worked on my mid-back hair and on friends with different textures.
These looks are aimed at straight to wavy 1B through 3A hair, and a few ideas include tweaks for thicker 3B curls. Most styles take 5 to 25 minutes after wash day, and the budget runs from under $20 for a silk pillowcase to a tool splurge around $120 for a curling iron. You can do almost everything at home, but color work and major lifts should go to a pro.
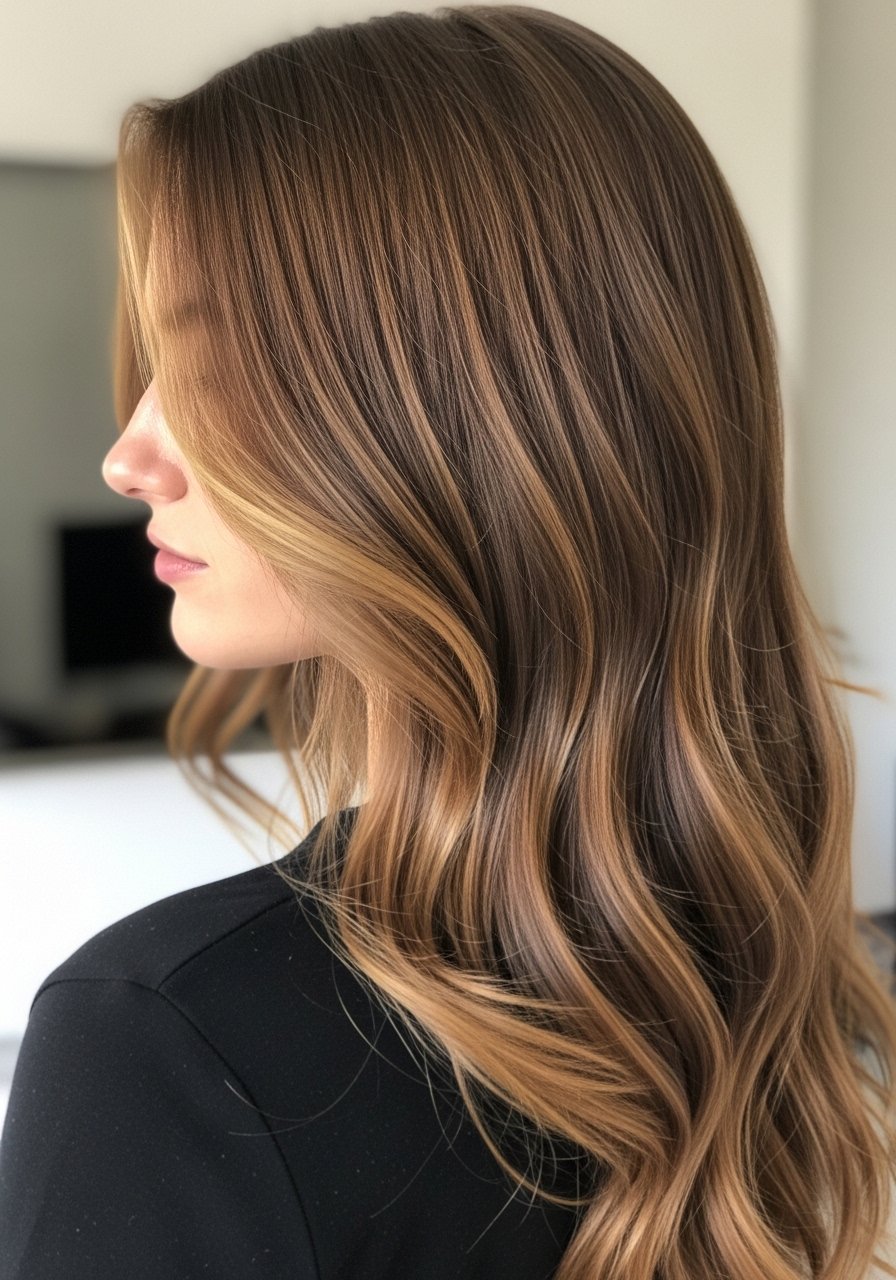
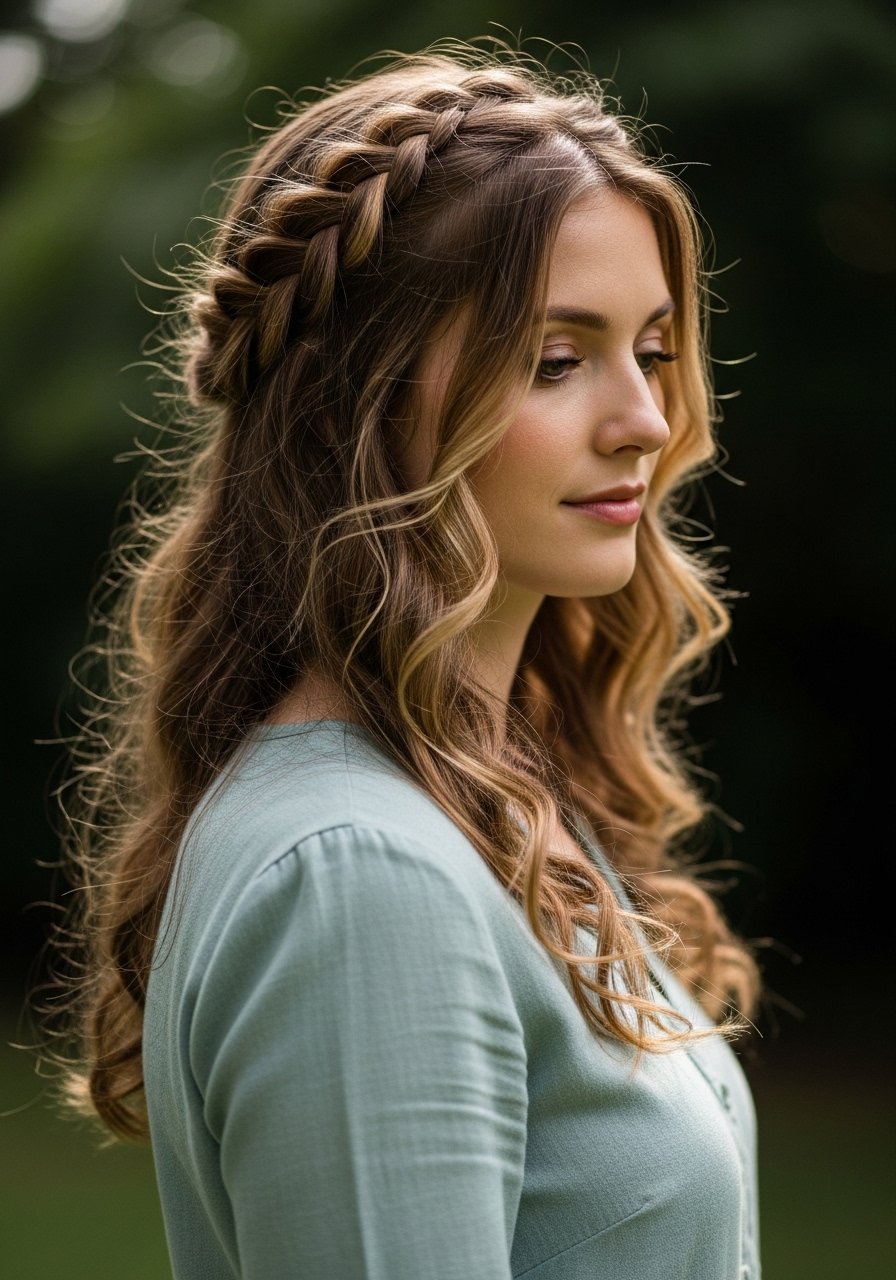
Curtain Layers That Soften a Long Face

If your face looks long when hair is blunt, curtain layers change the silhouette without removing length. Ask for layers that start at the cheekbone and are cut with a 10-degree vertical angle so they fall inward. For fine hair, keep the longest layer 2 to 3 inches below the jaw to avoid weightless flip out. For thicker hair, request thinner internal layers, not a blunt chop. Styling-wise, a one-inch round brush and a blow dryer on medium heat with the nozzle down gives a polished bend. A common mistake is over-thinning the ends at home, which creates split-feeling frizz. Salon vs DIY note, you can maintain the shape yourself with 1/4-inch trims every 8 to 10 weeks, but the initial layering is worth a stylist who knows face framing.
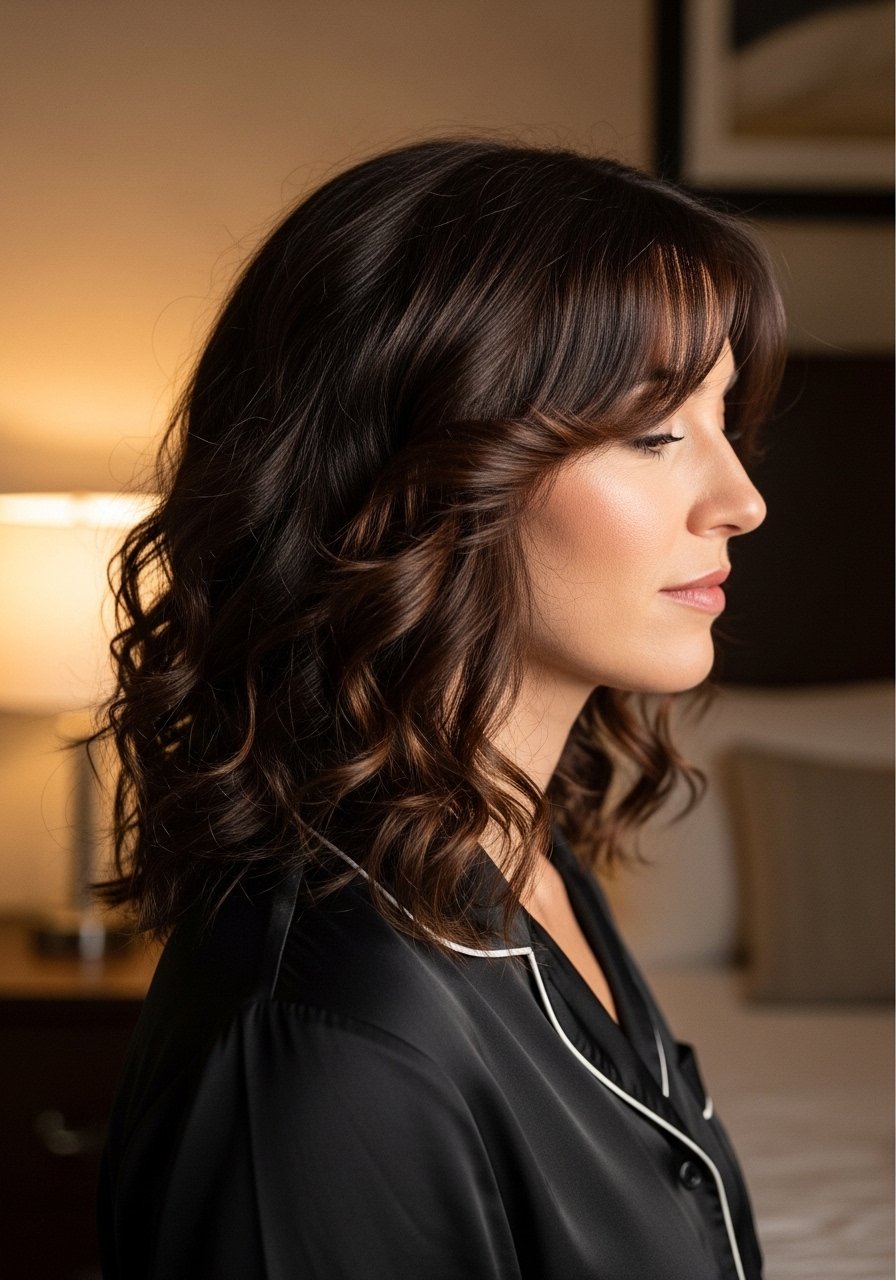
Grown-Out Curtain Bangs Without the Forehead Gap

If curtain bangs gap or look like an intentional fringe as they grow, the cut should be graduated, not blunt. I had curtain bangs that flopped day two until my stylist added short internal slices and a micro-layer at the temple. That tiny change makes them feather rather than split. For styling, rough-dry bangs to 80 percent, then flat iron on a low 320F setting using 1-inch sections to bend the ends inward. Most heat protectants you spray on dry hair before flat ironing barely work. Use a lightweight cream on damp hair first, then the spray on slightly damp or dry satin. If you get bangs at home, do a patch trim with hair dry and shaped the way you wear it, not soaking wet.
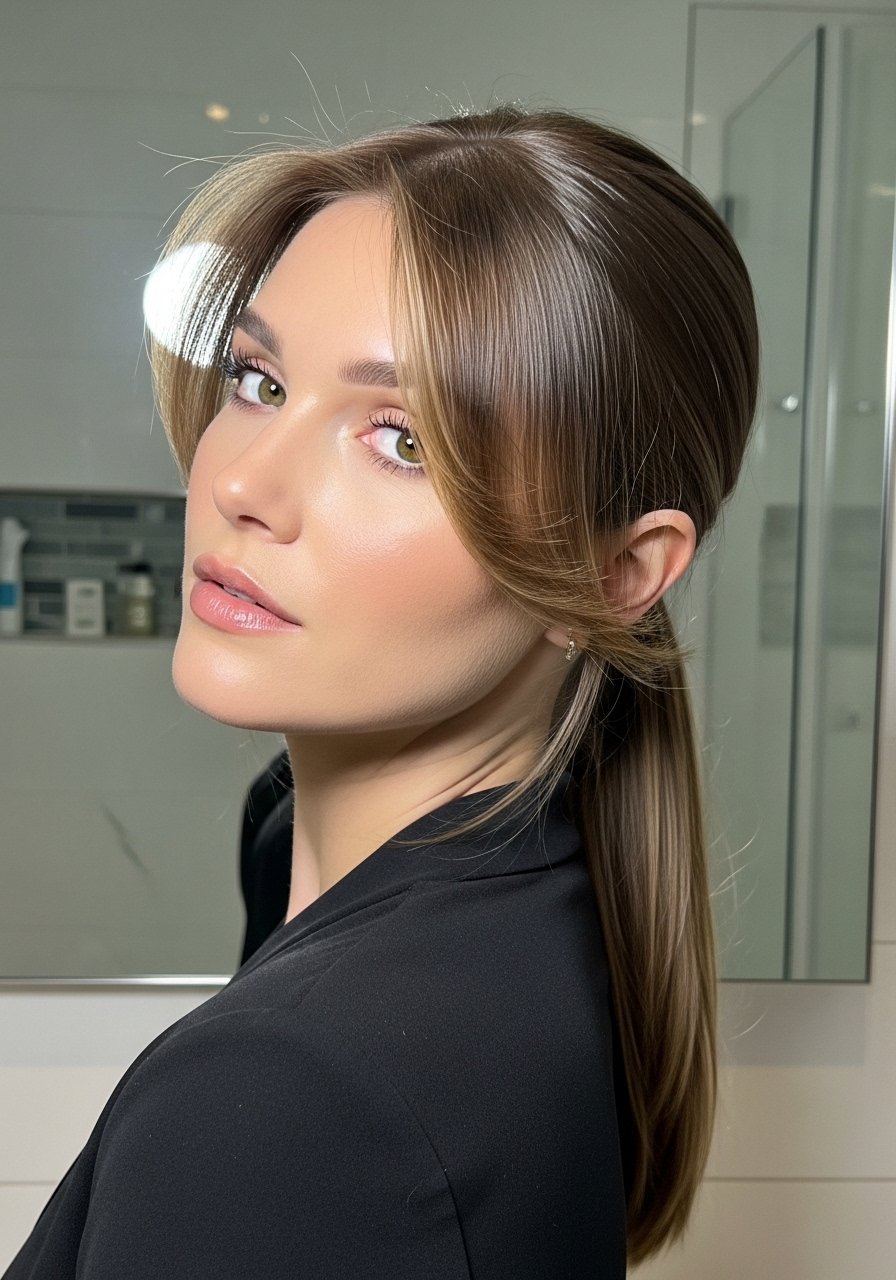
Money Piece Face-Framing Color You Can Maintain at Home
Lightening the face frame is the fastest way to update long hair without a full color job. For subtle impact, I bleach 1/2 to 1 inch of front sections using a 10 volume lift for 8 to 12 minutes on pre-lightened hair only. Do not lift over recent dye without a salon consult. If you prefer a DIY touch-up, use baby steps, like a soap cap application that takes 5 to 10 minutes extra to blend. A real-world trick: choose a shade one or two levels lighter than your base so grown-out roots look intentional. Watch for brassiness and use purple shampoo no more than once a week. For safety, allergy patch test any colorant 48 hours before you paint the hair.
Sleek Low Pony with Face Framing Wisps for Busy Days
A low pony feels fresh when paired with face-framing wisps that move as you talk. My trick is to leave two 1/2-inch sections on each side, wrap them around a small barrel curling iron at 300 to 320F for two to three seconds to give them a soft inward bend, then smooth with a pea-size amount of cream. Avoid over-smoothing which makes the wisps stick to the skin and look greasy. This style fixes the frustration of tight ponytails that flatten long layers. If your hair is fine and slips, add two bobby pins hidden above the elastic to anchor the layers. For an extra polished finish, give the elastic a quick spritz of anti-frizz spray before you tie.
Beachy Waves That Keep Face-Framing Layers from Getting Lost

My curls looked great on TikTok and like wet noodles by 11am. The difference was layering and product order. For wavy hair, cut longer layers that start at the chin so they peek out when you scrunch. Technique: work in a pea-size of curl cream on damp hair, then two spritzes of salt spray through mid-lengths only, not the roots. Air dry or diffuse on low with a microfibre towel scrunch for 10 to 15 minutes. For heat styling, use a 1 to 1.25 inch curling iron on 340F for medium hair in 1-inch sections, wrapping alternately away and toward the face. Common mistake is spraying texture on the roots, which looks greasy by day two. This method gives separation and keeps face-framing pieces visible.
The Bond Builder Routine That Saves Layered Ends
If your face-framing layers show damage first, weekly bond builder routines help the appearance while you grow hair out. I use a bond builder once a week, leave it in for 10 minutes, then follow with a gentle sulfate-free shampoo. K18 is a 4-minute treatment alternative I keep for quick fixes between appointments. Watch for counterfeit products, buy from the brand store on Amazon or pick them up at Ulta or Sephora to be safe. A mistake I see is daily use of bond treatments thinking more equals faster repair. Overuse can make hair feel gummy. Also, if you have recent color lifts, ask your colorist before combining a bond builder with a lightener. Bond builders smooth the appearance of breakage, they do not reverse years of damage.
Layer Placement for Curly Long Hair That Keeps the Face Visible
Curly hair needs face-framing layers placed differently than straight hair. Cut curls dry if possible so the stylist can see natural shrinkage and the way layers fall. For 3B patterns, start the shortest face-framing layer at the cheekbones and blend downward in 2 to 3 graduated sections so the curls stack. A common frustration is layers that create a triangle of volume around the face. Avoid that by thinning the interior, not the outer silhouette. For styling, use the LOC method with leave-in, oil, then gel, applying the gel by squishing in 1 to 2 coin-size dollops to set the curl at the face without crunchy residue. This approach keeps your face pieces defined and prevents them from vanishing into the mass of curls.
What I Wear to Keep Face-Framing Layers in Place While Sleeping
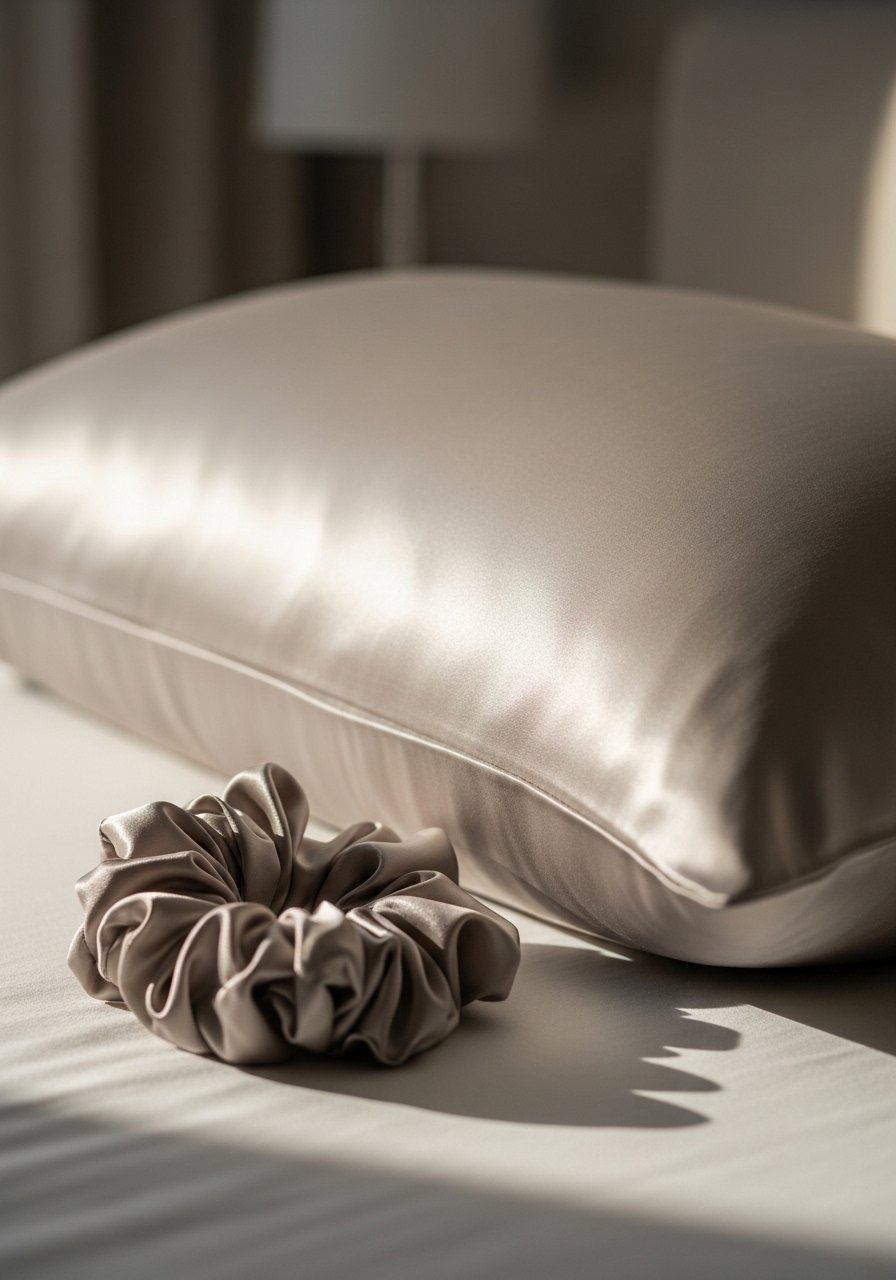
If face-framing layers kink overnight, swap cotton for silk or satin. A silk pillowcase cuts friction that causes frizz, and sleeping on a loose silk scarf keeps the short pieces from getting mashed. I use a soft scrunchie to loosely gather hair at the nape in a low loop. For people who wake up with flattened layers, a quick 10-second warm roll with a one-inch round brush and a blow dryer on low brings them back. Hair grows about half an inch a month at most, so patience plus protection preserves the cut until the next trim. This is a low-cost fix that beats daily restyling.
Braided Half-Up That Shows Off Face-Framing Layers
Braiding the top half of the hair while leaving face-framing layers loose is a go-to when you want structure without hiding the cut. I braid two 3/4-inch sections from the temple inward and secure with a small clear elastic, then tug each braid gently to widen it. This technique keeps the front soft and frames the face while the rest of the hair reads long. A mistake is braiding too tightly and bending the short layers into awkward angles. For a lived-in look, finish with a one to two-spray mist of flexible hold spray through the mid-lengths. This is a five-minute style that makes layers look intentional while keeping length visible.
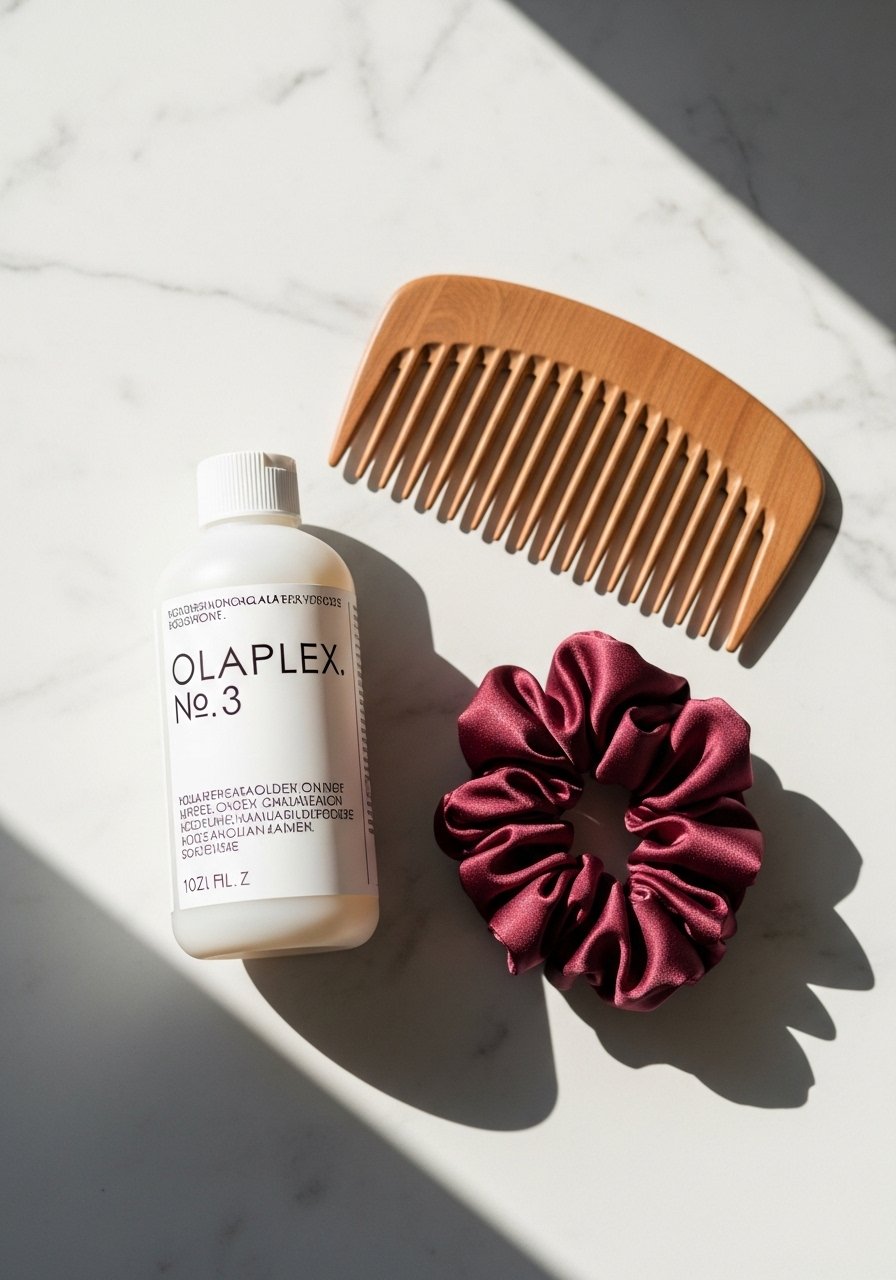
What I Actually Keep on My Shelf for Long Face-Framing Layers
- Honestly the best $30 I spend in any year, Olaplex No. 3 hair perfector used once a week for 10 minutes smooths the appearance of breakage. Buy from the official seller on Amazon or pick it up at Ulta to avoid fakes.
- For heat protection before any iron over 300F, I use Color Wow heat protectant spray. It absorbs if applied to damp hair, not bone dry.
- A 1.25 inch ceramic curling iron with adjustable heat. For fine hair I keep it at 320F, for thicker hair I push to 360 to 380F.
- A silk pillowcase queen size under $25. Cuts morning frizz and protects short face-framing pieces.
- Microfiber hair towel wrap to decrease dry time and reduce roughing the cuticle.
- A wide-tooth detangling comb for wet sectioning, and a small 1-inch round brush for smoothing curtain layers while blow drying.
- A light sea salt spray for texture that does not weigh down face-framing pieces.
- K18 peptide treatment travel size as a quick 4-minute option between salon visits. Buy from the brand store on Amazon or Sephora to be safe.
The Mistakes I Keep Catching With Long Face-Framing Layers
- Heat protectant goes on damp hair, not dry. The cuticle is more open and the product actually absorbs. A light heat protectant that sprays on damp hair saves my layers from frying.
- Don’t over-thin the ends of face-framing pieces. Thinning at the outer edge makes them look wispy in a sad way. Ask for internal texturizing only.
- Swap the gel-only routine for layering a leave-in cream under a light gel. I switched and second-day texture went from limp to wearable. I use a coin-size of cream under a fingertip of gel for my 2A waves.
- Trim small amounts more often. Hair grows about half an inch a month at most, so a small trim every 8 to 10 weeks keeps the frame fresh without losing length.
- When coloring the face frame, do short patch tests and start with a lower volume lift if you are blending into darker hair. Lifting too fast is how people end up in salon corrections.
Frequently Asked Questions
Q: How often should I trim face-framing layers to keep them intentional but not choppy?
A: Every 8 to 10 weeks for most people keeps the shape tidy. If you are growing them out, trim every 12 weeks but ask the stylist to take tiny amounts so the graduation stays soft. For curly textures, dry cuts are better because they show shrinkage.
Q: Can I bleach just the money piece at home without messing up the rest of my color?
A: Yes if your base is within two levels of what you want and you use low volume lift. If your hair has previous color or is darker than you expect, do a strand test and consider booking a salon consult. Lifting over previous color is the single most common reason hair breaks in the shower.
Q: What is the best sleep routine to protect short face-framing layers?
A: A silk pillowcase plus a loose low loop at the nape keeps short pieces from getting mashed. If your layers kink, a quick warm brush-through in the morning fixes the shape in under 30 seconds.
Q: How do I style curtain bangs so they do not separate into a forehead gap?
A: Rough-dry bangs to about 80 percent, then use a 1-inch round brush to roll them inward while you blast with medium heat. If they gap easily, your bangs need internal texturizing at the temple rather than a blunt line.
Q: Can bond treatments make my layered ends feel gummy if I use them too often?
A: Yes. Use bond builders once a week and follow directions strictly, leaving products for the recommended time. More is not better. If hair feels gummy, space treatments out and finish with a lightweight conditioner rinse.
Q: I have face-framing layers but my hair looks greasy near the front by day two. What am I doing wrong?
A: You are likely applying heavy product too close to the roots or using texture spray at the hairline. Apply creams and oils to mid-lengths and ends only. For root lift, use a dry shampoo at the part and a volumizing powder at the temple zone.

