
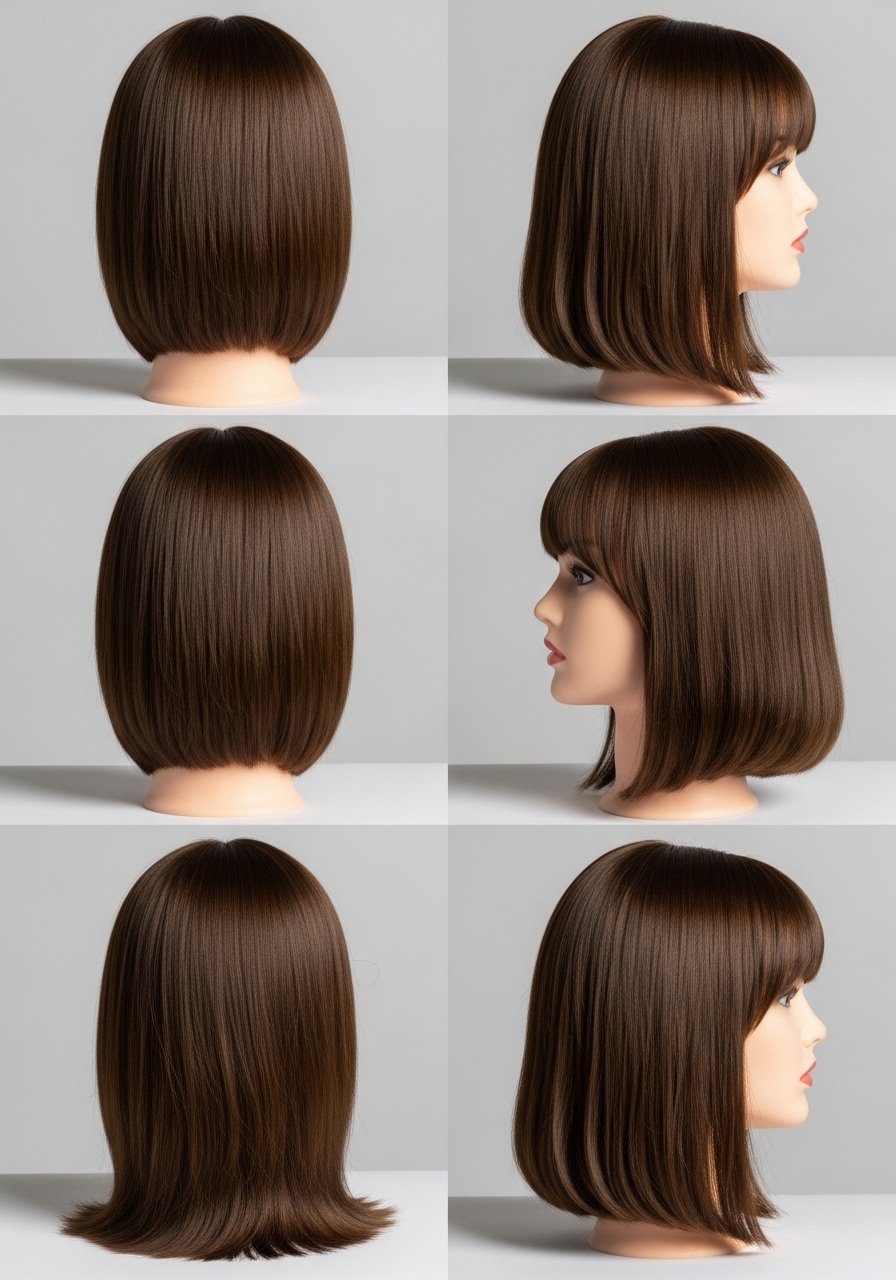
I split my first curtain bangs too short and had to wear clips for three weeks while they grew out. After fixing that mistake and testing growth, cutting, and styling hacks on friends with everything from bone-straight 1A hair to thick 2B, here is what actually works for curtain bangs on straight hair, especially when you want a choppy edge that reads modern not ragged. Expect simple daily styling, a few at-home trims, and a couple of tools that earn their shelf space.
These ideas mostly serve straight 1A through 1B hair, and fine to medium densities. Some suggestions scale for thicker hair with adjustments noted. Skill level is mostly beginner to confident DIY, time per style ranges from two minutes to twenty. Budget is mostly under $50 with one tool splurge mentioned. Most tips are doable at home, but color and heavy texturizing are salon services.
Razor Blending for Soft Choppy Curtain Bangs
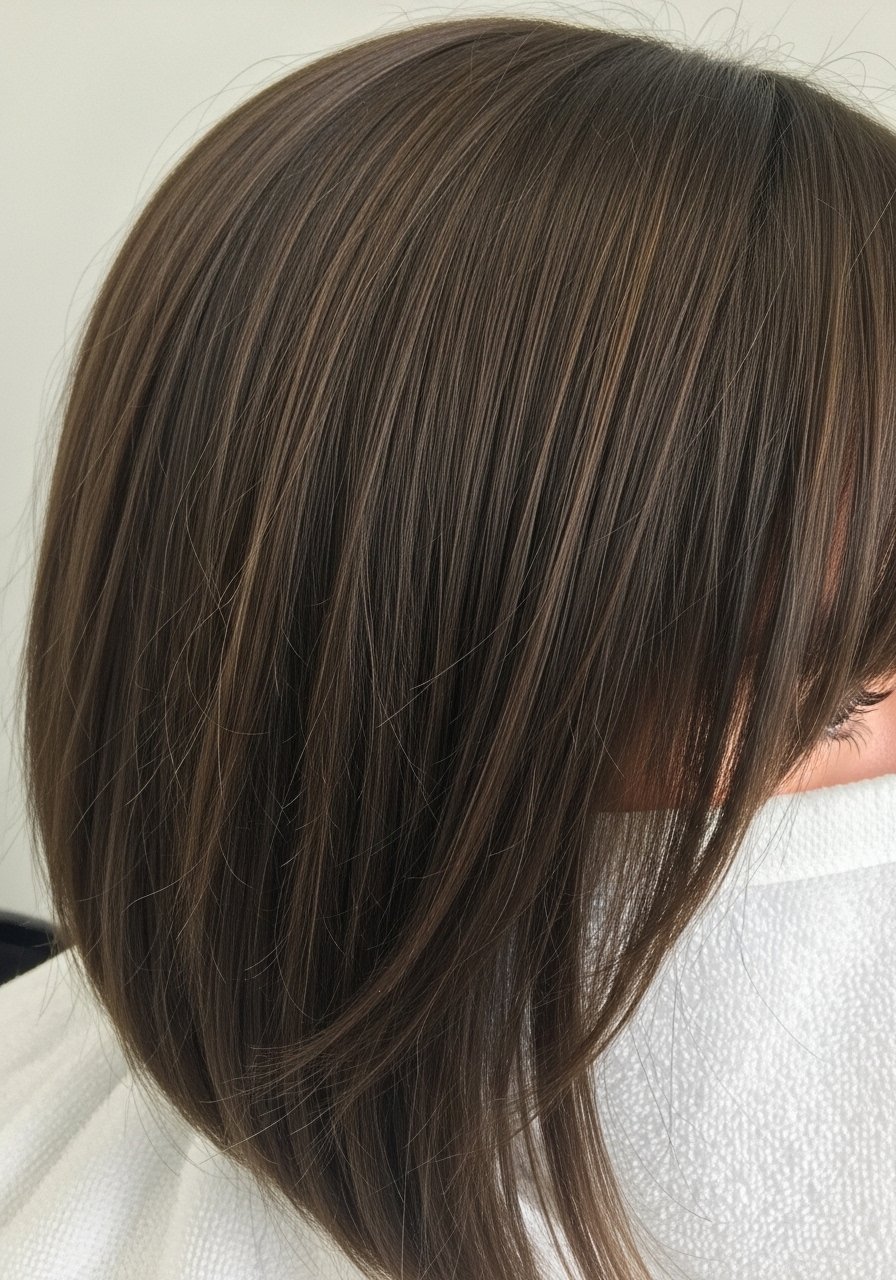
If your bangs feel blunt or too thick, light razor texturizing creates the choppy, airy finish most people mean by choppy curtain bangs. Section the fringe into three vertical slices, hold each piece at a 45 degree angle, and take one pass with a feather razor about 1/8 to 1/4 inch from the tips. For fine straight hair use lighter pressure and only one pass, for medium densities you can take a second feathering pass. A common mistake is over-texturizing, which makes bangs look fried on camera. This is a salon move if you are unsure, because razors remove weight fast. If you do it at home, wear a cape and keep a towel on your lap. Safety note, razors should be sharp and clean to avoid tugging.
Two-Second Flat Iron Bend for Curtain Bangs
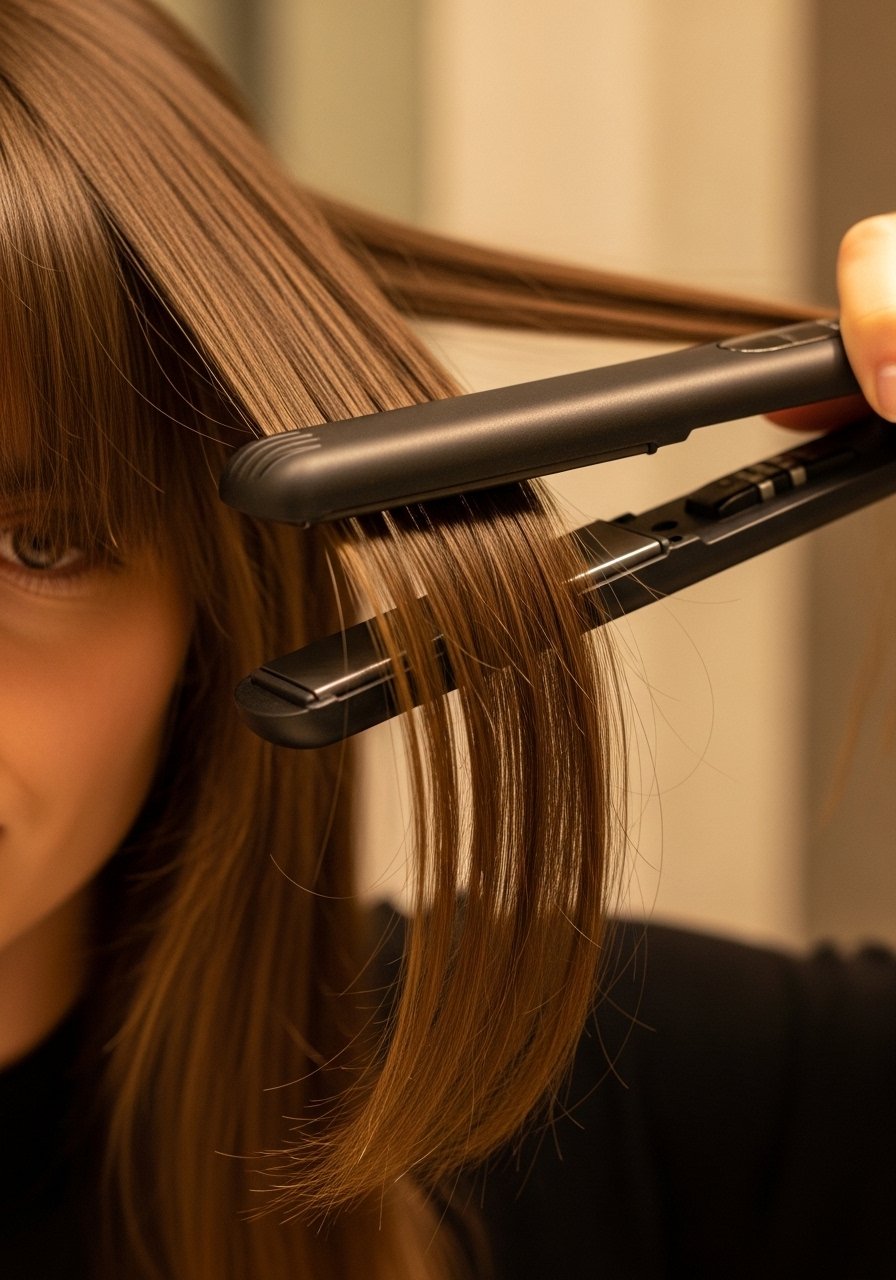
For that soft 90s curtain curve on straight hair, clamp a 1-inch flat iron at the root with the hair angled outward, then rotate away from the face and hold for two seconds at 300F. Heat protectant before any iron over 300F is essential, I run a pea-sized spritz of a lightweight protectant through damp bangs and let it dry before styling. Most heat protectants you spray on dry hair before flat ironing barely work. They need to absorb into damp or just-dried hair to actually shield the cuticle. Avoid multiple passes or the bend will snap back flat by midday. If your hair is fine, use the lowest effective heat and a narrow iron to get the curve without weight.
Texturizing Thick Straight Hair With Thinning Shears

Thick straight hair can make curtain bangs look heavy, especially when cut blunt. A stylist-grade thinning shear taken in vertical snips across the interior of the bang reduces weight while preserving a choppy finish. Ask for 15 to 25 percent weight removal in the first salon visit, not a full razor session. The problem this solves is the curtain that sticks to the forehead instead of parting. DIY thinning shears can slip and create gaps, so this one is worth a salon call if you are nervous. Expect the first trim to cost more because the stylist will finesse the part and shape the fall. Safety note, avoid thinning through the ends only, that can cause uneven breakage.
Air Dry Shaping to Keep Bangs From Flattening
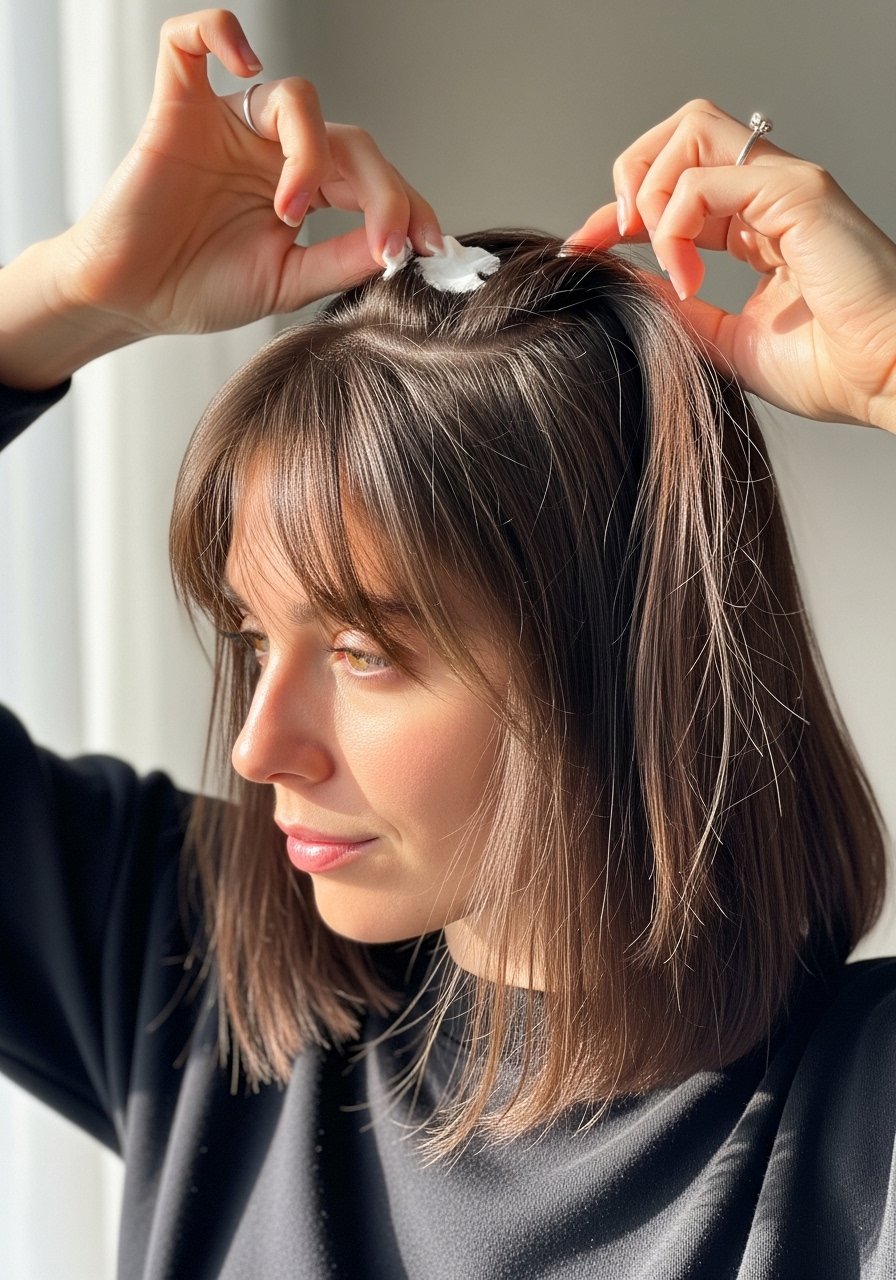
If your bangs go limp within hours, the fix is less product and more placement. After shampoo, squeeze excess water with a microfiber towel, then apply a nickel-sized amount of mousse at the roots only and finger-shape the part. The 80/20 product placement rule helps here, put more at the root and less on the lengths. Let bangs dry leaning slightly forward so they set away from the face. A common mistake is saturating ends and weighing the fringe down. This saves heat and two minutes of styling every morning. If your hair is very fine, a root lift spray on day two keeps the part from flattening without rewetting.
Subtle Money Piece Color Without Over-Bleaching
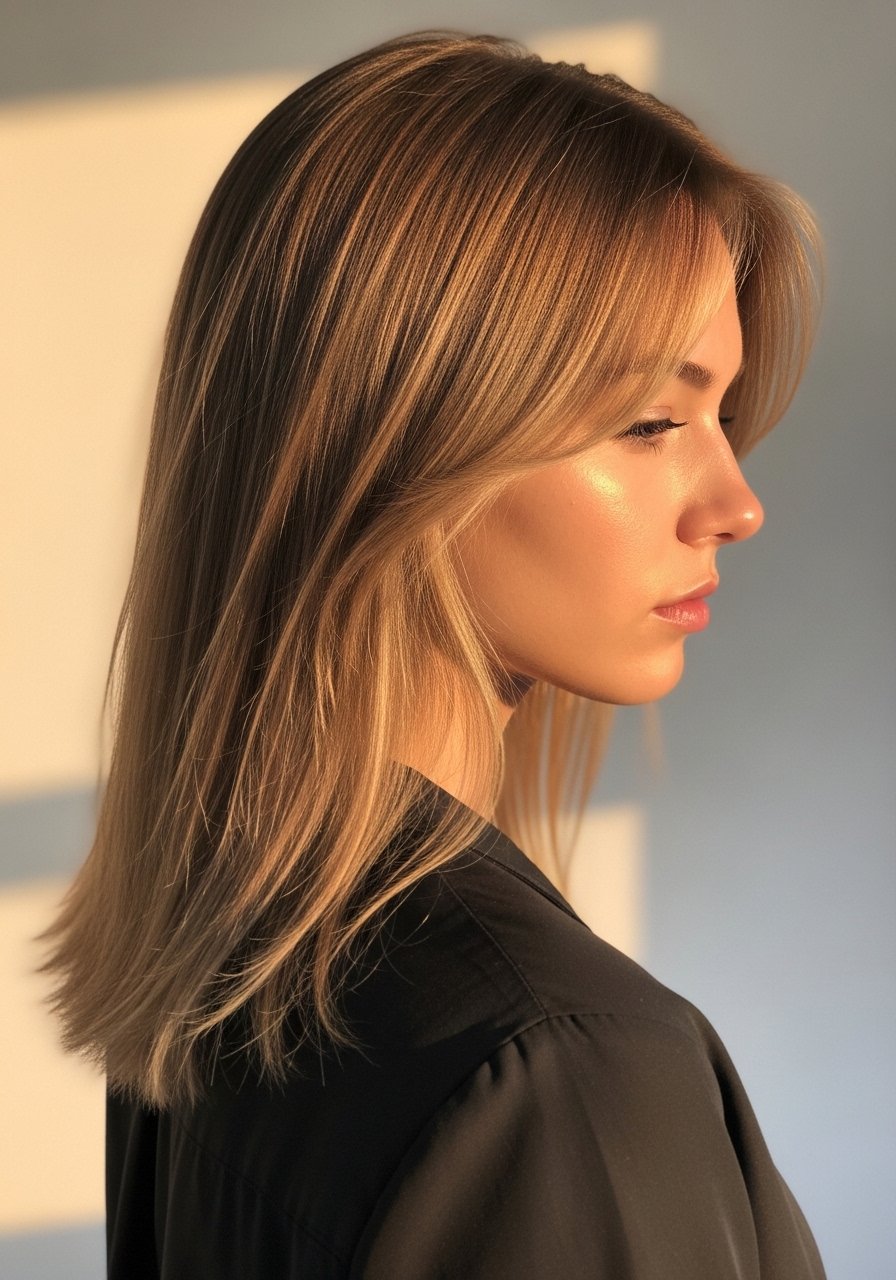
A choppy money piece can make curtain bangs pop but bleaching front sections into a harsh stripe ruins the look. If you want lighter face-framing strands, ask for a demi-permanent glaze first or foils lifted only two levels. Always do an allergy patch test for hair color. The real-life detail most stylists skip is to leave the front 1 to 1.5 inch sections out of a full lift and hand-paint them to match your natural halo. Home kits tempt people, but lifting over previous dark dye often needs a salon fix. If you must DIY, use a low-strength developer and expect multiple sessions spaced six to eight weeks apart to avoid breakage. Color care tip, buy from the official store on Amazon or grab it at Ulta to avoid counterfeits.
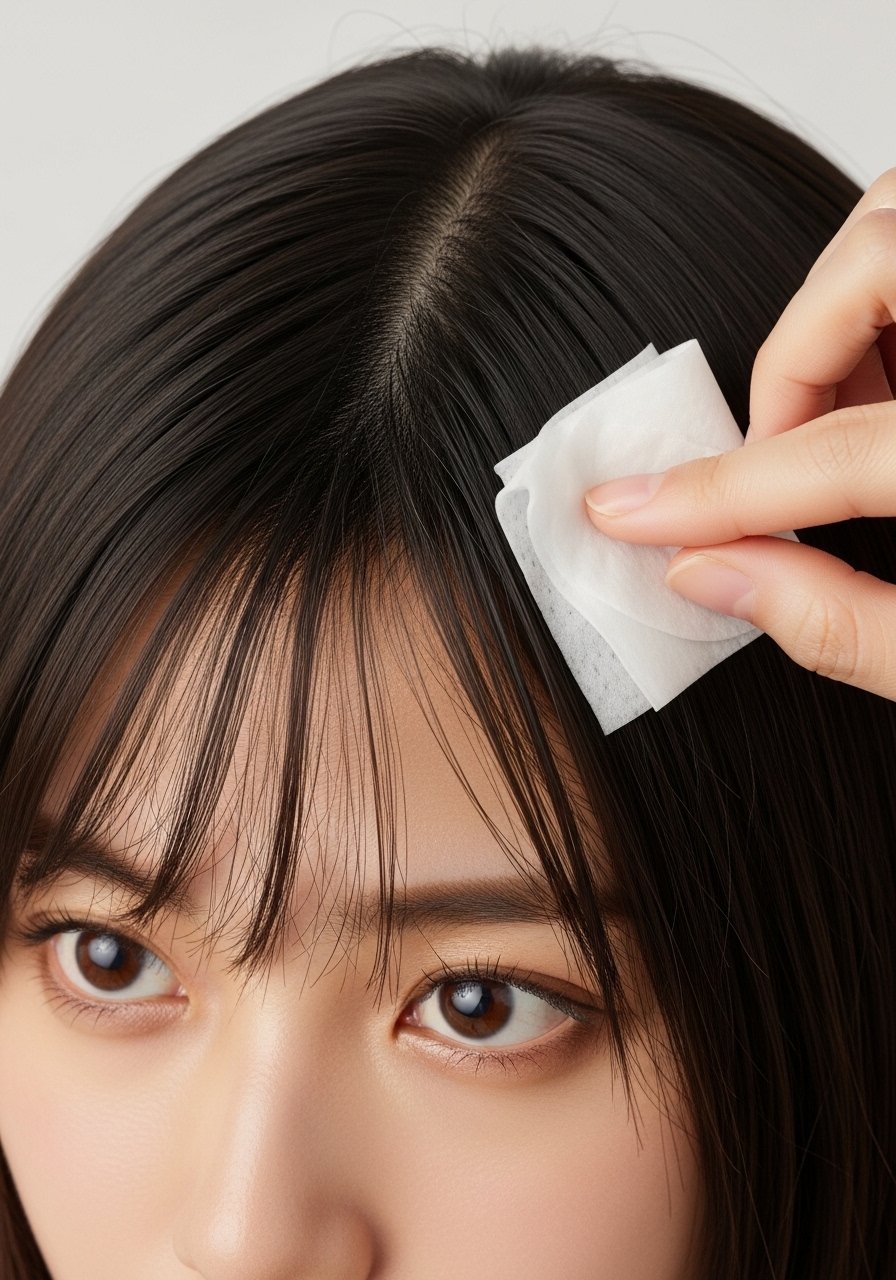
Quick Second-Day Refresh for Curtain Bangs
On day two when bangs get greasy but the rest looks fine, spray two short bursts of dry shampoo into the roots, then use a clean toothbrush to brush through and fake separation. The trick I learned is to lift at the roots with the toothbrush instead of rubbing product through the hair. A little spritz of texture spray at the tips recreates that choppy edge without weight. A common mistake is overusing powder which leaves a chalky cast. If you have darker straight hair, use a tinted dry shampoo to avoid visible residue. This saves a wash and keeps the fringe shape between trims.
Two-Minute Round Brush Blowout for Bang Shape
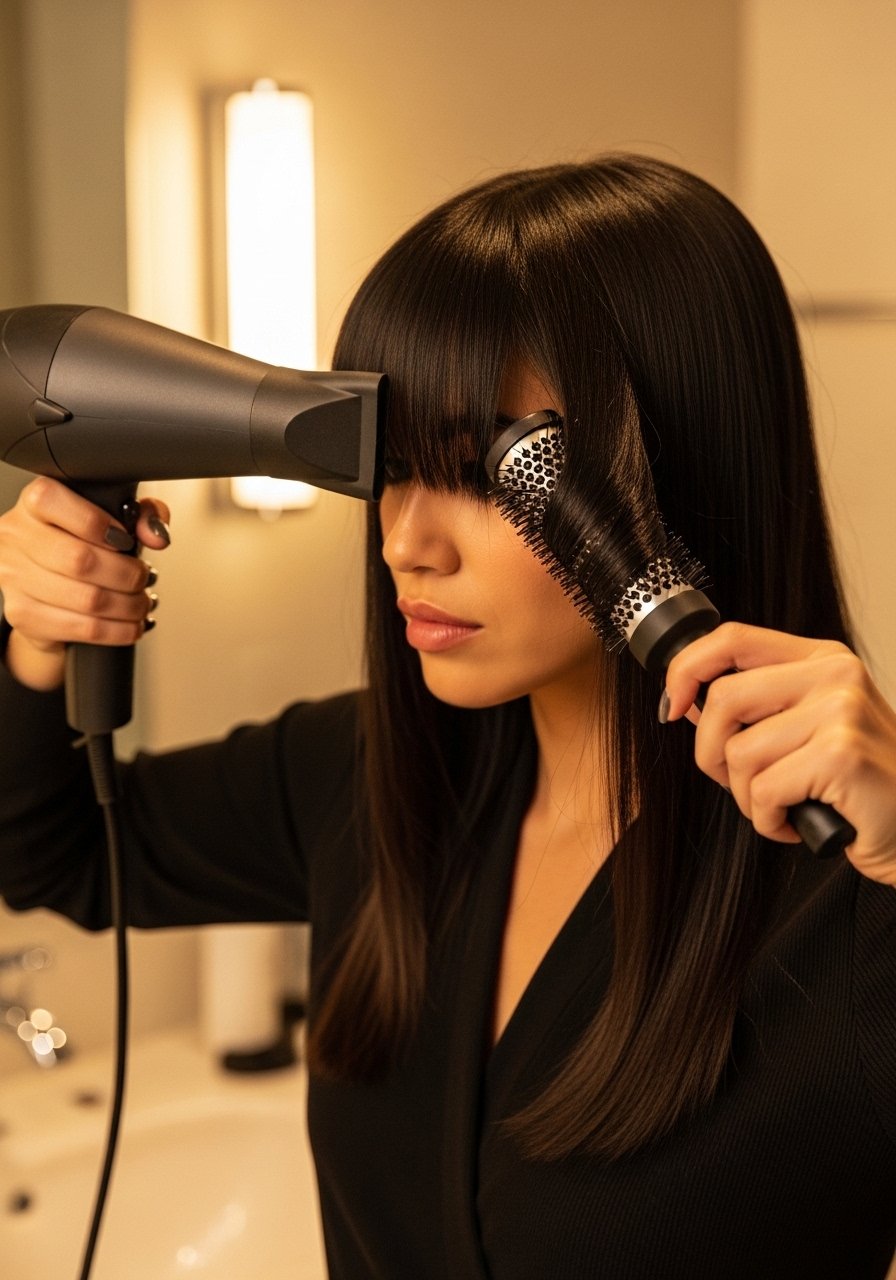
If you prefer a polished look, the round brush blowout works fast. Section the bangs into two equal halves, wrap one side around a one-inch boar-bristle round brush at the root, and blow with medium heat for eight to ten seconds at the root, then cool for two seconds before releasing. Repeat on the other side. The specific timing gives a bend that lasts until the next humidity spike. Mistakes people make include using high heat for longer than needed, which weakens the hair cuticle over time. Heat protectant before any iron over 300F applies here too. For fine hair, use a smaller brush and lower heat.
Grease Control Tricks for Oily Curtain Bangs
Oily bangs are the main reason people avoid curtain styles. For straight hair that gets greasy fast, two changes help. First, shorten the trim cycle to every four to six weeks, which keeps the ends from wicking oil down. Second, switch to a low-sulfate shampoo and wash the fringe more frequently than the rest of your hair, maybe every other day while keeping the lengths at your normal cadence. A small dab of lightweight styling paste at the tips prevents the fringe from sticking to the forehead. Watch for over-washing which signals your scalp to produce more oil. If oil persists despite changes, consider a scalp-focused shampoo and see a trichologist if you suspect a medical issue.
Face Shape Tweaks for Curtain Bangs
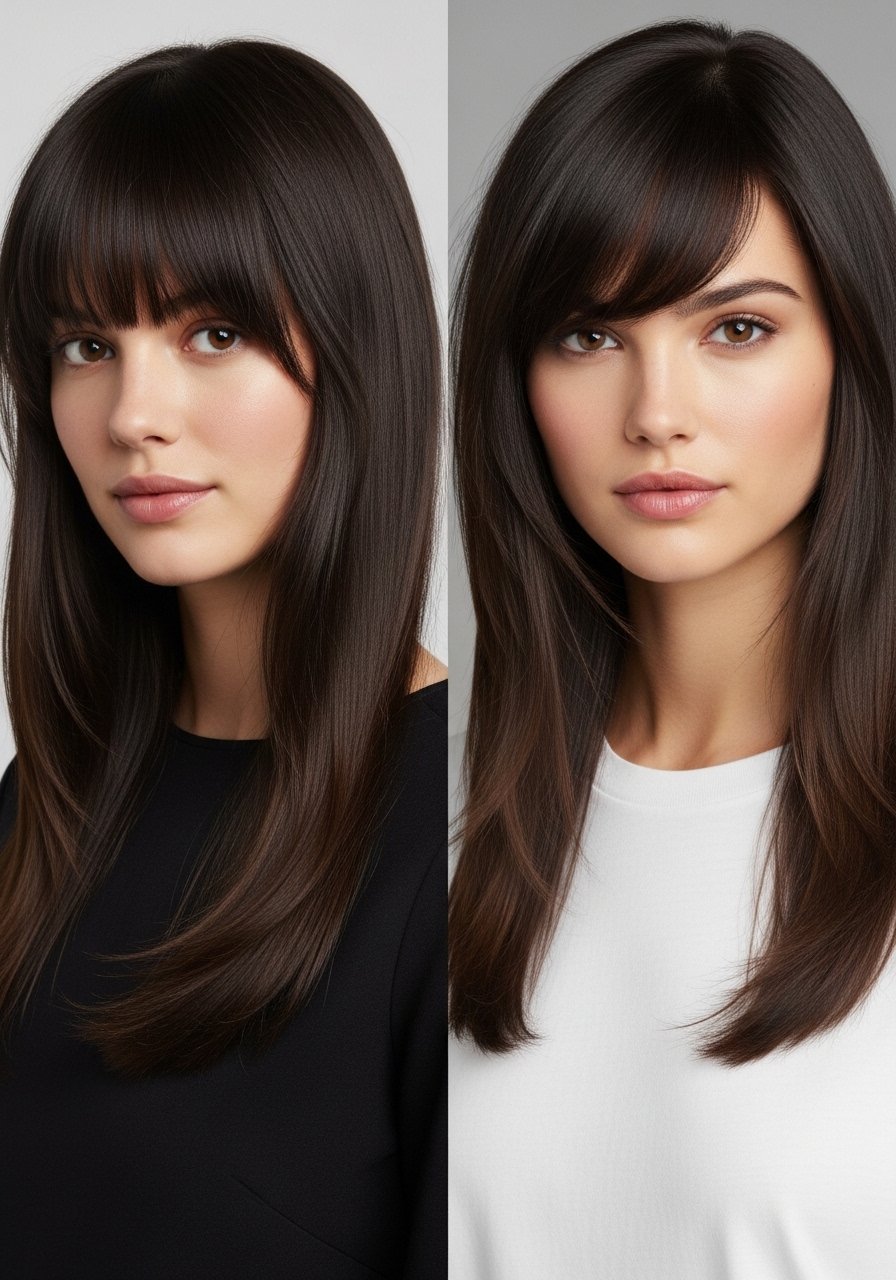
Curtain bangs can suit many faces if you tweak length and parting. For round faces, start the bangs slightly below eyebrow level and add a longer taper at the ends to create elongation. For oval faces, a shorter, choppier edge works and can sit above the brow for a flirty look. The detail most stylists use is where the part sits, shifting it half an inch off center changes how the bangs frame the cheekbones. If you have a strong jaw, keep the bangs longer on the sides to soften the line. These adjustments are cheap at a salon or doable at home with small trims, but avoid cutting too much in one session.
Grow-Out Strategy That Actually Looks Intentional
If you decide to grow curtain bangs out, plan staged trims. The easiest trick is to convert the bangs into a soft side fringe over two to three trims, each removing about 1/4 inch and pivoting the part slightly. A common mistake is letting them grow wild and then chopping a large chunk, which looks uneven. At-home option, clip the center back and twist side pieces into a loose pin to fake longer bangs until the next trim. For thick straight hair you might need two salon visits spaced six weeks apart. Remember, hair grows about half an inch a month at most, regardless of what biotin gummies promise you, so patience is part of the plan.
Bedtime Routine to Preserve Curtain Bang Shape
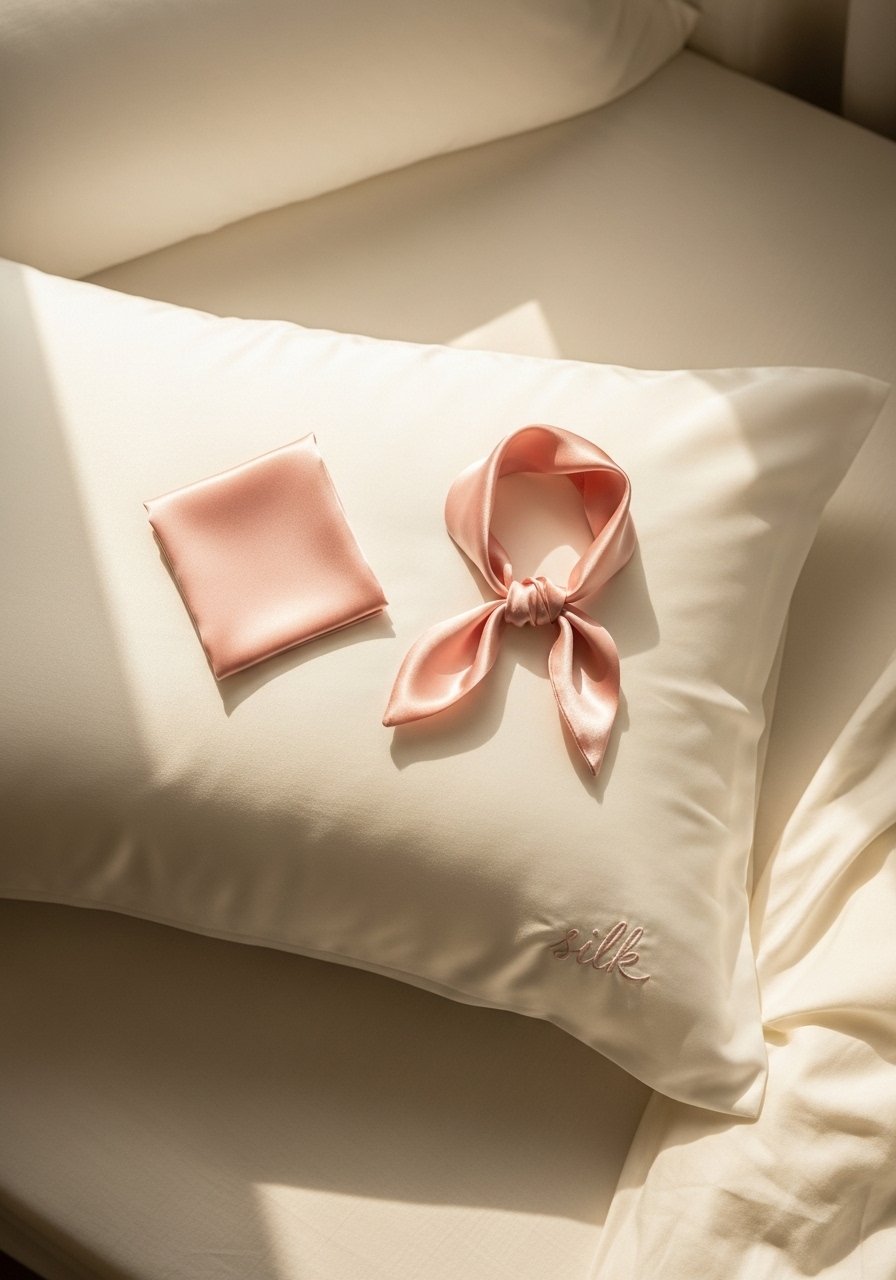
How you sleep affects the next morning. Wrap curtain bangs gently with a small silk scarf or lay a silk pillowcase under the fringe to reduce friction and flattening. A micro satin scrunchie to loosely hold the front section at the crown avoids creases. For fine straight hair, a silk pillowcase alone often does the job. One real-world tip, many people wake up with better bangs when they sleep slightly elevated. This routine costs under $30 and cuts morning styling time by half. If you have a scalp sensitivity, test any silk or spray on a small patch before nightly use.
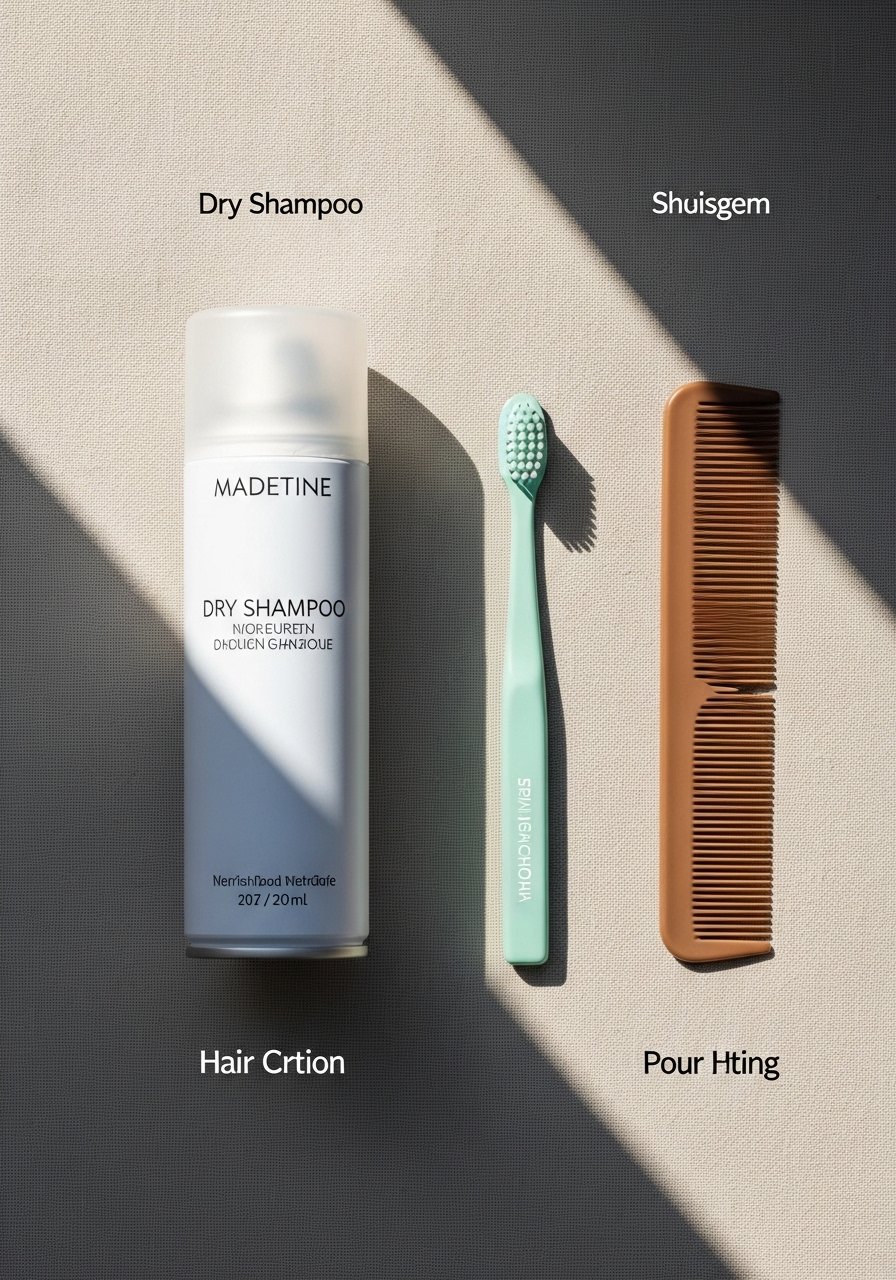
What I Keep in My Curtain Bang Kit
- Honestly the small things matter most. A one-inch boar bristle round brush for quick shaping, under $30.
- For heat protection, a lightweight heat protectant spray that absorbs on damp hair, buy from an authorized seller.
- For second-day oil control, a tinted dry shampoo for brunettes stops white cast.
- For weekly bond maintenance, Olaplex No.3 Hair Perfector 3.3 oz. Buy from the official store on Amazon or Sephora to avoid counterfeits.
- For subtle texture, a medium-hold mousse applied at roots only.
- For sleep protection, a silk pillowcase queen size under $40.
- For quick trims at home, hair cutting scissors sharp 6.5 inch if you will DIY carefully.
- For color touch-ups around the face, a demi-permanent gloss kit and always patch test.
Little Things I Wish I Knew Before Cutting Curtain Bangs
- Heat protectant goes on damp hair, not dry. The cuticle is more open and the product actually absorbs. This lightweight heat protectant spray is what I use for bangs.
- Grab a microfiber hair towel for $12. It cuts drying time and keeps the fringe from puffing during air dry.
- Hair grows about half an inch a month at most, regardless of what biotin gummies promise you. The thing that helps length retention is reducing breakage with a silk pillowcase and weekly bond treatments.
- Drugstore shampoo is fine. Spend on a good conditioner and bond builder. Olaplex No.5 Bond Maintenance Conditioner does heavy lifting for damaged hair.
Frequently Asked Questions
Q: Can straight hair pull off choppy curtain bangs or will they just look blunt?
A: Yes, straight hair can do choppy curtain bangs if the ends are texturized. Use a razor or thinning shears for light interior texturizing rather than blunt point cuts. If you are DIYing, take tiny amounts off and check in natural light.
Q: How often should I trim curtain bangs to keep the choppy look?
A: Every four to six weeks for those who want the original shape. If you prefer a longer grow-out, trim every eight to ten weeks and pivot the cut into a side fringe gradually.
Q: Is it safe to flat iron curtain bangs daily?
A: You can if you use heat protectant before any iron over 300F and keep the temperature as low as needed. Two-second holds at 300F on small sections create a bend without repeated passes. Give the hair a no-heat day to recover.
Q: Can I add a money piece at home without bleaching my whole head?
A: You can, but lifting face-framing pieces over previously colored hair risks breakage. Use low-strength developer, do an allergy patch test, and expect multiple sessions spaced weeks apart. A salon appointment is safer for dramatic lifts.
Q: What if my bangs keep getting oily within hours?
A: Shorten the trim cycle and wash the fringe more often than the lengths. Use a low-sulfate shampoo and a tinted dry shampoo for visible control. If oil persists despite changes, consult a trichologist.
Q: Will bond builders repair split ends in curtain bangs?
A: Bond builders smooth the appearance and strengthen strands temporarily but they do not repair split ends permanently. A small trim removes splits. Olaplex No.3 Hair Perfector helps reduce breakage between trims.

