
Most heat protectants you spray on dry hair before flat ironing barely work. They need to absorb into damp or just-dried hair to actually shield the cuticle. Here is what I actually use and how I apply it.
These red-with-highlights ideas are written for straight to curly 2A through 3C hair, and a few notes for coilier 4A textures where I actually tried them. Most take 15 to 60 minutes and sit in the $0 to $150 range, with a few salon-only looks you should book. I call out what you can do at home and what is worth a pro visit.
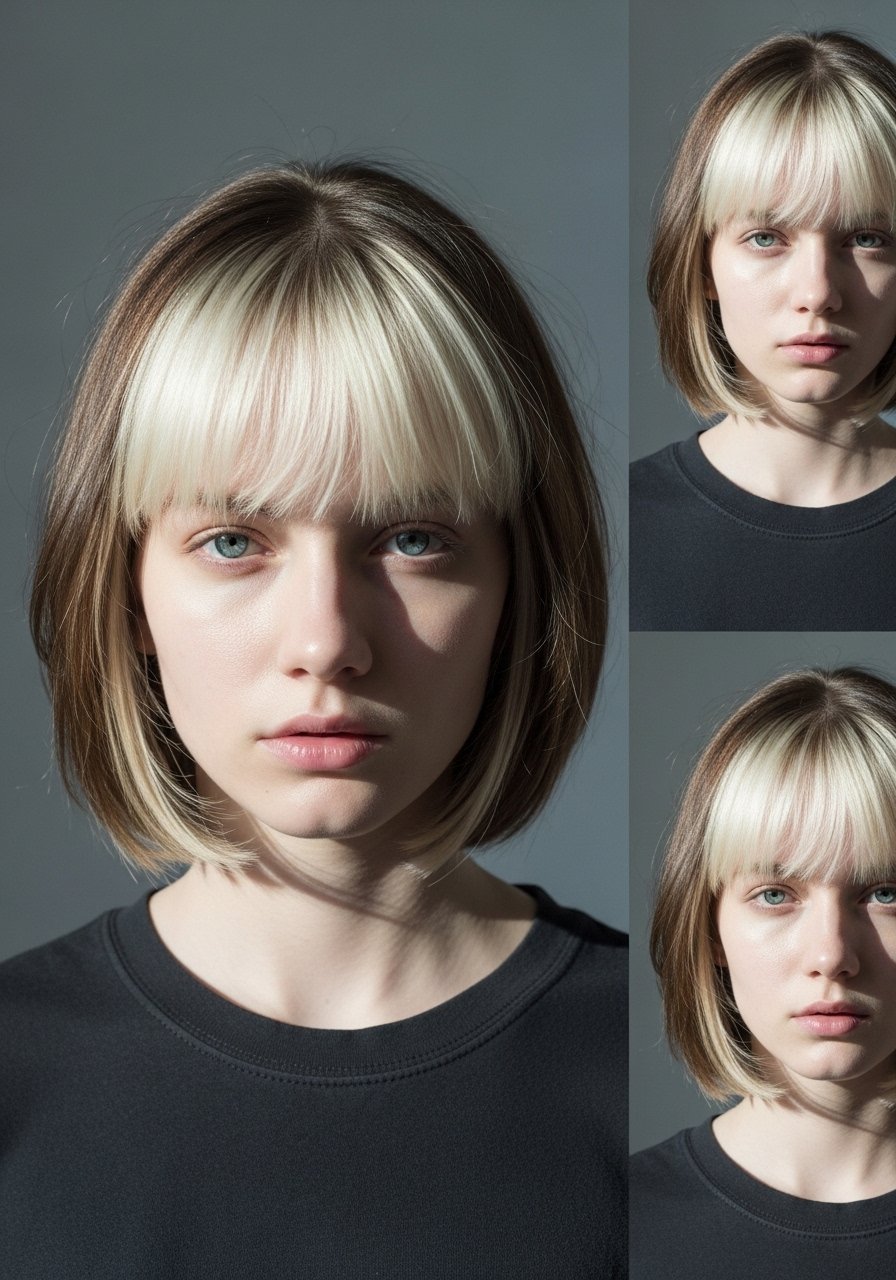
Copper Money Piece For Soft Face Framing
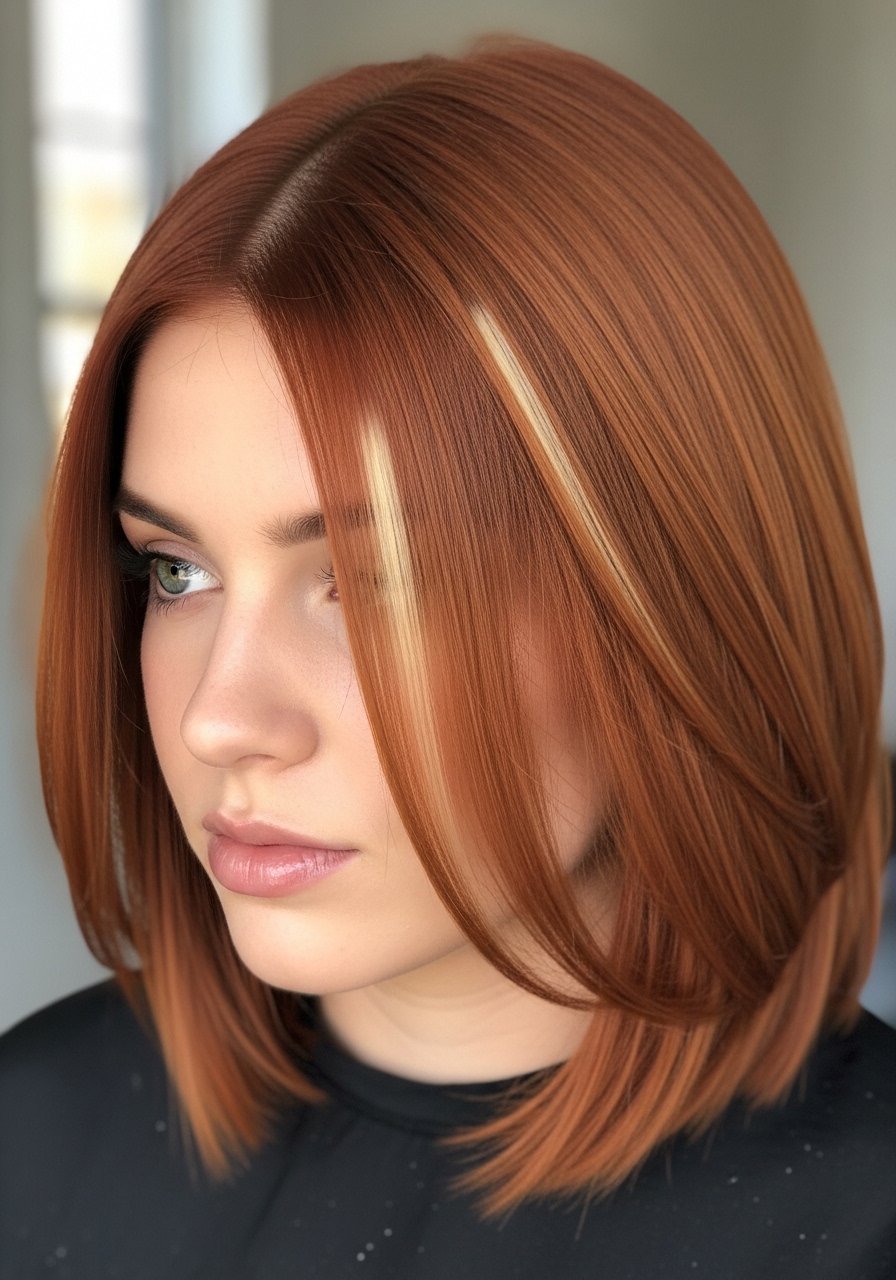
If you want instant brightness without bleaching the whole head, a copper money piece is the mood. It works best on straight to wavy 1B through 2C hair and looks especially good on collarbone length or shorter. For DIY, paint two 1/2-inch sections, foil them separately, and check lift at 10 minute intervals to avoid orange banding. I usually use a 20 volume developer for fine to medium hair and 30 volume only on thick resistant hair in the salon. Common mistake is overprocessing the face frames because people leave the bleach on for the same time as the rest of the head. Allergy patch test first and if you have previous dark dye, do not lift over it at home. Two pumps of Olaplex No. 3 hair perfector once a week kept my ends from feeling fried after doing mine.
Copper Balayage On Shoulder-Length Waves
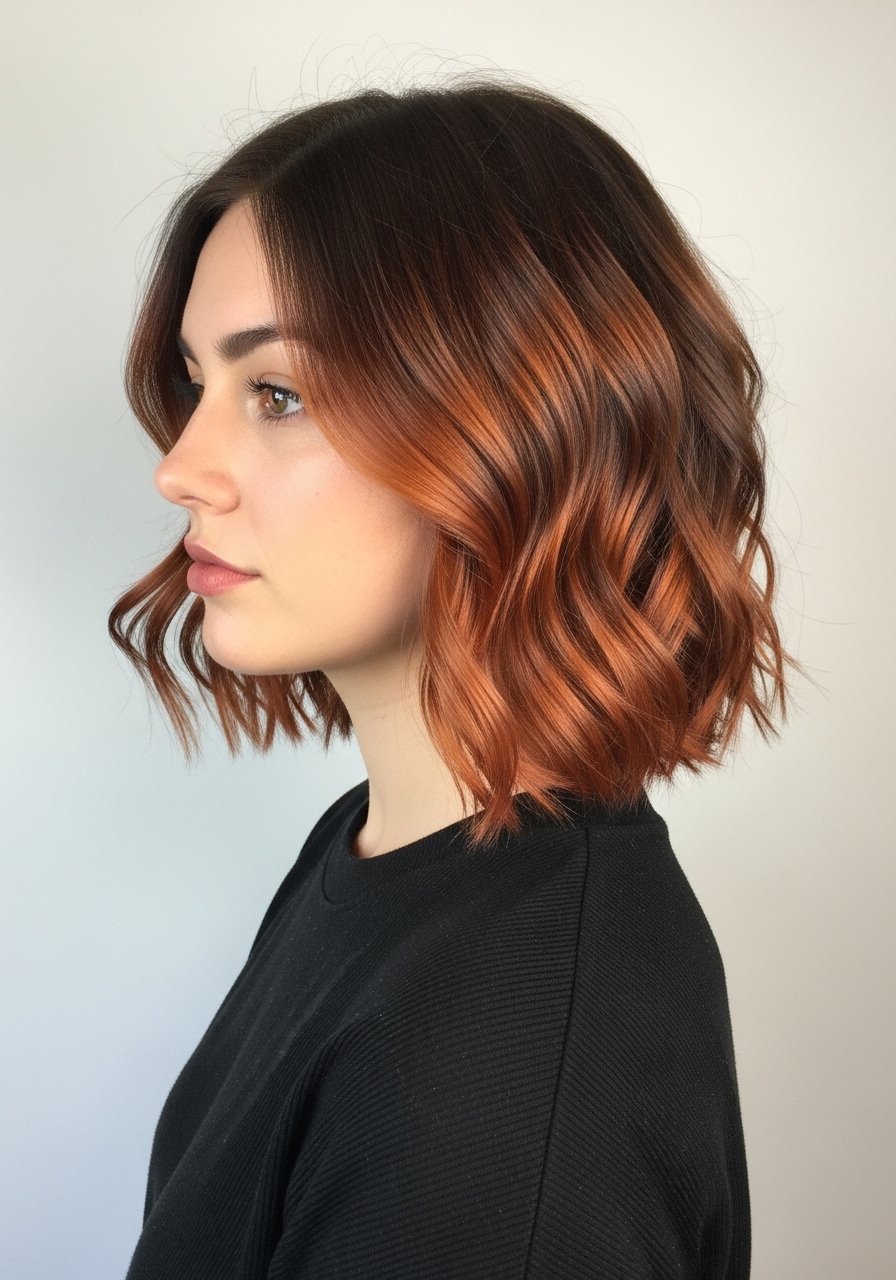
Balayage is forgiving, so it is my go-to when I want low-maintenance red highlights. This suits 2A to 3A hair best since waves catch the paint nicely, but you can adapt for thicker textures by widening sections. Section into 1-inch pieces and paint a 70/30 light-to-dark ratio toward the ends, then check lift at 15 minutes. The result gives the warmth without obvious grow-out lines and stretches salon visits to three months if you keep the roots dark. The classic mistake is painting too high up the hair, which makes regrowth obvious. Tone with a demi-gloss in the salon or use a color-depositing conditioner at home. If you blow-dry, spray Color Wow Dream Coat anti-humidity spray on damp hair first for extra shine and less frizz.
Deep Burgundy Gloss For Dark Brown Hair
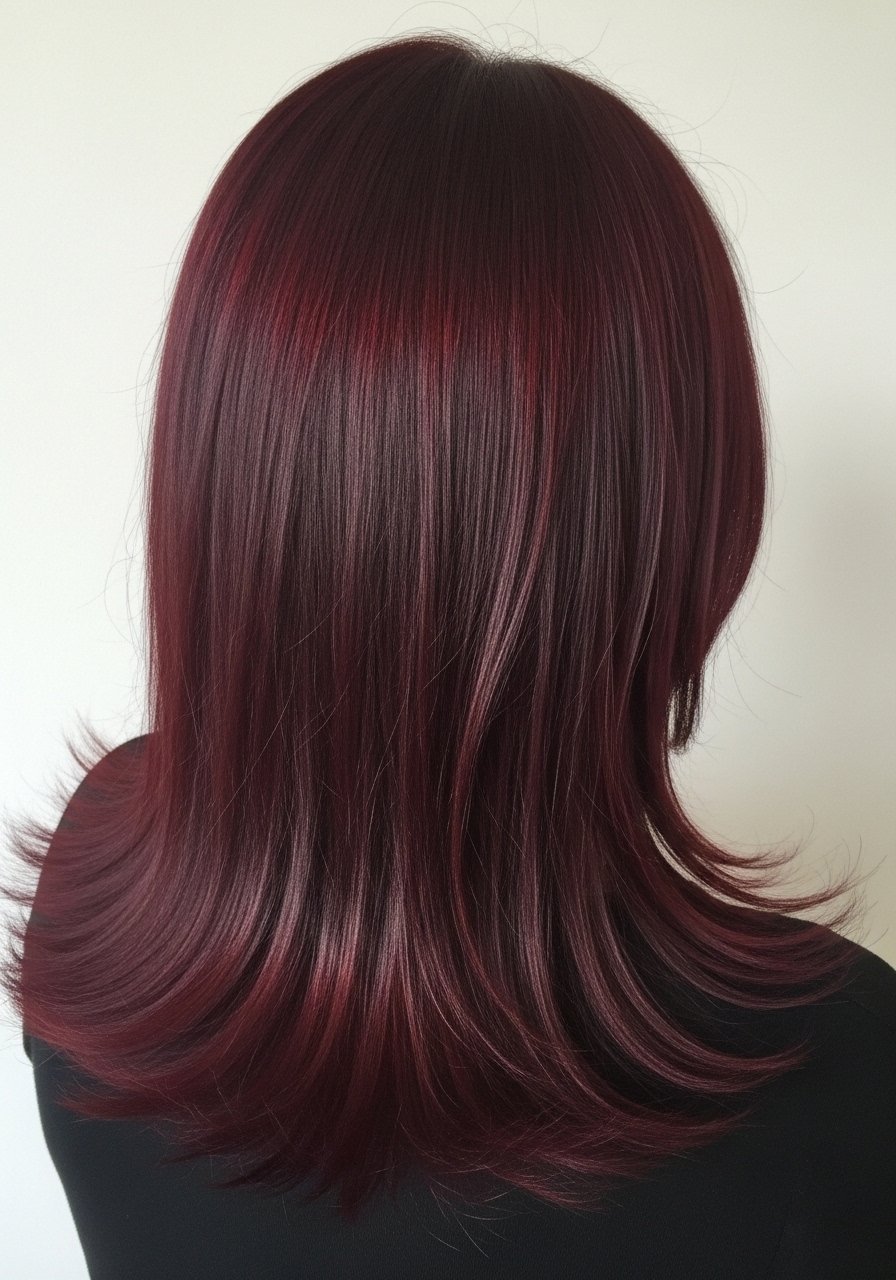
If your base is dark brown and you want depth with shine, a gloss is the fastest salon treatment. It deposits color without lifting, so it is safe if you do not want to bleach. Most stylists book this as a 30 to 45 minute service. The result is low upkeep, but the common frustration is people expecting a permanent change. The gloss fades in six to eight weeks with daily shampooing. I refresh it at home using a demi-permanent gloss or a pigmented mask every three to four washes. For at-home touch-ups, try a small jar of a pigmented mask and use it as a 10 minute rinse weekly. Buy gloss products from the official Amazon seller or at a salon to avoid counterfeits.
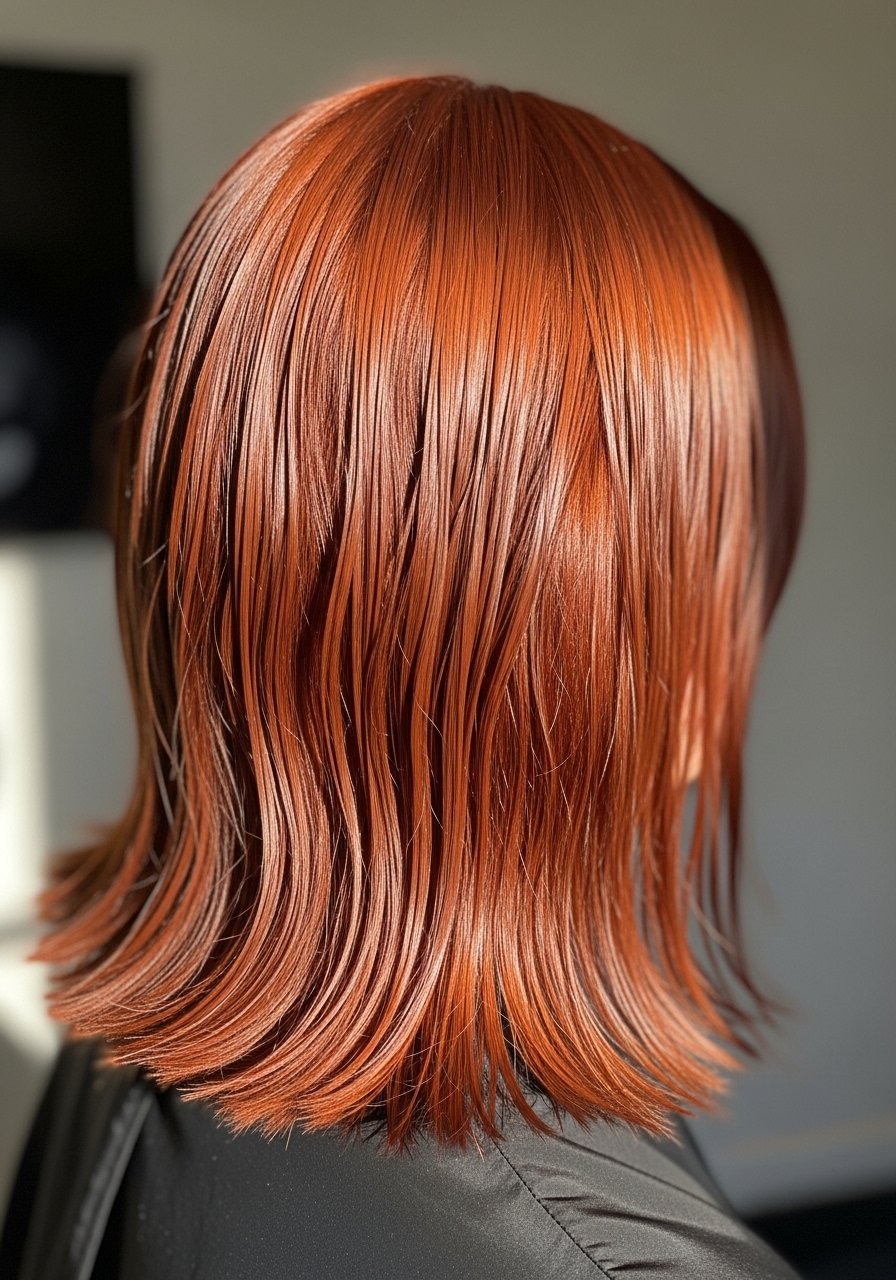
Strawberry Blonde Melt For Sun-Kissed Finish
Strawberry blonde melts are the softest red option and they read as warm without being bright orange. This look works best on fine to medium 1A through 2A hair because the lighter pieces sit airy and soft. Section the hair into 1.5-inch panels and apply the lighter formula only on the mid-lengths and ends, leave the roots darker for a grown-in vibe. The trick I learned is to tone with a cool demi to avoid accidental brass after two washes. The usual mistake is overdoing lift on fine hair, which creates brittle ends. If you go lighter, use a weekly bond-building treatment and always patch test color.
Copper Peekaboo Highlights For Curly Hair
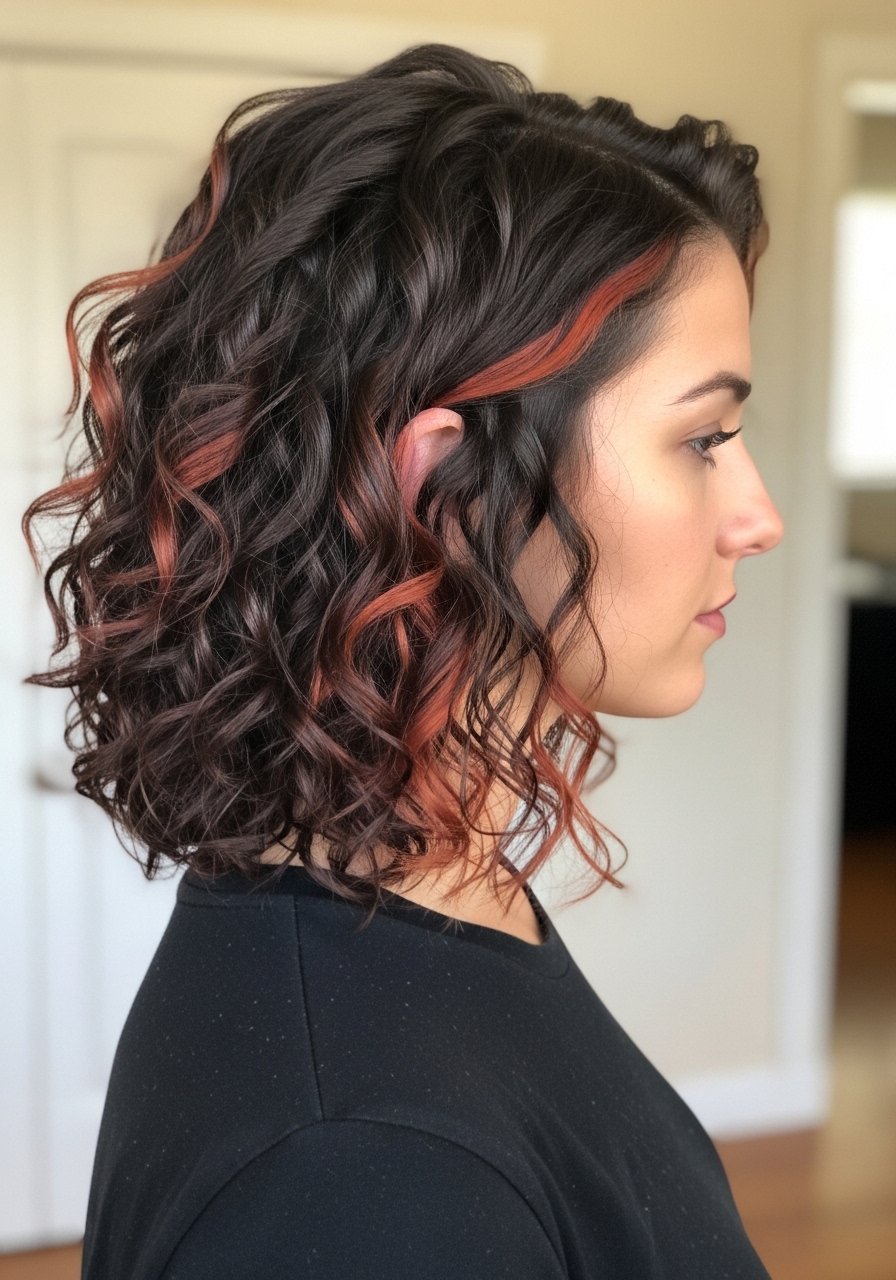
Peekaboo highlights are hidden color that pops when curls move, and they are my favorite for curly 3A to 3C textures who want bold without full commitment. Work in small vertical sections, weave every third section, and place color under the top layer. That reduces processing on the outermost hair and keeps your curl pattern intact. Budget is friendly if you do panels at home, but avoid lifting curly hair too often. The common error is saturating the outer layer, which kills shape. I follow with a leave-in cream under a gel to retain definition, not gel alone. Two quarters of a teaspoon of developer per small section is often enough for subtle peekaboos.
Soft Rose Gold Babylights For Fine Hair
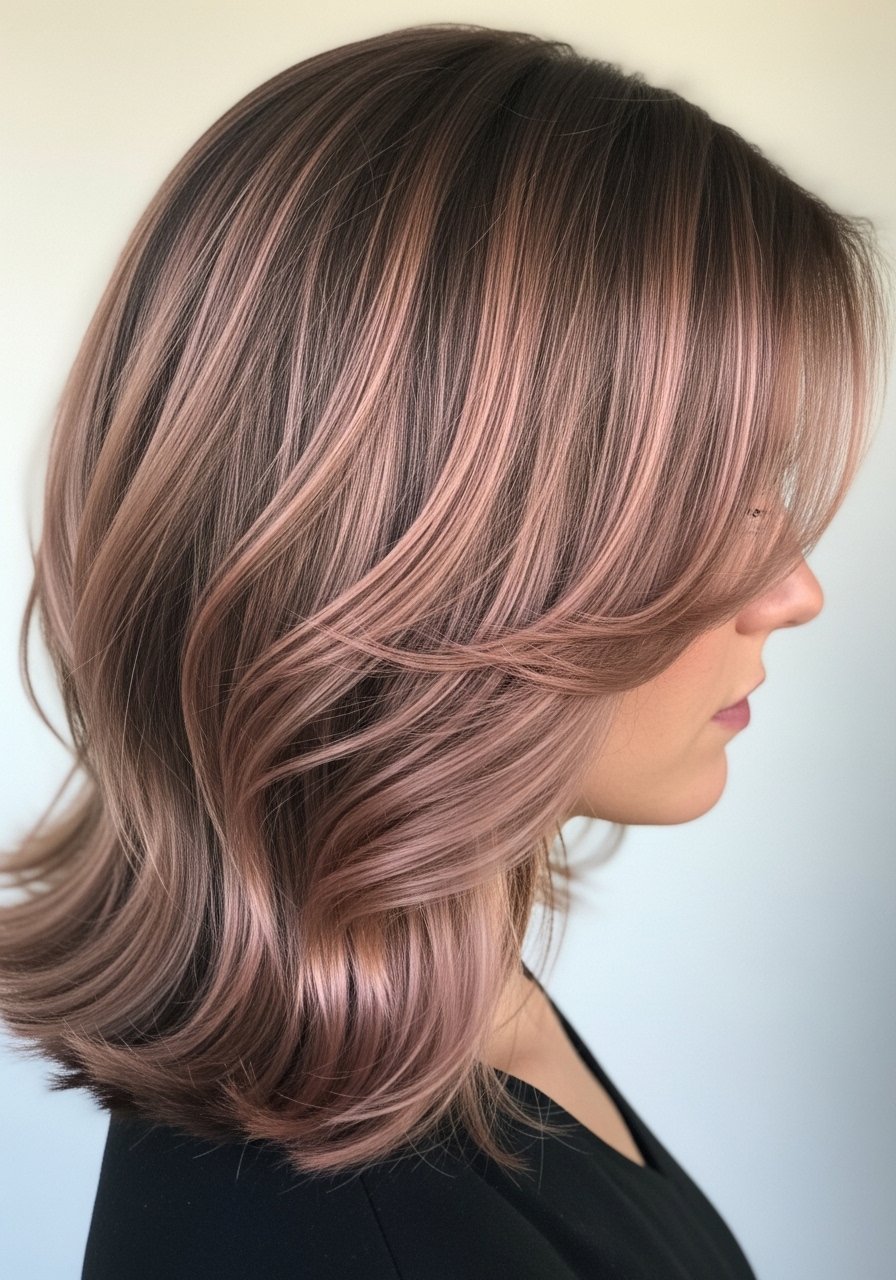
Babylights are the move when your hair is fine and you want dimension without harsh contrast. They are tiny slices, spaced close together, so the color reads natural. This is a salon service that can take two hours. If you DIY, do 1/8-inch slices and keep processing time short, around 8 to 12 minutes depending on the formula. The small slices prevent blocky-looking lines. Most people make them too thick and end up with obvious striping. For fragile fine hair, add a bond builder to the mix and limit heat styling for two weeks after. A pigmented conditioner helps the rose tone last longer between appointments.
Copper Root Melt For Easier Regrowth
If you hate the regrowth line, a root melt is the lazy person's red. It blends a darker root into coppery lengths so you can go 10 to 14 weeks between appointments. It suits straight through wavy 1A to 2C hair and is great for busy schedules. The salon lifts the mid-lengths slightly and melts the root with a demi tone. At home, you can ask your colorist for a wider lowlight at the root instead of touch-ups. Do not attempt heavy lift over already-lightened ends at home. The biggest mistake is using the same developer for root and mid-lengths. Use lower developer at the root to avoid muddy banding and always perform an allergy patch test.
What I Keep On Hand To Maintain Red With Highlights
- Honestly, the two things that saved my color were a pigmented conditioner and a bond builder. Color Depositing Conditioner in copper tones is what I use every two washes to keep brightness.
- For weekly repair I use Olaplex No. 3 hair perfector, buy from the official Amazon store or Sephora to avoid fakes.
- For heat protection, grab Color Wow heat protectant spray and apply to damp hair before blow-drying.
- A wide-tooth comb for wet detangling helps prevent breakage. Wide-tooth detangling comb under $10.
- For quick at-home glossing, try a demi gloss mask. Demi-permanent gloss mask keeps reds fresh for weeks.
- Microfiber towel to reduce frizz and speed drying, about $12. Microfiber hair towel
- A sulfate-free color-safe shampoo, 8oz bottle. Sulfate-free color-safe shampoo 8oz
- For DIY lightening panels, a 20 volume developer for most lifts and a separate 10 volume for root blending. 20 volume developer 32oz
- A silk pillowcase under $25 reduces abrasion on highlighted ends. Silk pillowcase queen
- Wide clips for sectioning during color or styling. Large hair sectioning clips 4-pack
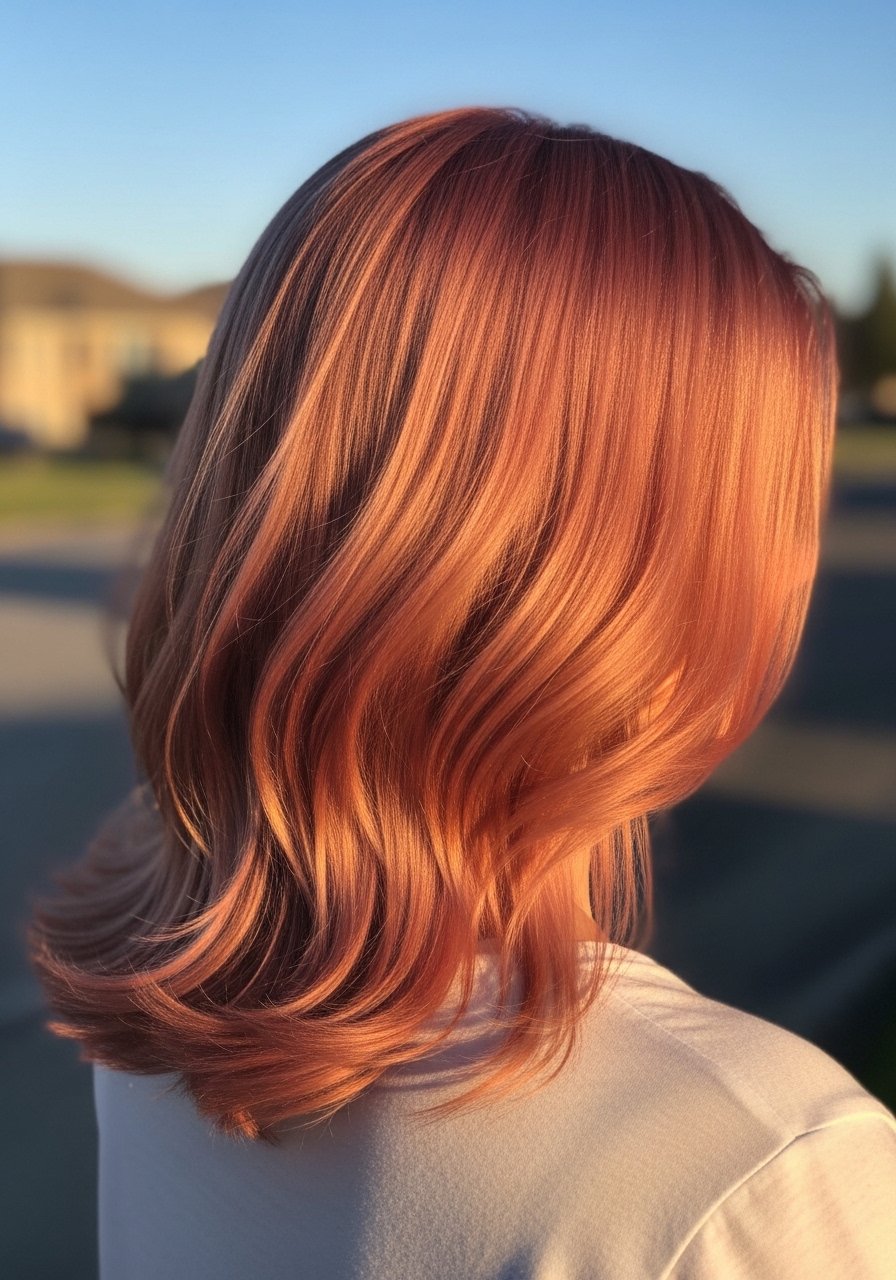
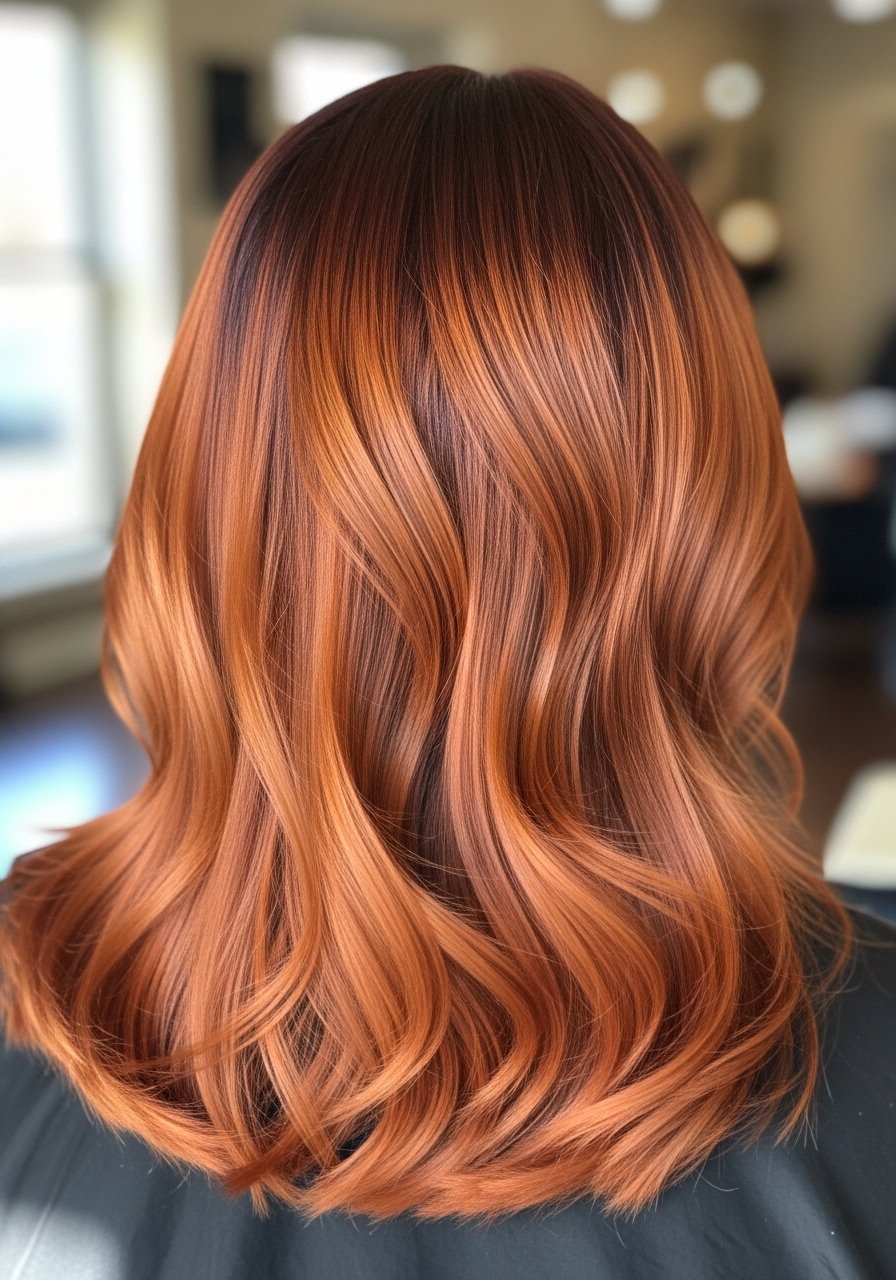
Dimensional Ginger Balayage For Thick Hair
Thick hair drinks color, so go wider with sections and more surface area on the mid-lengths. For thick 3A to 4A textures, paint 1.5-inch sections and feather the color toward the ends. I learned to use a 60/40 placement favoring brightness on the outer layer so the highlights read when hair is down. A common pain point is uneven lift where the underside stays darker. Solve it by flipping the hair and painting the underside separately. Deep condition the day after coloring and avoid hot tools for 48 hours. If you like to style with heat, apply a heat protectant to damp hair before any iron over 300F.
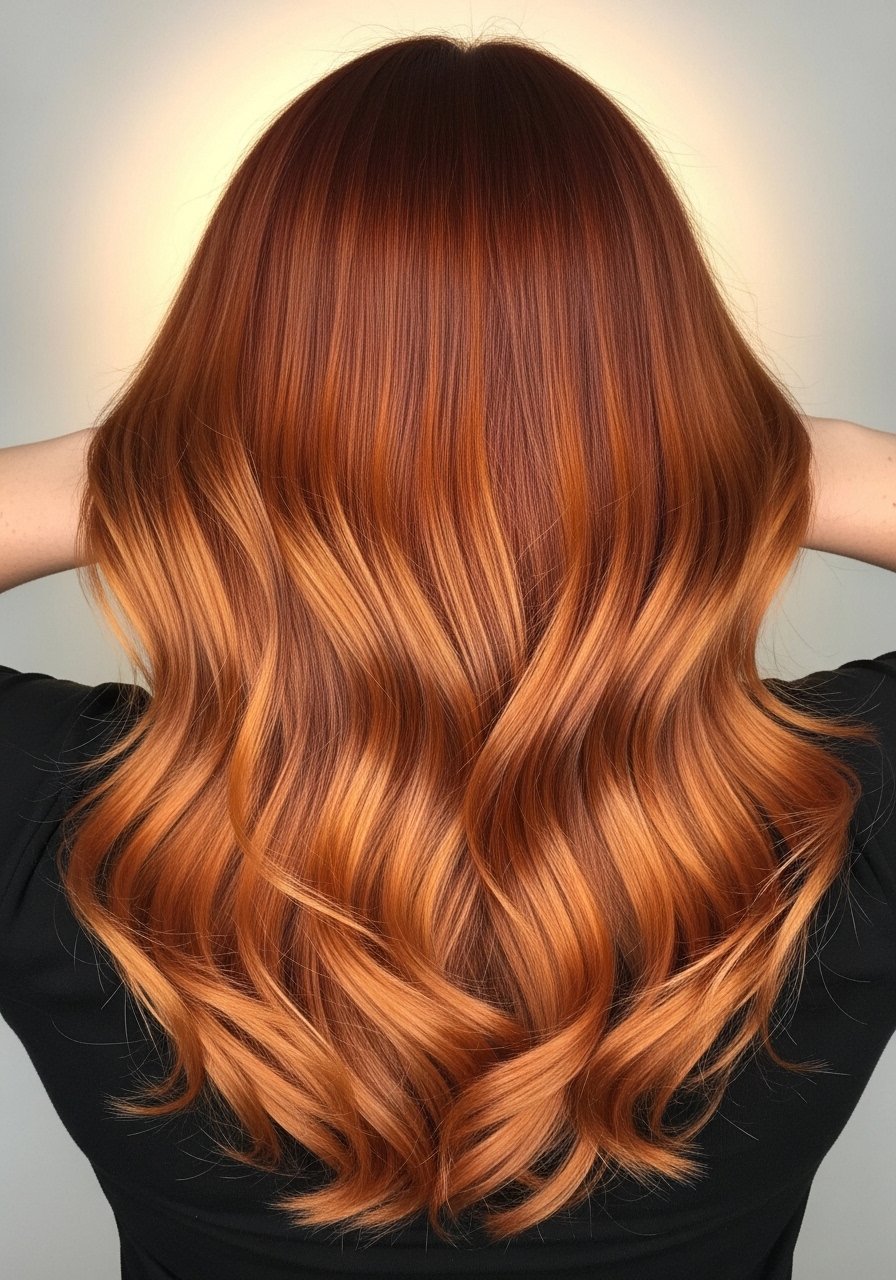
Cherry Cola Ombre For Cool Undertones
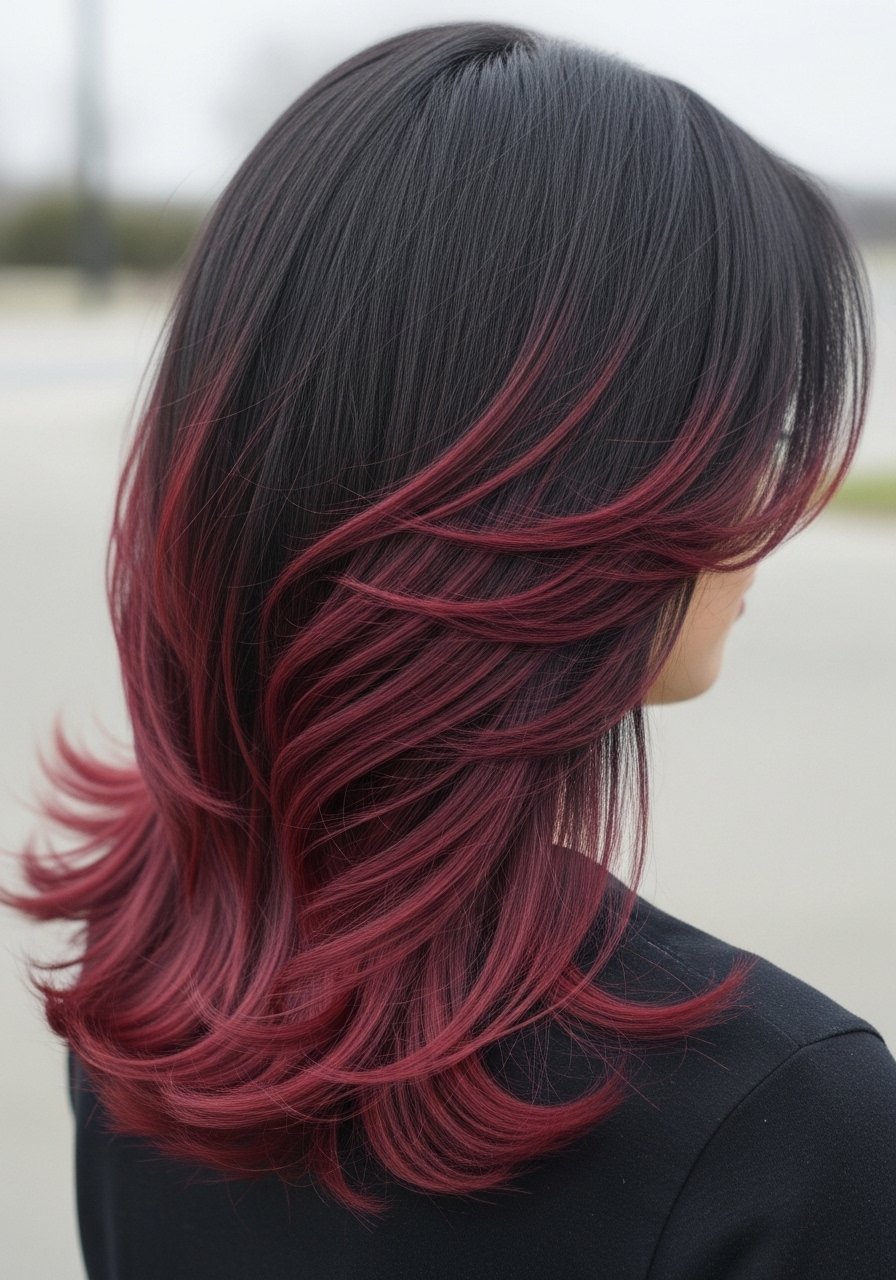
Cherry cola is that rich burgundy with cool undertones that flatters olive and cooler skin tones. Ombre placement gives a darker root so regrowth looks clean. Use a demi or semi for the burgundy to avoid quick fade, and touch up every two to three months. A mistake many people make is using clear glosses which strip the pigment faster. Instead, use a pigmented gloss or a color-locking spray after styling. If you are doing the color at home, do not overlap bleach onto previously dyed sections and test the tone on a hidden strand.
Subtle Auburn Slices For Pixies And Short Cuts
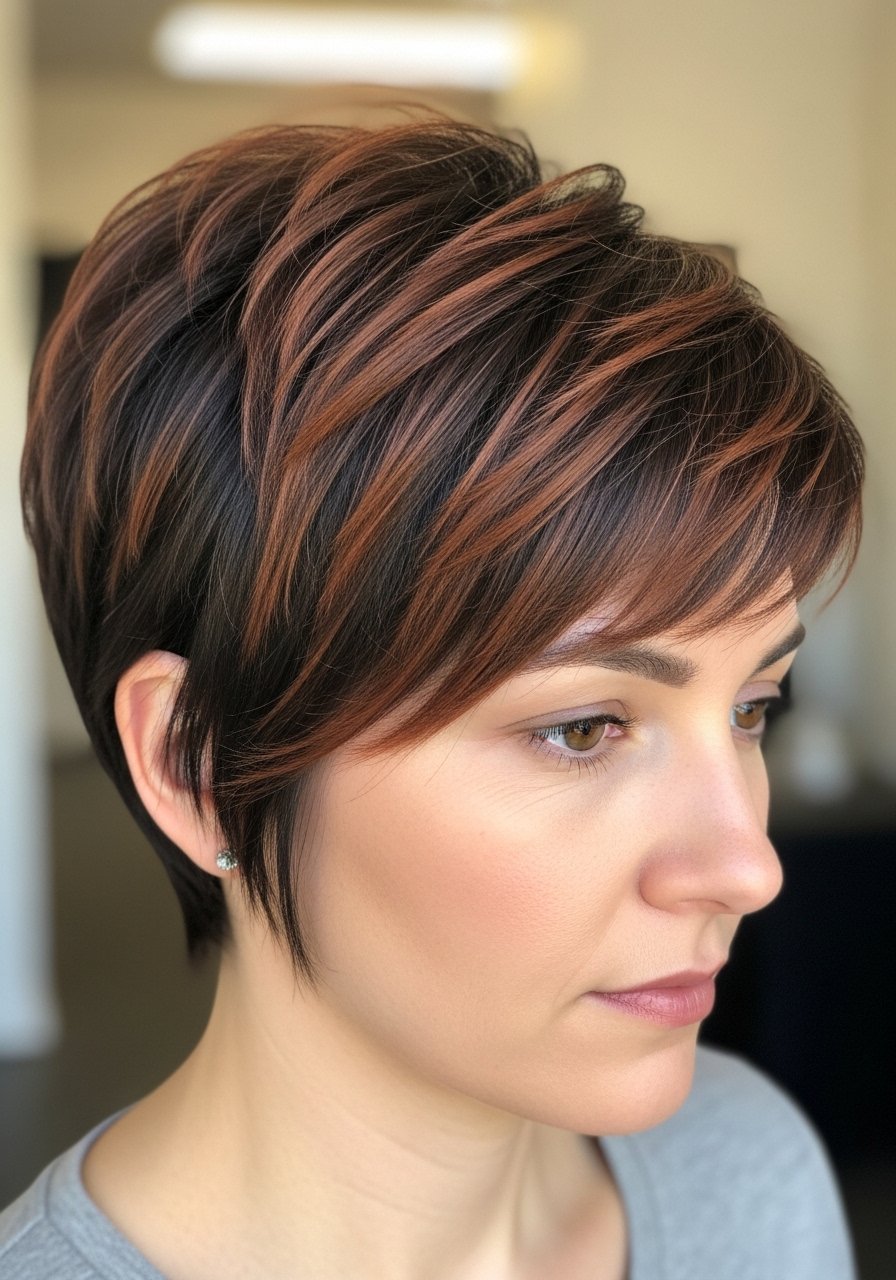
Short hair reads color faster, so thin slices placed strategically give the effect of fullness without heavy maintenance. For pixies and short bobs, paint 1/4-inch slices across the crown and at the temples and blend the edges with a tint brush to avoid hard lines. This is a salon-friendly look but doable at home if you keep the slices thin. The time investment is low, but the mistake is making slices too thick, which ages short hair. For fade control, use a color-depositing shampoo every other wash and be gentle with metal styling tools. If you have a sensitive scalp, do an allergy test and avoid overlap with scalp irritation.
Fiery Copper Gloss Treatment For Weekend Shine
For a quick weekend refresh, a glossy glaze will make the red feel fresh without a full color session. Apply a pigmented gloss for 10 to 15 minutes on damp hair, rinse and style. It is a cheap salon treatment I do at home when the color looks dull. The biggest false expectation is permanence. Glosses wash down with shampoo over two to six weeks depending on your routine. If you use clarifying shampoos often, your gloss will fade faster. I use a pigmented mask for 10 minutes after shampoo and it acts like a gloss between appointments.
Cinnamon Brown Lowlights To Reduce Fade

If pure red fades too fast for you, adding cinnamon brown lowlights stabilizes the overall look. Lowlights reduce the visual fade by giving your eye darker anchors. They work well on straight and slightly wavy 1B to 2B hair and add dimension for medium and long lengths. When placing lowlights, I alternate slices and panels, about every 1 to 1.5 inches, to avoid striping. The common mistake is slapping lowlights only at the ends, which creates a muddy bottom. Keep them close to the root area and blend through the mid-lengths for balance.
Bright Copper Babylights For Sleek Straight Hair
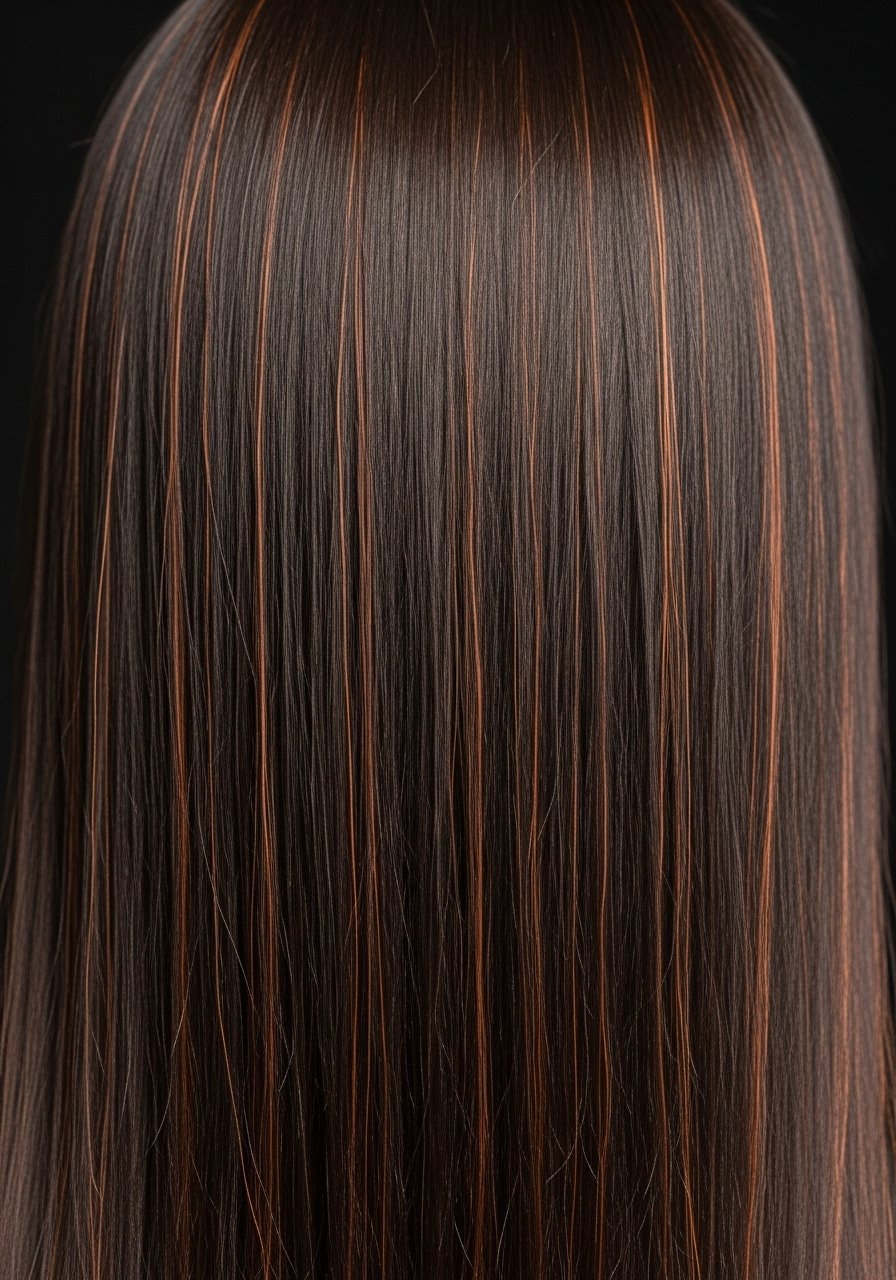
Babylights on very straight hair give the illusion of many small catches of light. For skill level, this is intermediate and takes patience. Use 1/8-inch slices across the crown and tiny hand-paint strokes. The result looks natural and reads expensive under indoor lighting. A common frustration is brassy ends from overheating the bleach. Watch processing times closely and neutralize with a demi-tone if the brass peaks through. Finish with a shine serum and avoid sulfates in your shampoo to prevent quick wash-out.
Bleach-and-Tone Money Piece For Pale Skin
Pale skin tones can handle very light money pieces that brighten the face dramatically. This is a more aggressive lightening move, so consider a salon. If you DIY, lift the front slice carefully and tone immediately to avoid orange. The mistake I made once was waiting too long to tone and the result went cartoony. Bleaching over previously colored hair increases breakage risk, so avoid overlapping and consider doing the face frames on a separate day. Use a weekly bond-building mask and sleep on a silk pillowcase for less friction on the lightened sections.
Color-Depositing Conditioner Routine To Keep Red Vibrant

If you want to keep the red between salon visits, a color-depositing conditioner is the single most practical hack. Use it as a 5 to 10 minute rinse once every two to three washes. It takes the edge off brass and refreshes tone without harsh chemicals. The mistake is leaving it on overnight, which can oversaturate and tint unintended fabrics. For best results, apply to towel-dried hair, comb through with a wide-tooth comb, leave ten minutes, and rinse in cool water. I alternate pigmented conditioner with a moisturizing mask so my hair does not go dry.
What I Wish Someone Had Told Me About Red With Highlights
- Heat protectant timing matters. Heat protectant goes on damp hair, not dry. The cuticle is more open and the product actually absorbs. Color Wow heat protectant spray is what I reach for before blow drying.
- Hair grows about half an inch a month at most, regardless of supplements. The thing that helps length retention is reducing breakage with a silk pillowcase queen and weekly bond treatments.
- Swap a purple shampoo obsession for a color-depositing conditioner when dealing with red tones. Purple shampoos fight brass, but depositors maintain your specific red.
- Patch test every single permanent or demi color. I once had a scalp reaction and missed a weekend of work.
- Bond builders do a lot but they do not reverse historical damage. They strengthen, they do not graft new hair back.
- For curlier textures, layer a leave-in cream under a gel rather than gel-only. It preserves second-day shape better. Leave-in curl cream
Frequently Asked Questions
Q: How often should I use a color-depositing conditioner to keep reds from fading?
A: Every two to three washes is a safe rhythm. If you shampoo daily, do a deposit every three to four shampoos. Too frequent use can build up tint.
Q: Can I safely bleach a face-framing money piece at home if I have dark dye on the rest of my hair?
A: Bleaching over previous dye is risky and a common cause of breakage. If the dark dye is recent, book a salon color correction. If you must DIY, test a hidden strand and accept it may take multiple sessions spaced weeks apart.
Q: Will a bond builder fix split ends from highlighting?
A: Bond builders strengthen and reduce breakage, but they do not permanently fix split ends. A trim is the only permanent fix. Use a bond builder to smooth and protect until you can trim.
Q: How often should I do a gloss after going red with highlights?
A: For most people, every six to eight weeks keeps the shine and tone. If you wash daily or use clarifying shampoos, you may want a mid-cycle at-home gloss or pigmented mask at week three or four.
Q: Can people with 4A coils get these red highlight looks?
A: Yes, but placement and technique change. Hidden peekaboos and deeper root melts work particularly well. Book a stylist experienced with 4A textures or consult them about section width and processing time to avoid over-drying.
Q: Does toner make red hair last longer or does it wash out quickly?
A: Toners smooth brass and set the exact shade, but pigmented toners are semi-durable. They help lock the initial tone for a few washes. For long-term maintenance, use color-safe shampoo and pigmented conditioners between salon toning.

