
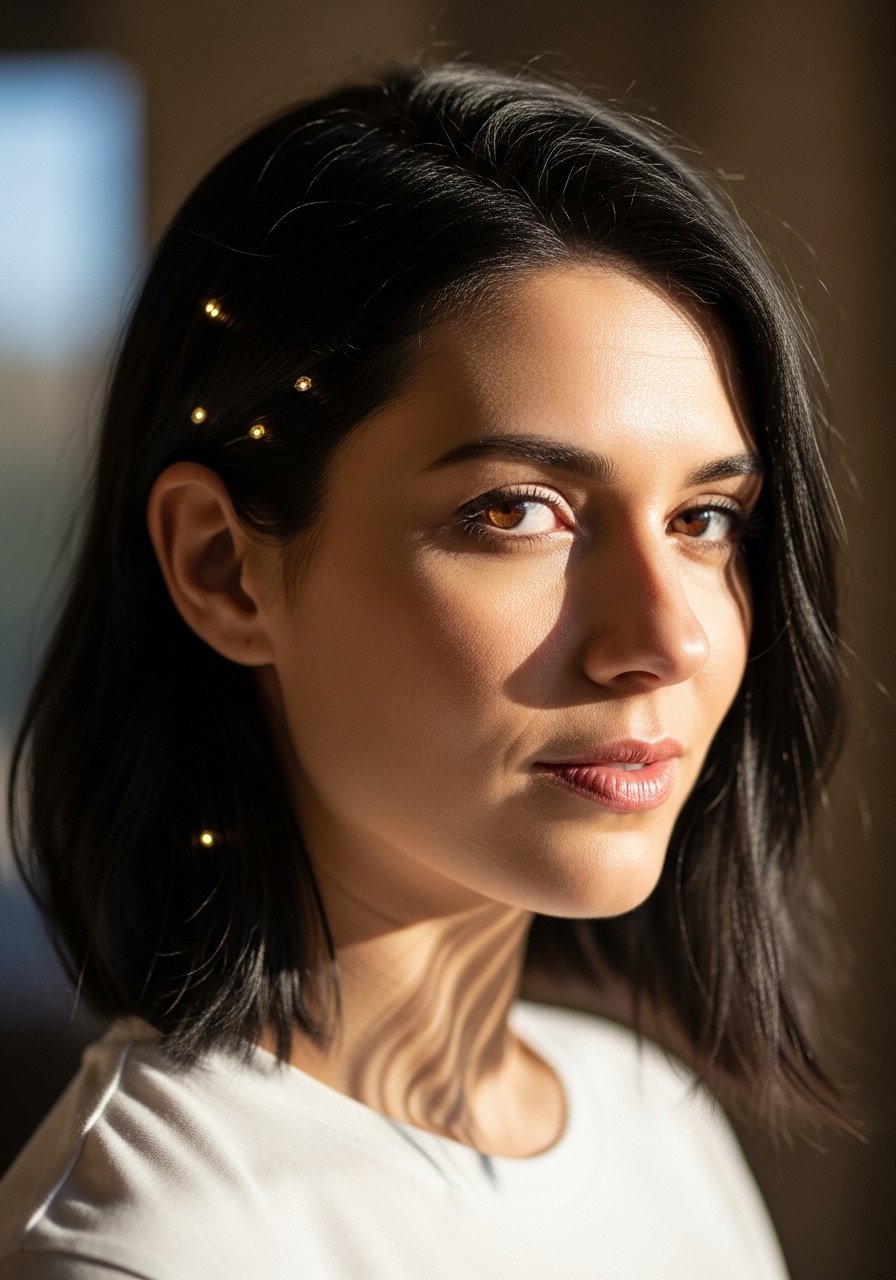
I once asked my colorist for "warm but not orange" highlights on dark hair and left with obvious striping and a salon bill I did not expect. Since then I learned how to get reddish brown highlights that sit naturally on dark bases without the brass, and how to keep them from fading two weeks later. These ideas are what actually worked for me and friends when dark hair met red tones.
This list is built for dark natural or color-treated hair, mostly shoulder length to mid-back. Some ideas suit fine crimpy waves through dense coils, I call out adjustments where needed. Expect mostly at-home friendly steps, a few salon-only notes, and budgets from $10 upkeep to $150 for a one-time tool. Skill ranges from beginner wipe-in glosses to foil painting that takes 45 minutes.
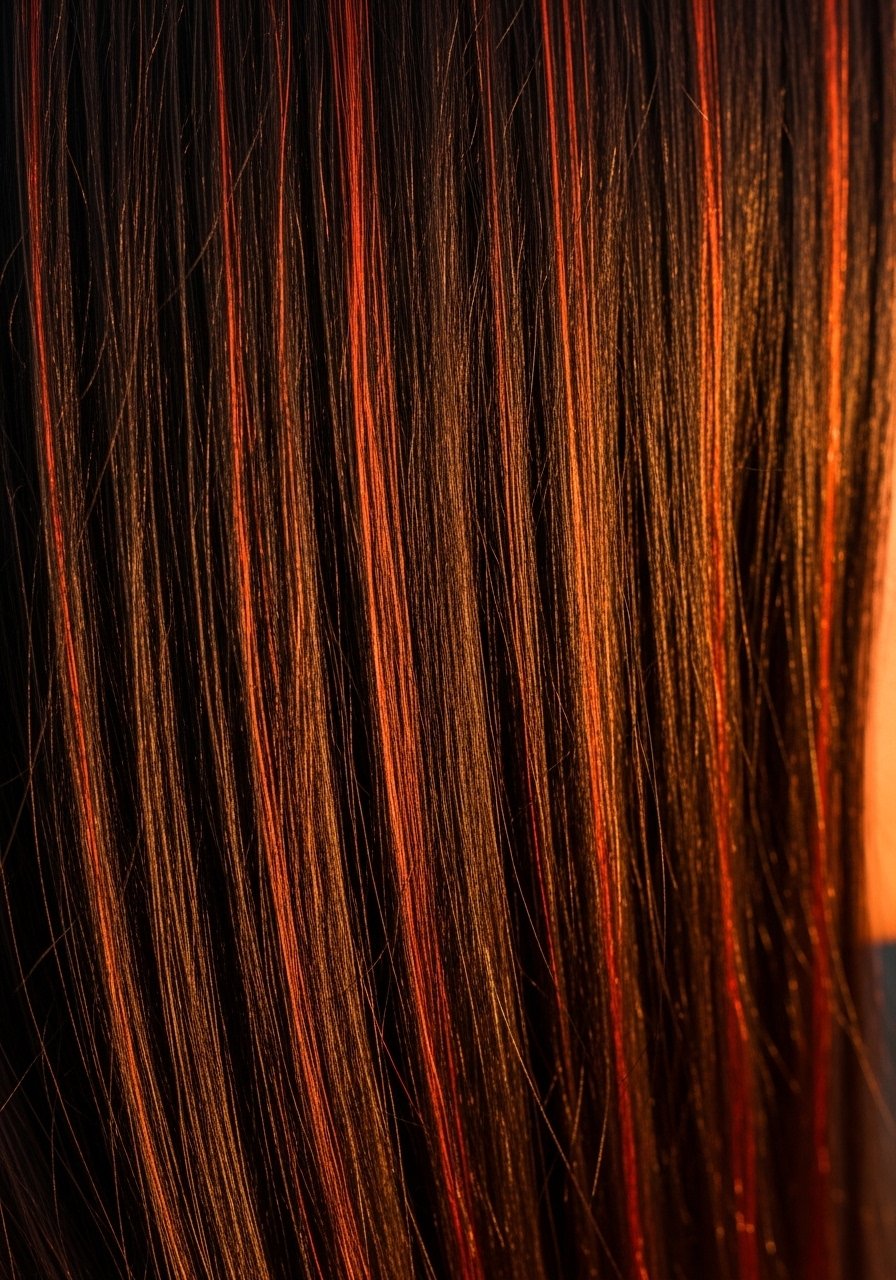
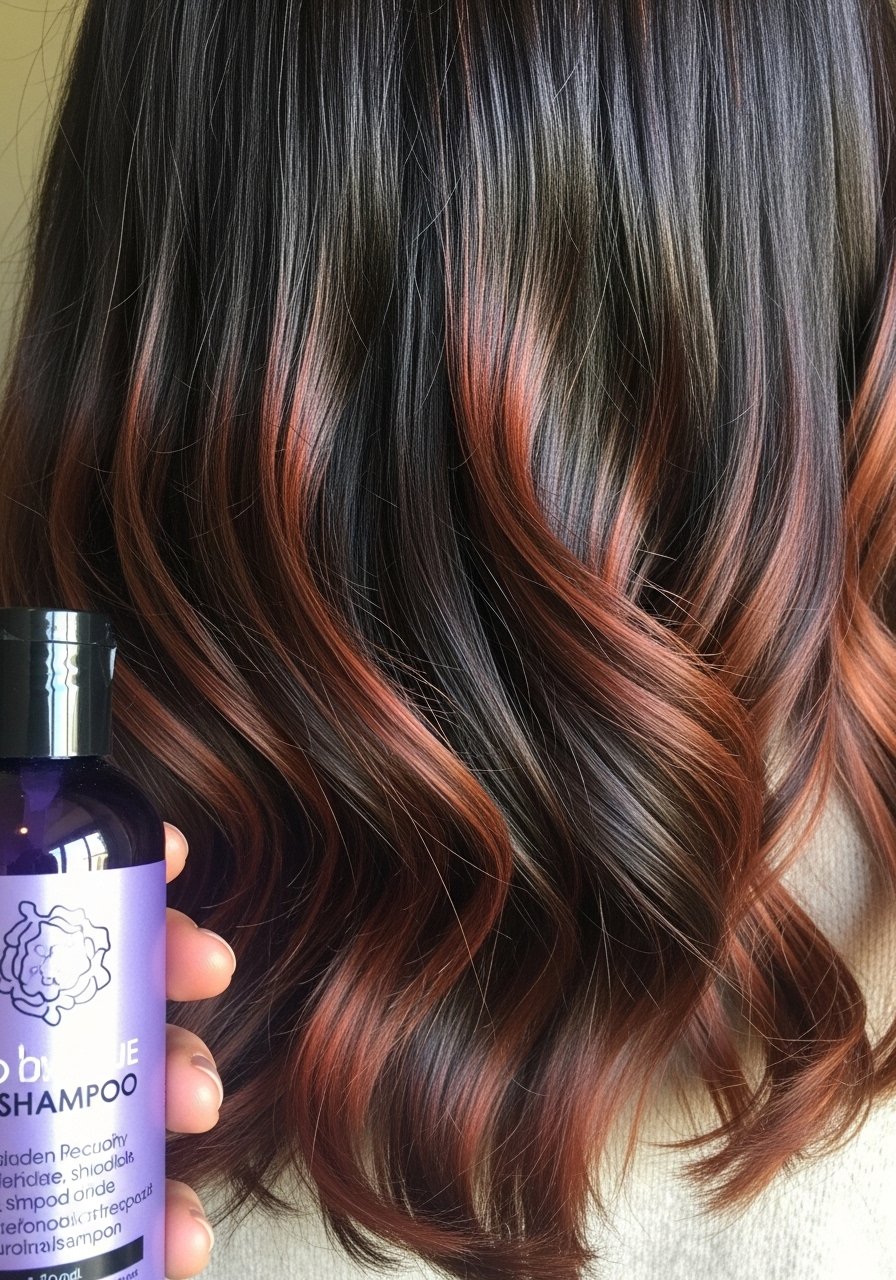
Reddish Money Piece That Frames the Face Without Looking Painted

For that immediate warmth around the face, slice a one inch section on each side and paint foil-wrapped lightener with a 20 volume developer for 10 to 18 minutes depending on how dark the base is, then tone with a demi-gloss for five to seven minutes. On very dark hair this is a two-session lift to avoid brass and breakage. I like smoothing a tiny pea size of leave-in into the painted section before blow-drying to keep the edges soft, especially for fine hair. Common mistake, people go too thin and it reads streaky on photos. Salon vs DIY, attempt this only if you are comfortable with foils and patch tests. Allergy patch test and scalp sensitivity caution apply.
Low-Maintenance Balayage With Reddish Brown Depth
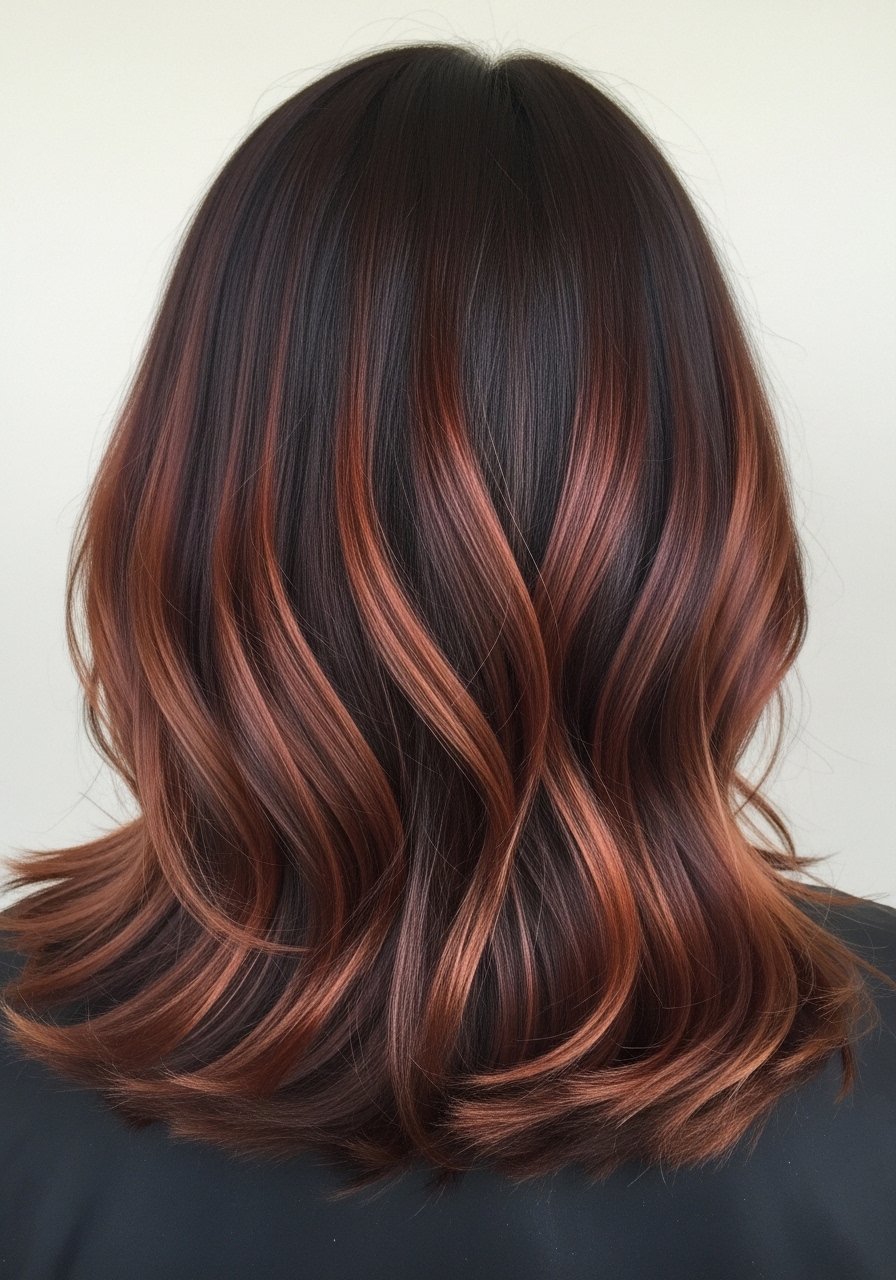
Balayage is forgiving on dark hair because you paint pieces rather than lift everything. I ask for low-density, warm reddish brown babylights placed every 1 to 1.5 inches for a blended sun-kissed effect. If your hair has previous dark dye expect two sessions spaced four to six weeks apart. The real detail people miss is processing time. On a level 3 base, 20 volume for 15 to 25 minutes for face-framing pieces usually hits the sweet spot without pushing orange. Budget is salon-level, but upkeep is low. Rinse with cool water, use a color-safe sulfate-free shampoo, and refresh with a red-depositing conditioner between appointments.
Quick At-Home Gloss To Refresh Warm Tones
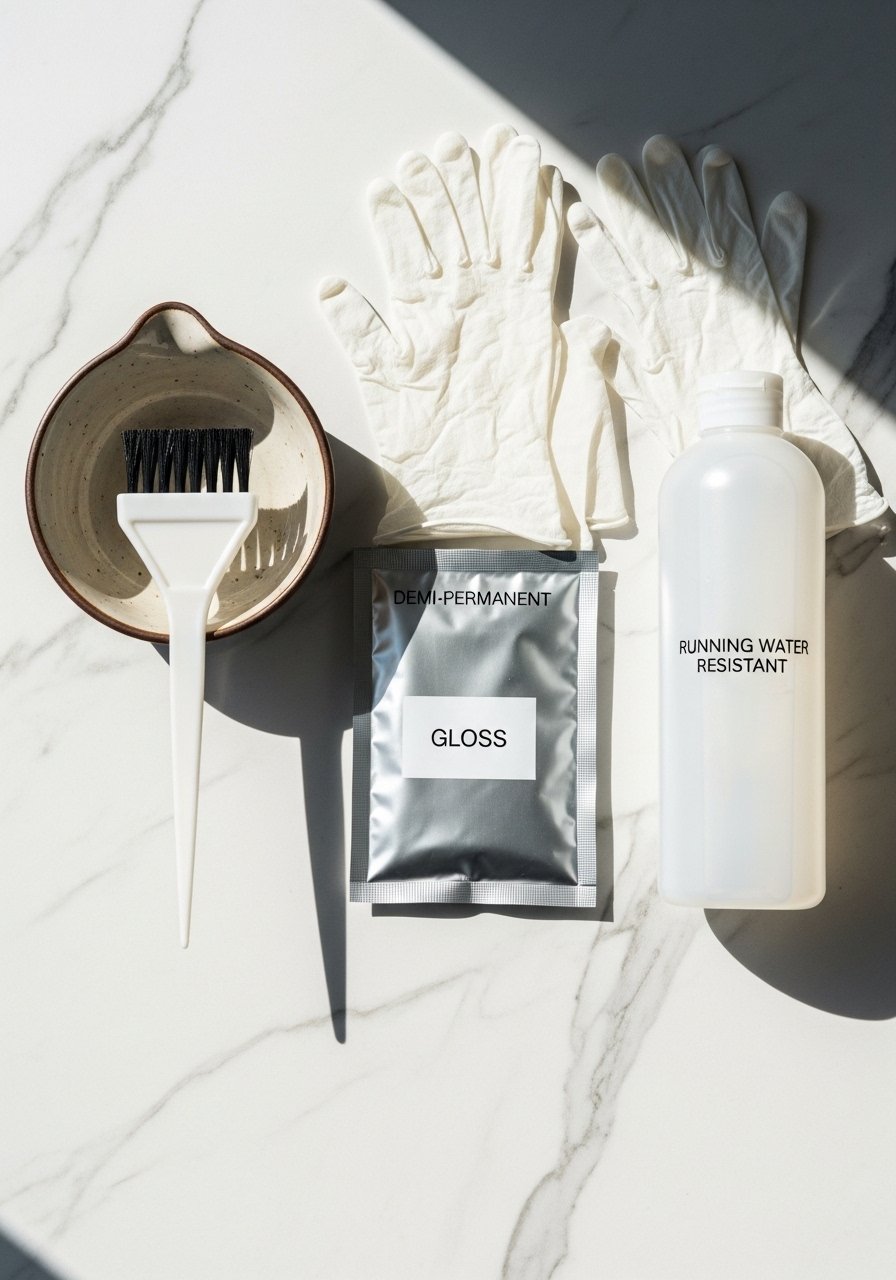
If you cannot visit the salon every six weeks, an at-home demi gloss is your best friend. Mix the gloss according to instructions, apply to towel-dried hair in four sections, leave on 10 to 20 minutes, then rinse. The little detail I will give you is to apply gloss only to mid-lengths and ends first for two minutes, then quickly pull a drop through roots so you do not over-deposit warmth at the scalp. Use a weekly Olaplex No. 3 treatment to fortify processed hair, and buy from the official store on Amazon or Sephora to avoid fakes. Glossing is cheap, takes 20 to 45 minutes incuding set time, and keeps reddish brown tones glossy between salon visits.
Babylights Blended Into Reddish Brown for Curly Hair

Curly hair needs highlights spaced wider to avoid stripey results. On 3B to 4A, ask your colorist for 6 to 10 foils strategically placed, not a full head. The practical trick is to lift only on dry-shrunken curls so the final result looks the same in coil shrinkage. After color, use the LOC method in styling, with a lightweight leave-in, a cream, then a light gel to lock the curls and make highlights pop. If you DIY, leave processing to the pros for tight coils. Heat and bleach warnings apply, and a bond builder once every one to two weeks helps reduce breakage.
Cool Reddish Brown With Root Shadow For Seamless Regrowth
Root shadowing keeps the color wearable for longer and solves the "hot roots" problem on dark hair. Right after balayage or foils, your colorist applies a diluted demi to the root line and blends it down 1 inch. The specific ratio I use in the salon is one part demi to two parts developer in low volumes for five to seven minutes, just to melt the color. This adds months between appointments and looks natural on everyone from fine straight to thick wavy hair. DIY attempts often end with a visible line, so this one leans salon unless you know how to feather color with a soft brush. Allergy patch test remains mandatory.
Copper Accents With Low Heat Styling To Avoid Fade
Copper and ginger tones fade faster under heat and UV. To protect them, use a heat protectant before any iron over 300F and keep flat iron temps at or below 320F for gentle smoothing. My tip is to add two light spritzes of an anti-humidity seal like Color Wow Dream Coat before blow drying, then smooth with a 320F iron for three to five second passes. The mistake people make is heavy repeated ironing on fresh color. If you style daily, focus on low heat and apply a color-depositing conditioner once every two washes to refresh warmth.
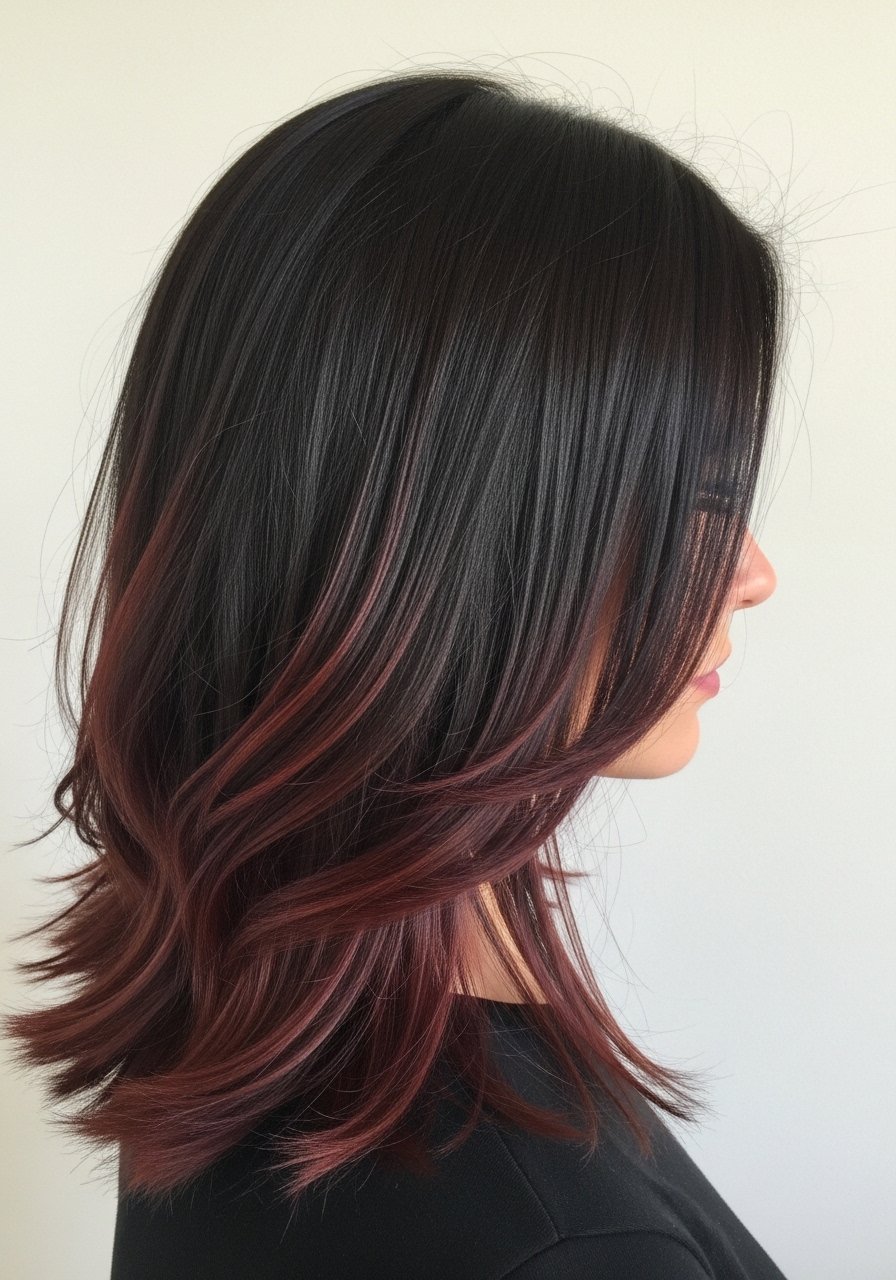
Face-Framing Baby Lights For Dark Hair That Stay Natural
Baby lights at the hairline create a soft glow without full head lift. For dark hair, place very thin slices, one eighth inch wide, spaced 1 inch apart and process only 8 to 12 minutes with 10 to 20 volume depending on natural darkness. Toner for five minutes tames any flash of brass. If you are retouching at home, use a microhighlighting cap technique only for very cautious, small pieces. The wrong move is dragging too much color forward, which reads painted in photos. This look suits oval and heart faces especially well, and it plays nicely with the root shadow idea above.
What I Keep Ready For Reddish Brown Highlights That Last
- Honestly the items I grab most after color. Olaplex No. 3 Hair Perfector used once a week helped me save the ends after my first DIY lift. Buy from the official seller on Amazon or Sephora to avoid counterfeits
- For washing, 8oz sulfate-free clarifying shampoo for the occasional deep clean, not every wash
- To keep tone between glosses, a red-depositing-conditioner used every two to three washes
- Anti-frizz sealing for styling, Color Wow Dream Coat (~$28). Also sold at Ulta
- Sleep protection, silk pillowcase queen. Saves color and reduces breakage
- Drying and detangling, microfiber hair towel to cut drying time by a third
- Brushes and combs, wide-tooth-comb for wet detangling and a boar-bristle-paddle-brush to distribute oils
- Heat protection, heat-protectant-spray applied to damp hair before any heat tool
- For curl care, SheaMoisture Curl Enhancing Smoothie for thicker coils
- If you style with tools often, a budget for a good iron, under $150 for decent ceramic plates
Short Copper Balayage For A Subtle Change
If you want a noticeable but subtle shift, do copper balayage focused on ends only. The trick on dark hair is to avoid lifting past the midpoint on the first session. In practice I keep 6 to 8 sections and paint with a mix that lightens only the ends, processing for 12 to 20 minutes with a low volume developer. After the salon, use a color-safe conditioner and plan a tone refresh at eight to 12 weeks. People overdo the at-home brightening products and end up with patchy color, so this one is a safe salon-first move.
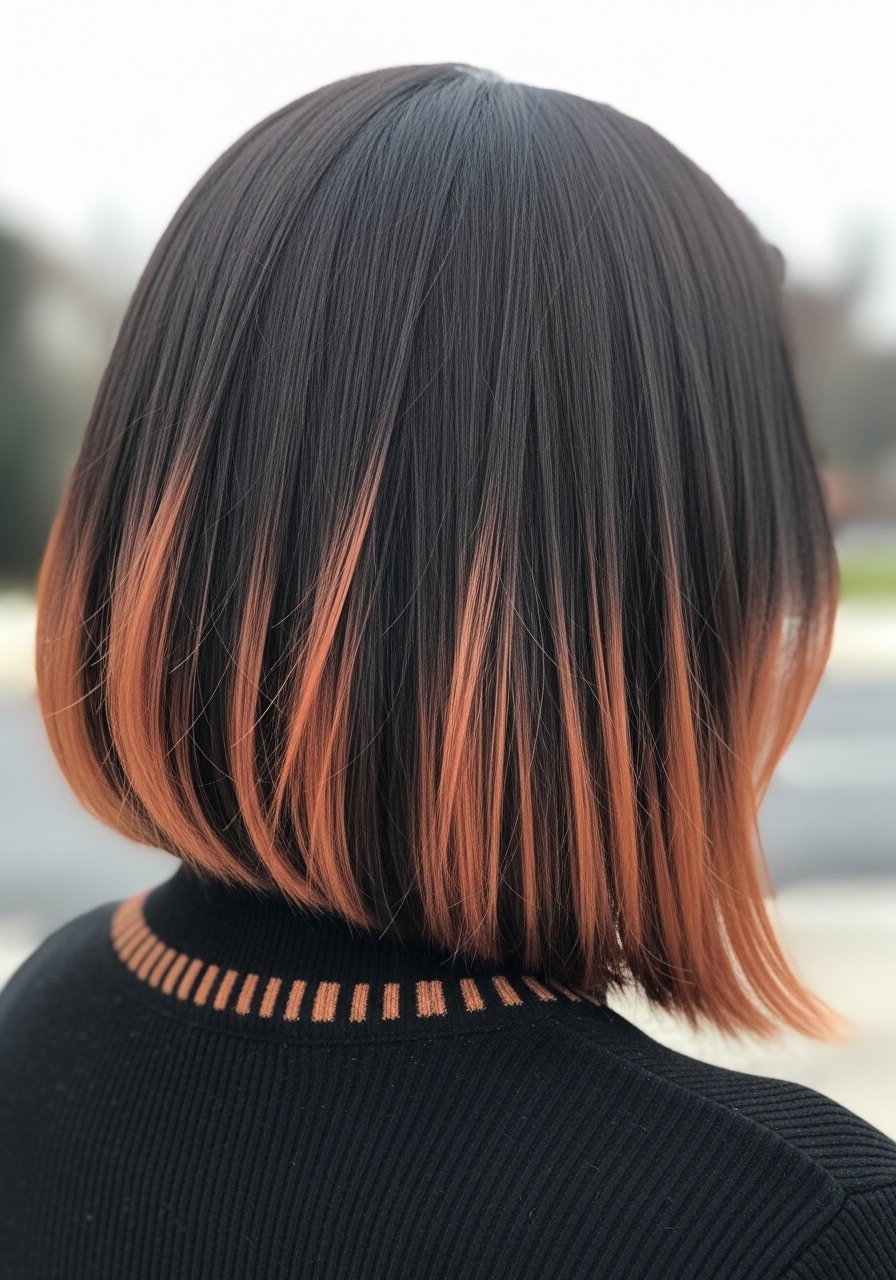
Reddish Brown Ombre For Low Upkeep

Ombre gives warmth without constant root touch-ups because the base stays dark. Ask for a blended melt that starts about two to three inches from the root so regrowth is invisible. The specific detail to ask for is a feathered blend and a toner that pulls any orange toward a warm reddish brown. At-home, use a gloss every six to eight weeks and limit shampooing to two to three times per week if you want the color to last. This look fits medium to thick textures particularly well, because the weight helps the color sit.
Heatless Robe Tie Waves That Show Off Highlights
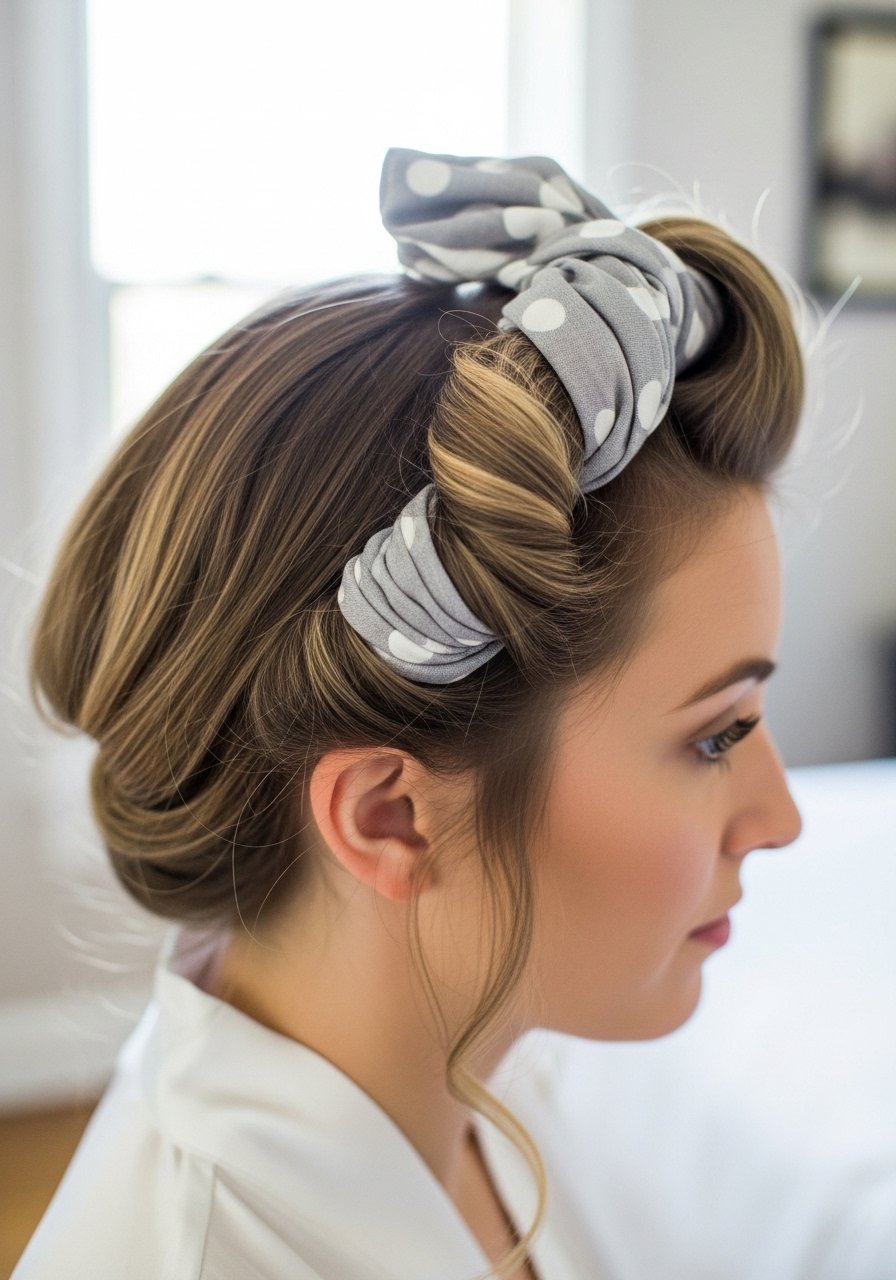
I started using the robe tie method when I wanted defined waves that highlighted my color without heat damage. Section hair into eight 1.5 inch pieces, wrap each around the robe tie, sleep, and release in the morning. The detail that changed everything for me was to lightly spritz each section with a salt-free texturizer before wrapping. For fine hair reduce section size to avoid limp results. This is a budget-friendly alternative to curling irons and it makes babylights and face-framing pieces look natural next morning.
Short Reddish Brown Bob With Peek-a-Boo Warmth
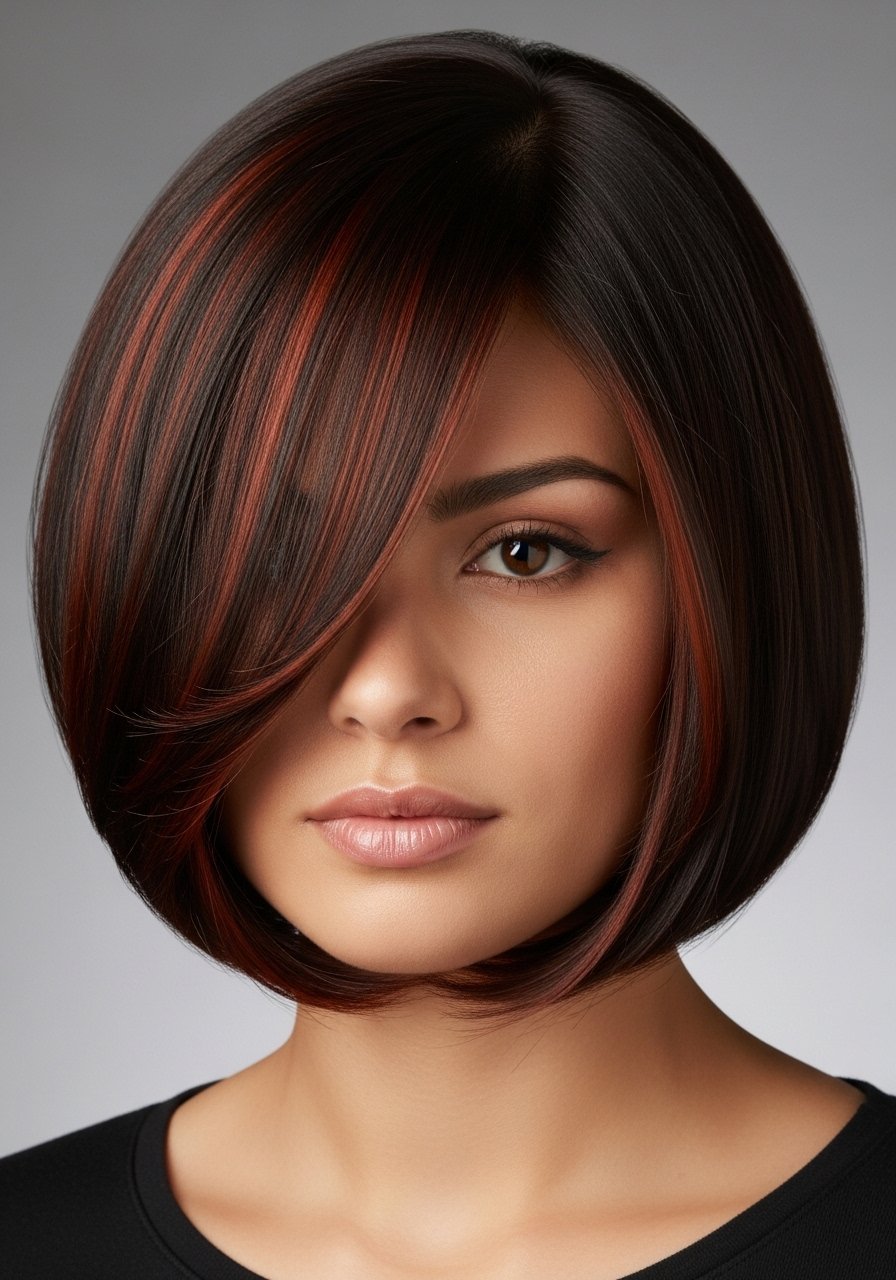
Short cuts can still show color dimension. A chin-length bob with subtle reddish brown pieces tucked under the top layer looks intentional when the hair moves. On short hair place 4 to 6 thin highlights under the crown and tone immediately to avoid flashiness. If you cut it yourself after color, expect to lose a bit of the highlight placement precision. This style is low-maintenance and great for people who want warmth without a big commitment.
How To Keep Reddish Brown From Turning Brassy
My friend asked why her hair felt like straw. She had been using purple shampoo every wash for six months. Swapped to once a week and it came back. Purple shampoo is useful, but overuse dries and can muddy warm red tones. Use a purple or blue shampoo only when brassy yellow shows, and follow with a moisturizing conditioner. For maintenance, apply a red-depositing conditioner every two to three washes instead of daily toning, and avoid hot water during rinses. If the brass is severe, a salon toner or a gloss will reset the warmth without excessive lifting.
What I Wish I Knew Before Going Reddish Brown On Dark Hair
- Heat protectant goes on damp hair, not dry. The cuticle is more open and the product actually absorbs. Available heat protectant sprays protect color and keep irons from burning dye into the strand
- Grab a microfiber hair towel for under $15. It cuts blow dry time and prevents the frizz that makes highlights look messy
- Hair grows about half an inch a month at most, regardless of what biotin gummies promise you. The thing that helps length retention is reducing breakage with a silk pillowcase queen and weekly bond treatments
- Drugstore shampoos will clean. Where you need to spend is on conditioner and a bond builder. Olaplex No. 5 Bond Maintenance Conditioner does more for processed hair than a pricey shampoo
Frequently Asked Questions
Q: Can I get reddish brown highlights on very dark black hair in one session?
A: It depends on how dark and previously dyed the hair is. Very dark natural hair may need two sessions to avoid orange banding. Lifting too fast increases breakage, so plan with your colorist for staged sessions and use bond rebuilding treatments in between.
Q: How often should I gloss my reddish brown highlights?
A: Every six to eight weeks is a good rule for most people. If your hair is exposed to daily sun or frequent hot tools, you might refresh with a demi-gloss every four to six weeks. A color-depositing conditioner can bridge the gap between glosses.
Q: Will red-depositing conditioners stain towels or pillows?
A: They can, which is why I only use them in the shower and rinse thoroughly. If you worry about staining, use a dark towel and let hair air-dry a little before bed. A silk pillowcase also reduces friction and color transfer.
Q: Is a bond builder necessary after highlights or is conditioner enough?
A: Bond builders repair internal disulfide bonds to strengthen hair after chemical processes. Conditioner smooths the cuticle. For lifted red tones, a weekly bond treatment for a month after heavy lift is worth it. Buy bond builders from authorized sellers to avoid counterfeits.
Q: Can I use a flat iron on highlighted reddish brown hair every day?
A: You can, but protect it. Use a heat protectant on damp hair and keep the iron around 300 to 320F. Reduce passes to one or two quick strokes. Daily high heat accelerates color fade and increases breakage.
Q: How do I stop my reddish brown highlights from looking painted in photos?
A: Ask for feathered ends and variable thickness in your highlights. On dark hair that means alternating thin and medium slices and toning immediately to blend any flash. Also avoid placing too many slices directly at the hairline.

