
If your twist out falls flat by midday or turns into a frizz halo by commute time, this is for you. I tried the gel-only route for months and my curls looked great on TikTok and like wet noodles by 11am. Finally figured out it was the gel-only routine. Added a leave-in cream underneath and it changed everything. These 15 twist out options are written from doing my own hair, fixing friends after salon mistakes, and accepting that some methods need a tiny tool or one splurge.
These looks work best on 3B through 4C textures, from shoulder length to mid-back, with a couple of ideas tweaked for short hair. Expect most styles to take 45 minutes to two hours, a few are overnight methods. Budget runs from under $20 for knotted satin scarves to a $30 bond builder and one optional tool splurge mentioned later. Nearly everything can be done at home, but if you are lifting color or correcting breakage, book the salon consult.
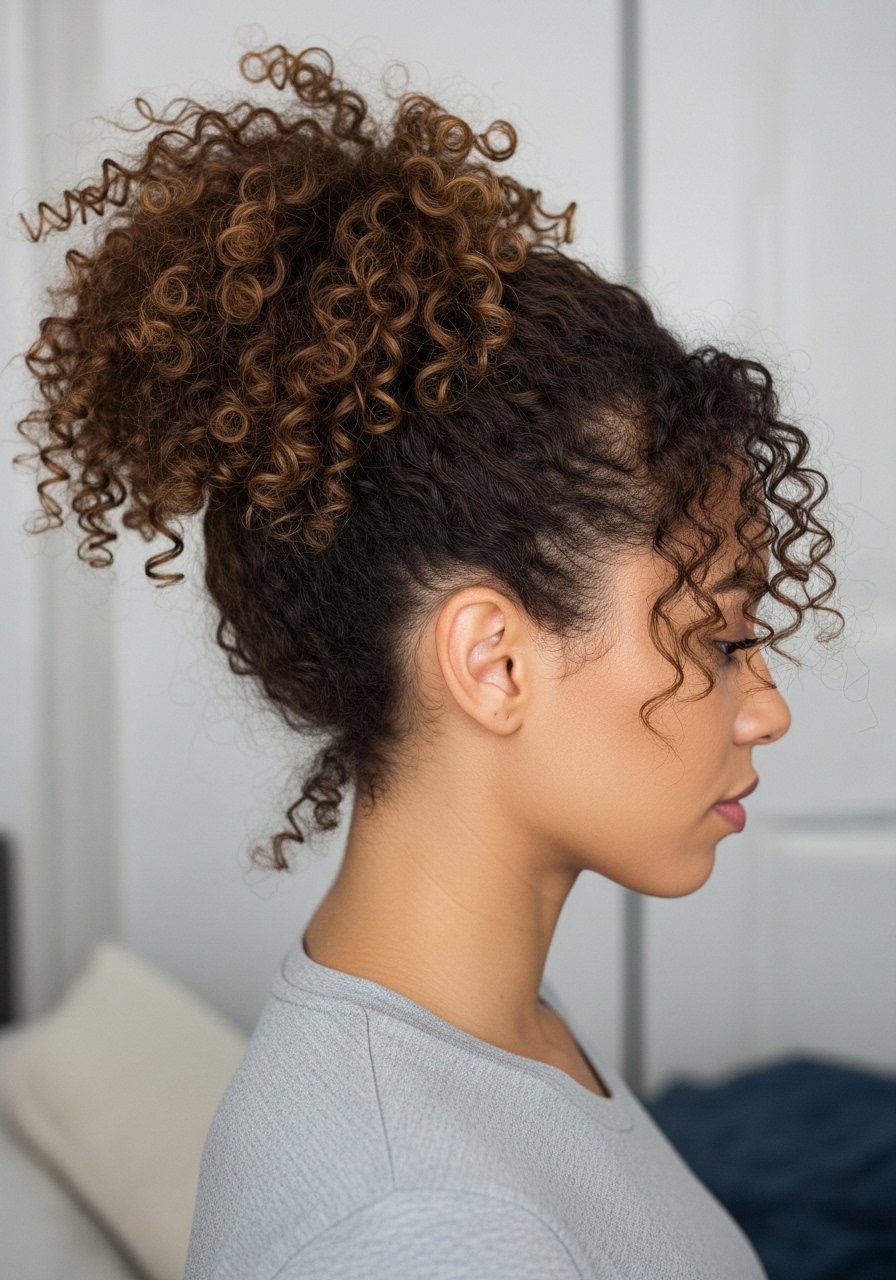
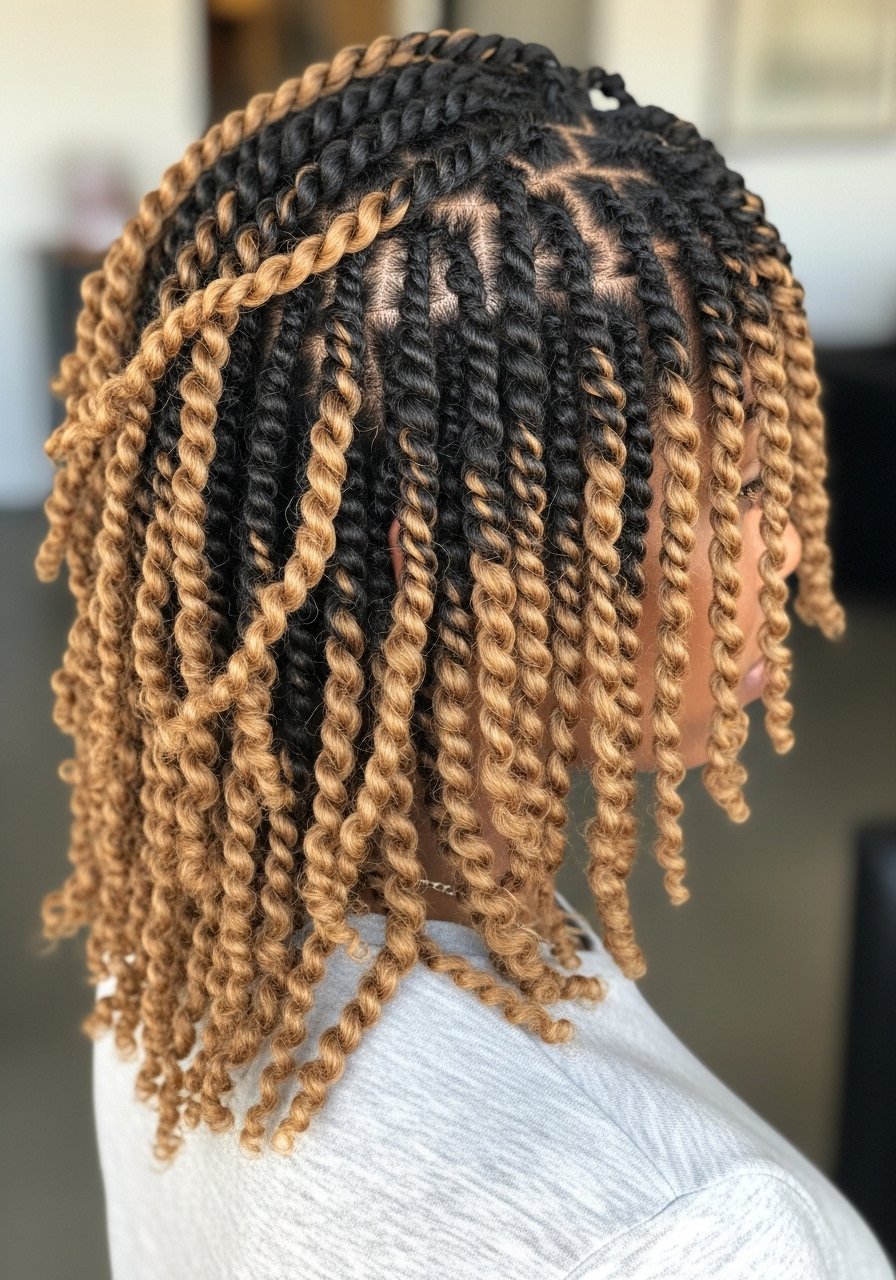
Classic Two-Strand Twist Out For Defined Spring
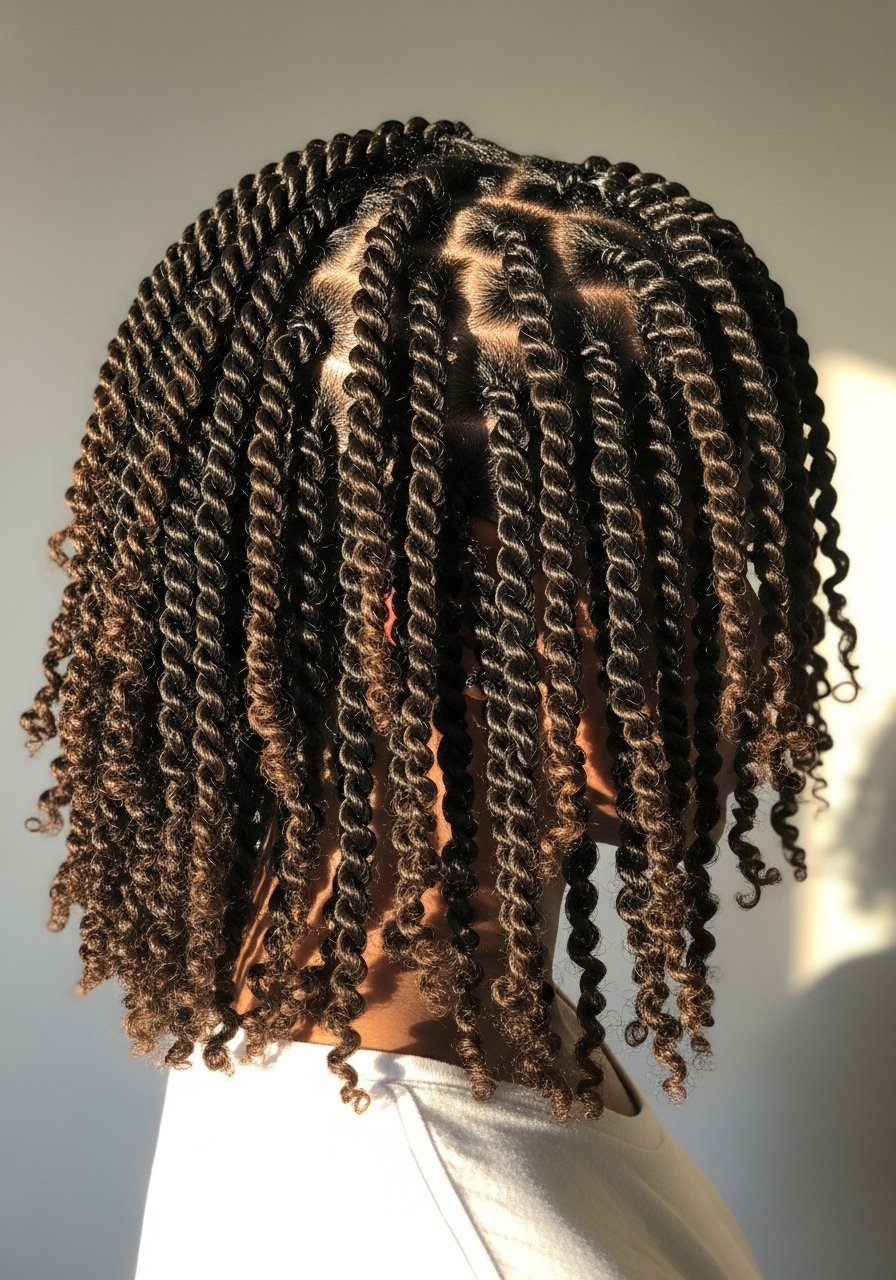
Start with clean, detangled hair and section into about 12 medium parts for mid-back length hair. Apply a pea-sized amount of leave-in per section then a nickel-sized amount of styling cream before twisting. Twist each section clockwise and anti-clockwise to avoid a permanent coil memory. Let twists air dry about eight to 12 hours, or sit under a hood on low for 45 minutes if you are in a hurry. Untwist gently with minimal tension and separate only where needed. Common mistake is opening twists while damp, which causes frizz. For fine 3B hair, cut twist width in half and skip the heavy cream. A wide-tooth comb helps detangle before twisting, and sleep on a silk pillowcase to keep the pattern.
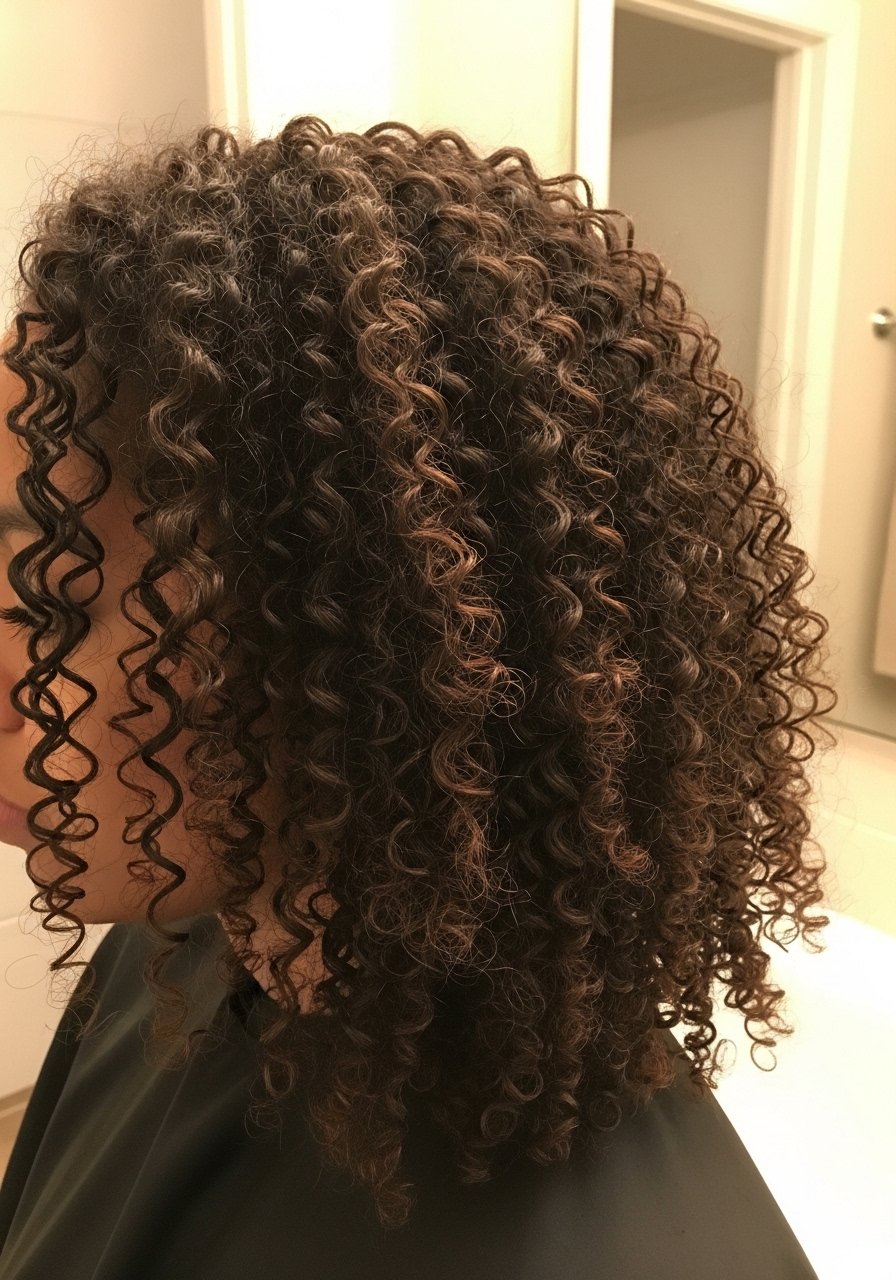
Finger Coil Assisted Twist Out For Tight, Glassy Spirals

If you want pinpoint definition, finger coil the last one to two inches of every twist as you go. Use a light leave-in and one pump of curl cream per palm, then twirl a 1/4-inch subsection around your finger before continuing the twist. This method is especially good for 3A to 3C textures that lose definition by day two. It adds time, expect 20 to 40 extra minutes, but cuts the fluff on day one and helps curls hold without heavy gels. A common error is using too much product at the tips which leaves them sticky. Finish with a light oil on ends only, avoiding the roots to keep volume at the scalp.
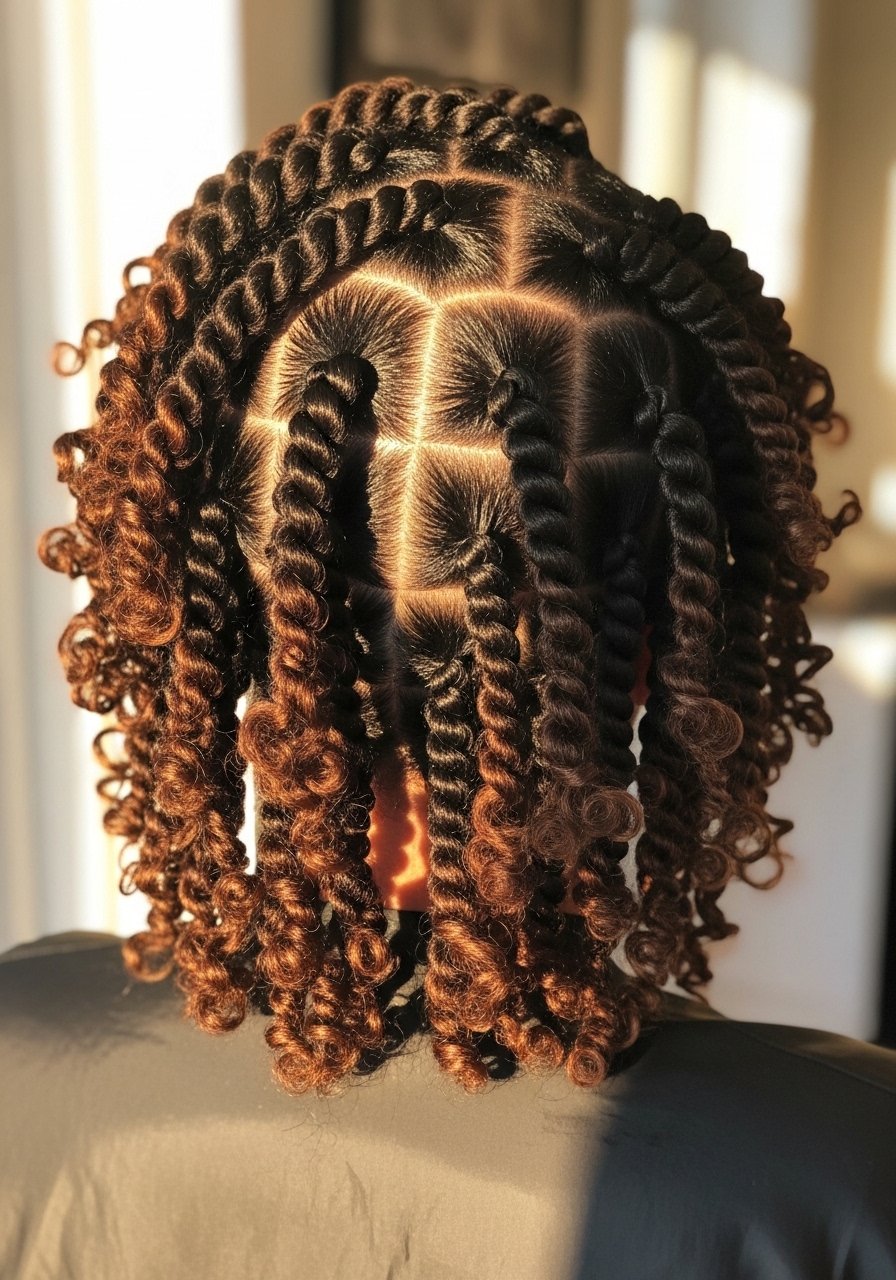
Banding Stretch Twist Out For Elongated 4A To 4C Curls
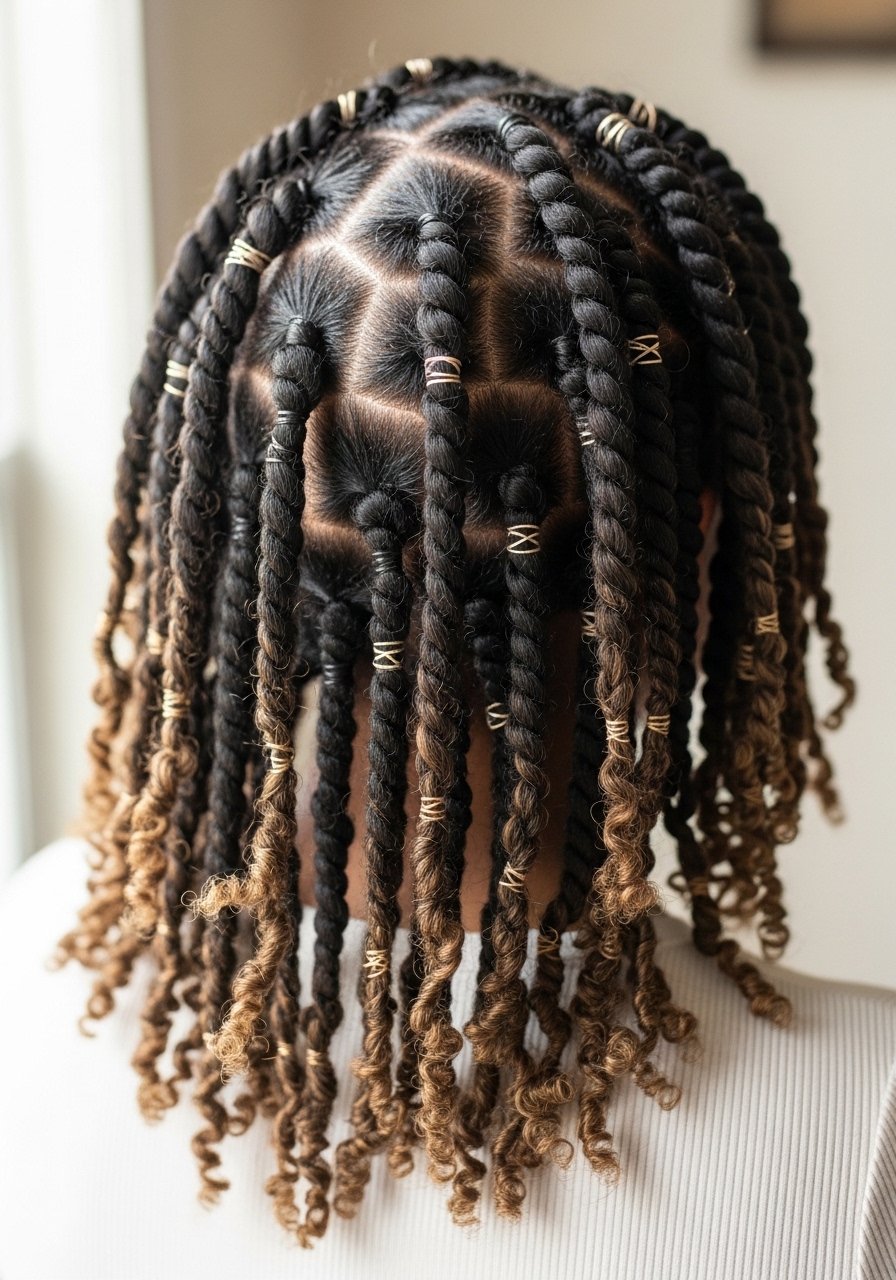
For length retention on 4A to 4C hair, band each twist with three to five soft hair bands spaced about 1.5 inches apart. Start on damp hair that has been smoothed with a small amount of cream to avoid breakage. This reduces shrinkage and keeps the twist pattern elongated without heat. Expect a longer set time, overnight or 10 to 12 hours for best results. Watch the bands when removing them, do not rip. A frequent mistake is using tight elastic which dents the hair. For transitioning hair, add a weekly bond builder like a once-a-week 2 to 3 pump application to the mid-lengths to ends before styling.
Short Hair Twist Out For Pixies And Bobs With Texture
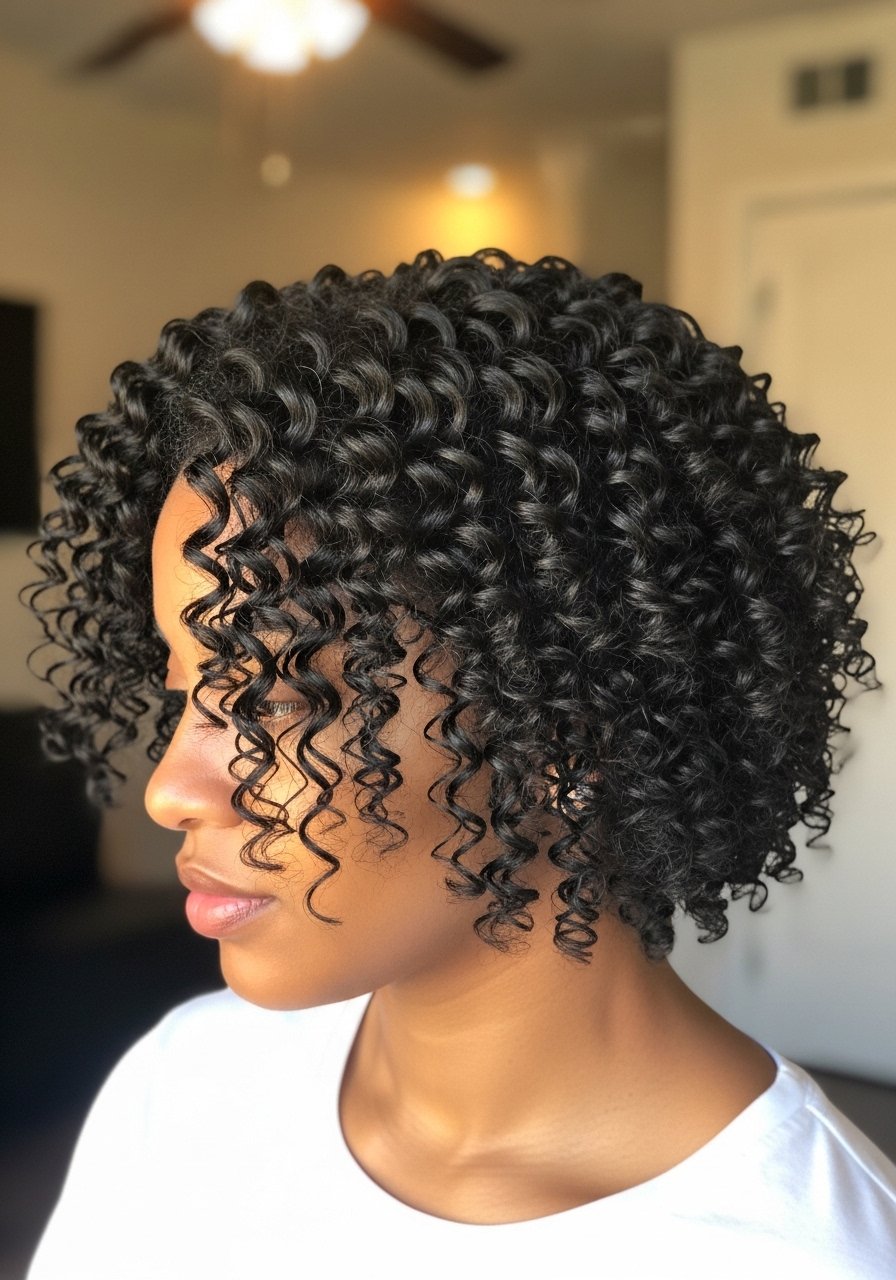
Short hair needs smaller sections and more deliberate separation. I work in 8 to 10 tiny sections on a pixie and use finger-twisting rather than two-strand twists for better shape. Use one pea-sized drop of styling cream per section and gentle stretching with your fingers during the first detangling. Time wise, expect 30 to 60 minutes depending on density. People often over-separate short twists and lose pattern, so separate only where you see limp joins. For a sleek finish at the hairline try a satin scarf for 10 minutes after the twists dry to set edges. Avoid heavy butters on fine short hair, they weigh things down quickly.
Twist Out With Gel Layered Under Cream For Longer Hold

Most people apply a leave-in or cream, then wonder why it does nothing. The cuticle has already started to seal. Layering a water-based leave-in, then a light gel, then a cream seals hold and moisture. I use a pea-sized leave-in, then two finger pumps of clear gel per large section, then a nickelsized cream over the top. This combo prevents the wet-noodle midday flop I used to get. Mistake to avoid is using gel only. My curls looked great on TikTok and like wet noodles by 11am. Finally figured out it was the gel-only routine. Added a leave-in cream underneath and it changed everything. If you need extra frizz control, a quick blast with a diffuser on low keeps pattern without heat damage.
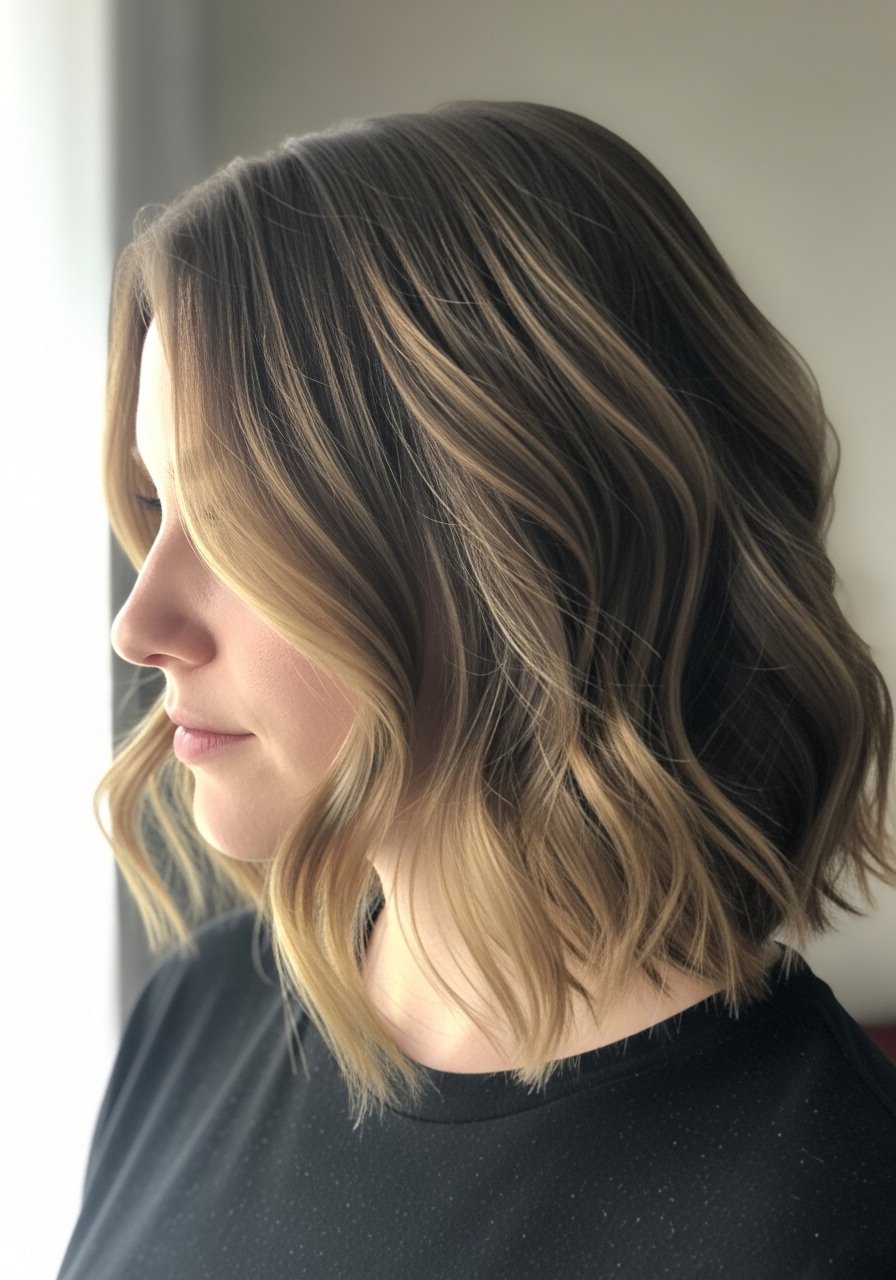
Heat-Set Twist Out For Sleek Ends And Definition
If you like a sleeker finish, use a blow dryer on low through twists once they are 70 percent dry, then flat iron only the last 1 to 2 inches at 300F or below. Always put heat protectant on damp or just-dried hair because most heat protectants work better when absorbed into slightly damp hair. Heat protectant goes on damp hair, not dry. The cuticle is more open and the product actually absorbs. A common error is flat ironing the whole twist, which flattens the root and defeats the twist pattern. Keep the iron at or under 300F and never skip the protectant. If you have previously colored hair consider a salon consult before any regular heat setting.
Pineapple Second-Day Twist Out Refresh For Preserving Shape
When volume dips on day two, pineappleing before bed keeps roots separated and preserves the twist pattern. Gather hair loosely at the crown with a satin scrunchie and sleep on a silk pillowcase. In the morning spritz a water and leave-in mix, shake out, and separate fewer spots to avoid fuzz. People who sleep with twists unprotected wake up with a flattened crown and frizz. This costs nothing and usually takes two to five minutes to refresh in the morning. For wet winter months I add a small satin bonnet over the pineapple to keep humidity at bay.
What I Keep On Hand For Twist Outs
- Honestly the small things make the biggest difference. A microfiber hair towel cuts drying time and stops the initial frizz
- For detangling, a wide-tooth comb 7-inch distributes product without breaking strands
- Weekly bond care, Olaplex No. 3 hair perfector 3.3oz. Buy from the official store on Amazon or Sephora to avoid counterfeits
- For hold without crunch, a light styling gel 8oz and a curl cream 8oz
- Sleep protection, a satin pillowcase queen and a cheap satin bonnet for extra security
- Tools under $20 I rely on, flexi rods set for controlled ends and spray bottle 12oz for refresh mixes
- A denser brush for smoothing edges, a boar bristle mixed paddle brush
- For anti-humidity days, Color Wow Dream Coat 6.7oz gives a few frizz-free days after blow dry
- If you like a silky finish, a lightweight hair oil 2oz
Two-Product Minimal Twist Out For Fine 3A To 3B Hair
Fine 3A hair hates heavy layers of product. I do a two-product system: a lightweight leave-in spray and a whipped foam or mousse. Apply two spritzes of leave-in per section, then one palmful of mousse raked through. Twist into slightly thicker sections than you think you need because fine hair can over-separate. This method shaves styling time and stops weighted-down roots. A frequent mistake is over-twisting which creates stiff spots. You get more natural movement and better second-day body when you avoid oils at the root. Pair this with a silk pillowcase to stretch day two without restyling.
Chunky Twist Out For Big, Bouncy Volume
If you want statement volume, make larger twists, roughly 3/4 to 1 inch wide. Use a cream that has slip and a light gel to lock the pattern without crunch. For mid-back hair I do 8 to 10 sections to keep the head shape balanced. Let it fully dry overnight and separate carefully only at the roots for maximum lift. A common misstep is separating too small which defeats the chunky look. This also hides a lot of uneven cuts and works well with a tapered haircut. If you prefer less frizz, apply a satin scarf for 20 minutes after untwisting to calm the halo.
Micro Twist Out For Tiny, Defined Coils On 4B To 4C
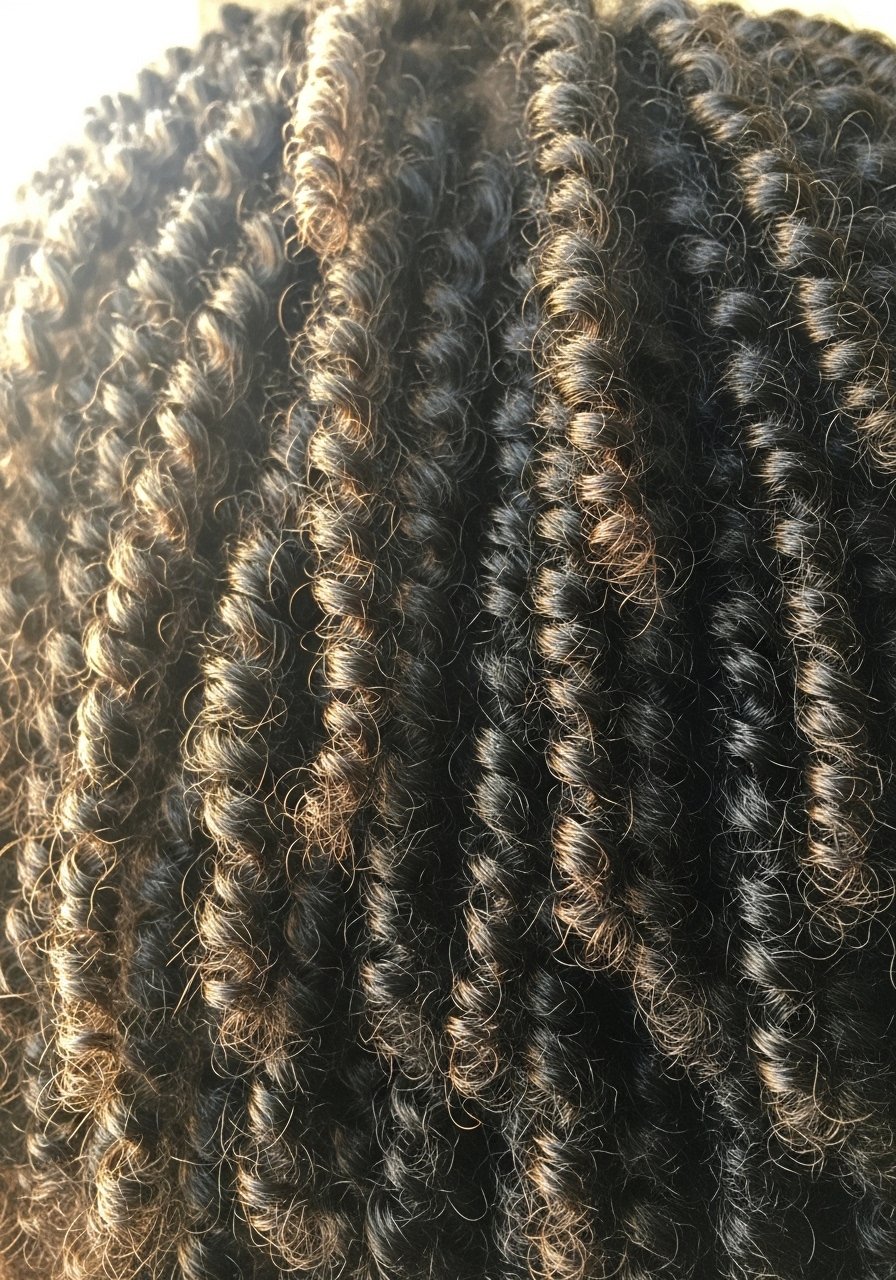
Micro twists take patience but give the most definition for 4B to 4C coils. Use a detangler then section into no more than 30 to 40 micro sections for shoulder-length hair. A rice-grain amount of product per section keeps weight down. These take longer to install and longer to undo, five to six hours install time is common. A time-saving trick is to do micro twists over two days, half one evening, half the next. Avoid twisting with too much tension near the scalp to prevent breakage. For damaged ends, trim first or add a bond treatment and wait two to three applications before tight micro work.
Twist Out With Money Piece Fronts For Face-Framing Color
Adding lighter pieces at the front changes how a twist out reads around the face. If you color at home, do subtle money-piece touch-ups instead of full-head lifting to reduce damage. Use a demi-permanent toner and wait at least two weeks after a lift for regular heat styling. A common mistake is bleaching the front without strengthening treatments which leads to brittle front pieces. If you are unsure, book a salon consult for placement and timing. For upkeep, a gloss every six to eight weeks keeps brass down and keeps the color blending with the twist pattern.
Twist Out Updo Combo For Work Or Special Events
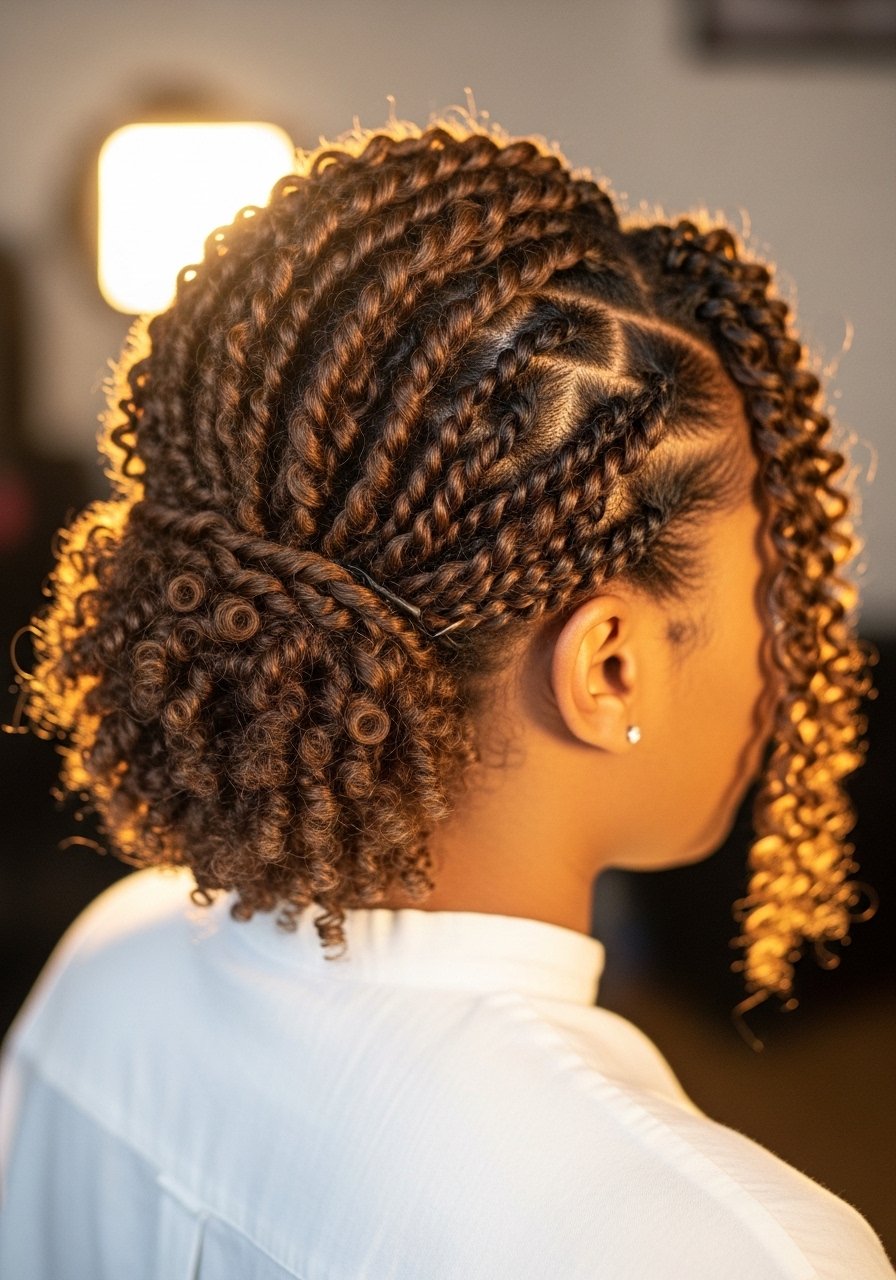
Take a set twist out and pin back sections into a low chignon or half-up style for an elevated look that still reads natural. I pick three to four larger twists on each side to pin and leave the rest down. This takes 10 to 15 minutes and hides roots in between washes. The mistake here is using too much bobby pins without smoothing the twist base which creates bulk. Use a little gel at the base to keep pins from slipping. This is a salon-worthy look that is totally DIY, and it survives a full commute if you wrap with a silk scarf for the ride.
Bond Builder Twist Out For Transitioning Or Damaged Hair
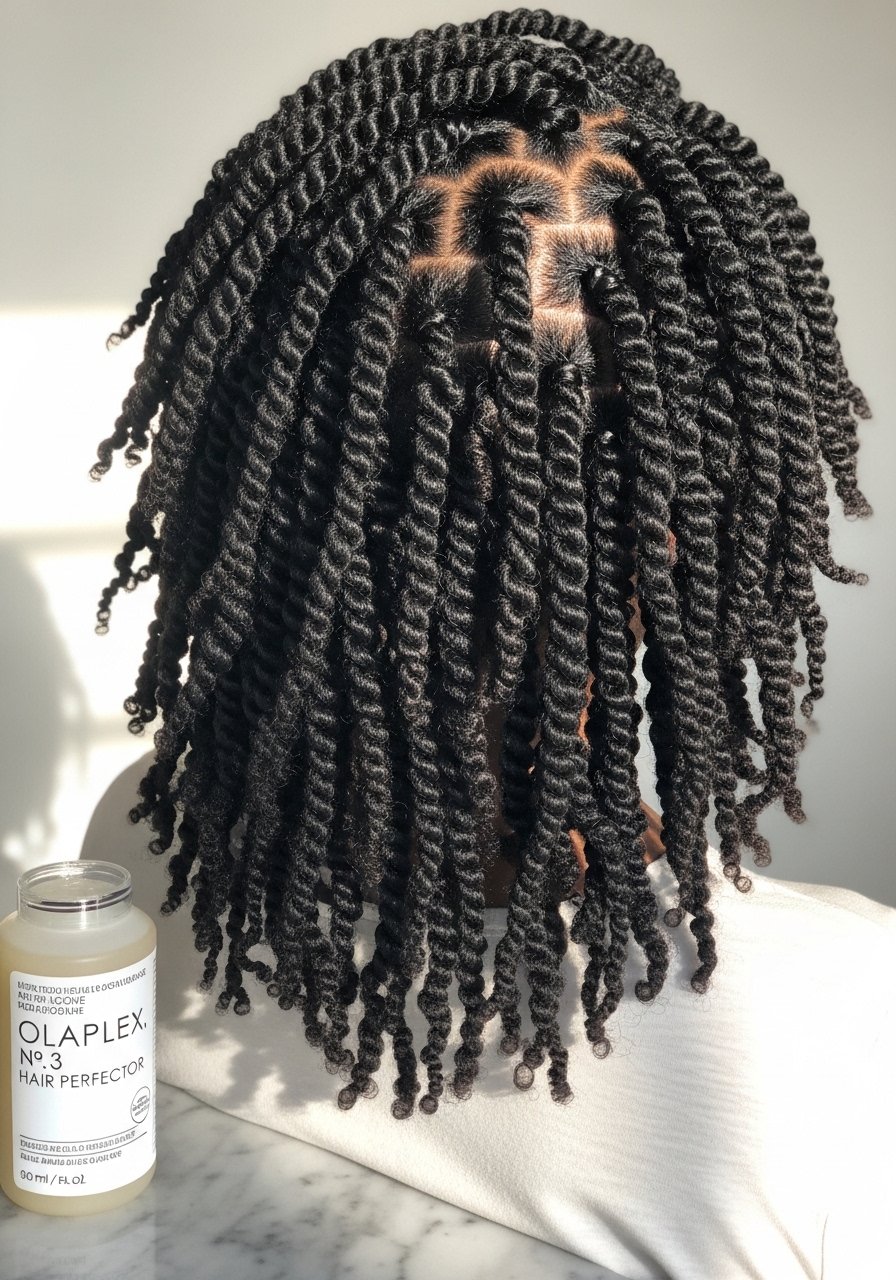
If your ends feel like straw from overprocessing, weekly bond building before styling helps strengthen mid-lengths and ends. I use a 10 to 20 minute Olaplex No. 3 treatment on damp hair once a week, then continue with the twist out. I bleached my own hair last winter trying to save $200. Three months later I paid $400 to fix it. Olaplex No. 3 saved what was left. Buy Olaplex from the official Amazon store or Sephora to avoid counterfeits. Bond builders are not a miracle, they reduce breakage but they do not undo historic damage. After two to three treatments you will notice smoother strand movement and fewer broken short hairs when separating twists.
Braided Twist Out Hybrid For A Looser, S-Shaped Wave

Combine cornrows at the crown with twists below for a controlled root and looser ends. This hybrid reduces bulk at the top and gives a consistent flow from scalp to ends. I section the crown into 4 to 6 cornrows and twist the lower half into 10 to 12 twists. This is great for those who want a flatter root profile and bouncy lower lengths. Avoid creating too much tension with the cornrows, which is a common cause of breakage. For second day volume, remove bobby pins and fluff at the roots only with a pick.
Robe-Tie Overnight Twist Out For Heatless Definition
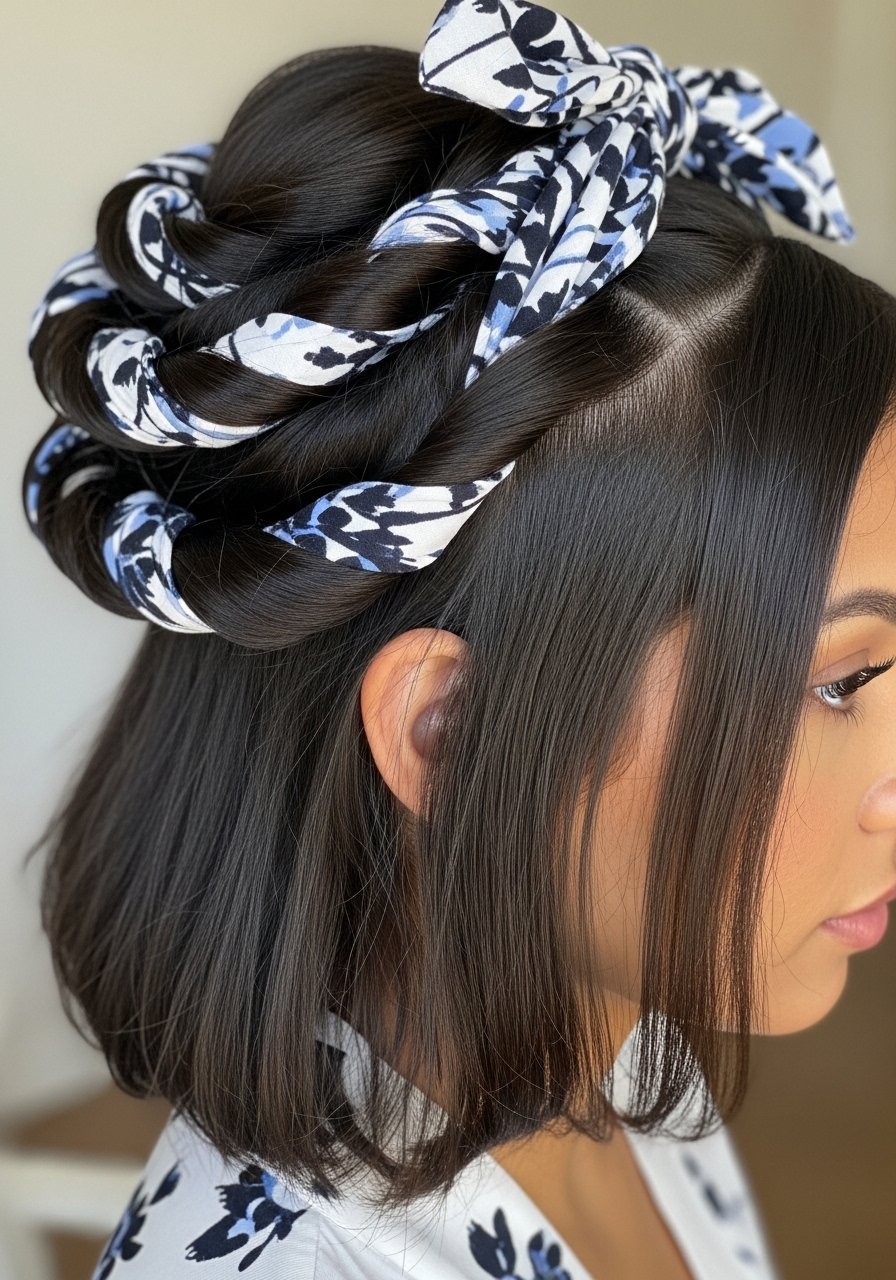
The robe-tie method uses a fabric sash as a heatless curling tool that sits on the crown with hair wound around it. Divide hair into 8 to 12 sections and wrap each section around the sash, securing with a small clip. Sleep on this overnight and unwind in the morning for defined, bouncy twists without heat. Common errors are wrapping too tightly or using thick fabric that resists drying. For slightly damp hair, it dries quicker overnight. This is an easy method when you want definition but are avoiding heat for a stretch.
What I Wish Someone Told Me About Twist Outs
- Heat protectant should be applied to damp or just-dried hair, not dry hair. Color Wow heat protectant is a solid option many stylists mention
- Grab a microfiber hair towel for $12. It cuts your blow dry time by a third and stops frizz before it starts
- Hair grows about half an inch a month at most, regardless of what biotin gummies promise you. Reducing breakage keeps length retention real
- Drugstore shampoo is fine. Where you actually need to spend money is on the conditioner and a bond builder. Olaplex No. 5 conditioner 8.5oz does a lot for damaged hair
- Watch section size. Bigger sections equal a chunkier twist out that takes less time and shows off volume
Frequently Asked Questions
Q: How often should I actually deep condition before doing twist outs?
A: Once a week if your hair is healthy, twice a week if it is damaged or color-treated. More than that and hair can feel mushy from over-moisturizing. A good deep mask 8oz once weekly usually does the trick.
Q: Can I use Olaplex No. 3 if my hair is not damaged, or will it make it worse?
A: It will not make hair worse. Using a bond builder on healthy hair is fine occasionally, but it is most cost effective for hair that has been lifted or shows breakage. Buy from authorized sellers to avoid counterfeits.
Q: My twist out looks great the first hour then frizzes. What am I doing wrong?
A: Most of the time it is either untwisting while hair is still damp or using too much oil at the root. Try the leave-in, gel, cream layering and wait until fully dry before separating. Sleep protection helps second-day integrity.
Q: What is the difference between a leave-in and a curl cream, and do I need both?
A: Leave-ins hydrate and prime the hair, curl creams add definition and slip. For many textures, a small amount of both applied in that order gives longer hold than either alone.
Q: Is it safe to flat iron the ends of my twists to get sleek tips?
A: Yes if you use a heat protectant applied to damp or just-dried hair and keep the iron at or under 300F. Heat without protectant or repeated high-heat passes is what causes damage.
Q: How often should I retwist to keep a consistent twist out without breaking my hair?
A: For most natural textures, every 7 to 10 days is a good rhythm. If you notice small broken hairs at the root, lengthen the interval and add weekly bond building.
Q: Can I do a twist out over color treated hair?
A: Yes, but if you lifted or bleached recently, wait two weeks and do bond-building treatments first. If you are doing any at-home lightening, book a salon consult rather than experimenting at the sink.

