
If your braid looks tidy in the bathroom mirror and has fallen apart by the time you get to work, I get it. I have ruined three different salon braids by twisting too tightly, using the wrong elastic, or skipping the detangling step. These 15 braid ideas are the quick wins I actually use when I need a polished look without paying for a redo or spending half an hour in the mirror.
These styles mainly fit straight to wavy 1B through 3B hair, with notes for thick or coily textures when needed. Most take five to 20 minutes. Budget ranges from under $10 for essentials to a $35 tool splurge that I use weekly. Nearly everything here is DIY friendly, but I flag which looks I would still book at the salon.
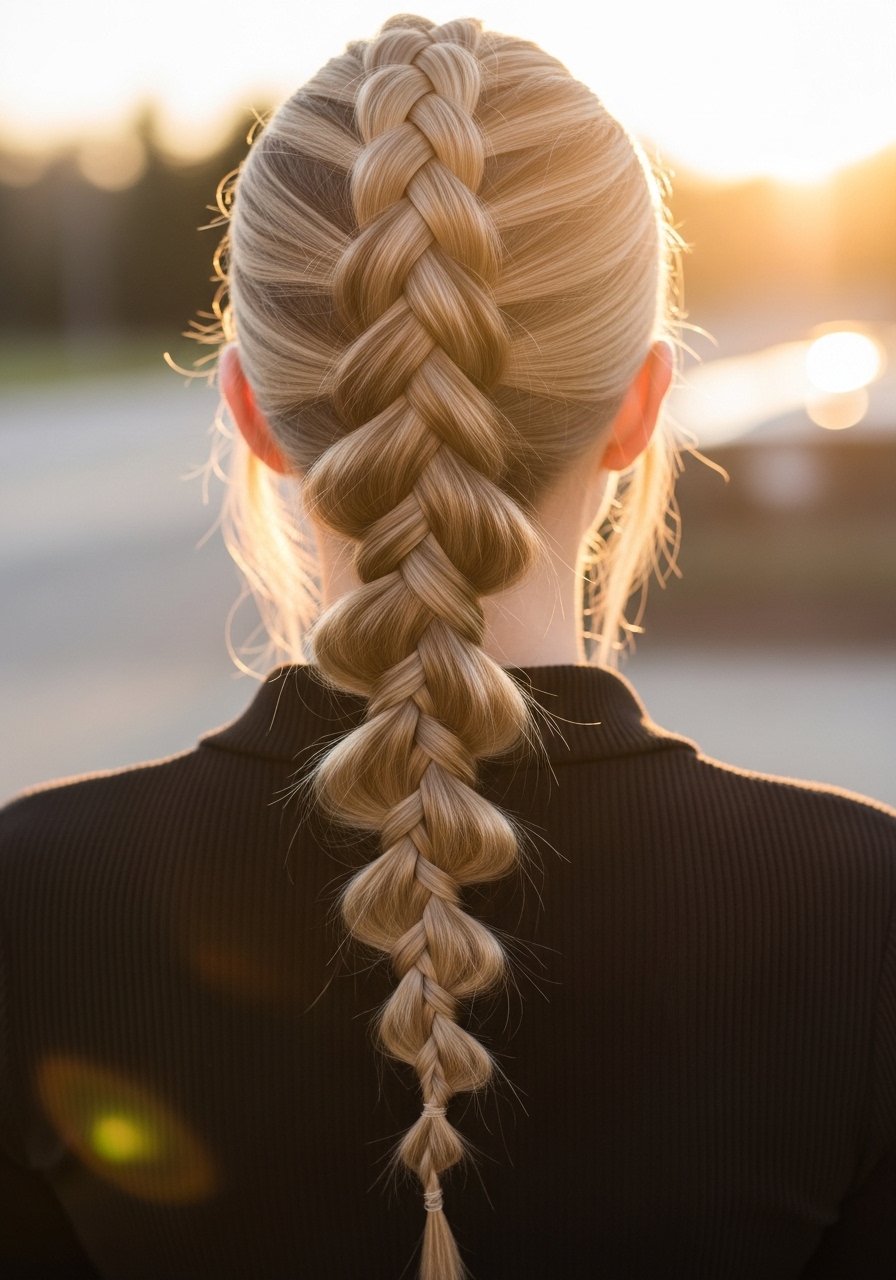
Classic Three-Strand Braid That Actually Lasts
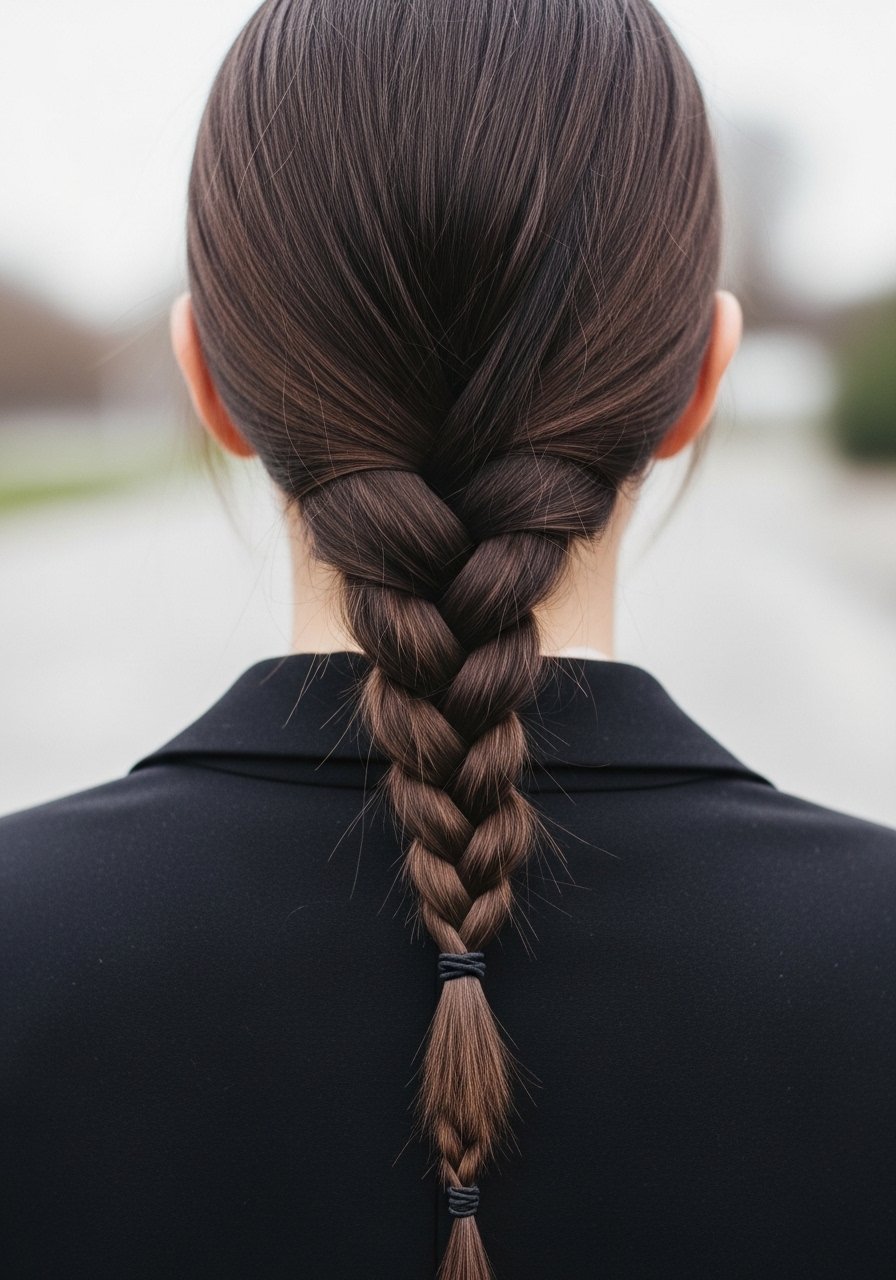
I keep coming back to the old three-strand because it works on almost any length and texture when done right. The trick, learned the hard way, is to detangle with a paddle brush, mist with a light hold spray, then split hair into three even sections, braid with even tension and secure with a snag-free elastic. Two spritzes of a medium-hold hairspray over the finished braid locks it without the crunchy look. If your hair is thick, make three smaller braids and pin them together for extra grip. Avoid braiding when hair is soaking wet since the stretch in wet strands leads to faster loosening as it dries.
French Braid With Controlled Volume
French braids look professional, but the problem I always ran into was flatness at the crown. Tease a 1-inch section at the root and smooth the top layer, then French braid adding equal pieces from both sides. For medium hair I pick up one-inch subsections each time so the braid stays neat. A dime-sized pump of a light gel or cream keeps flyaways contained without turning the braid into a helmet. If you have fine 2A hair, mist roots with a salt spray to give the braid texture before you start. Tightening too aggressively is the common mistake. If you want a softer look, gently pull small loops along the braid after you finish.
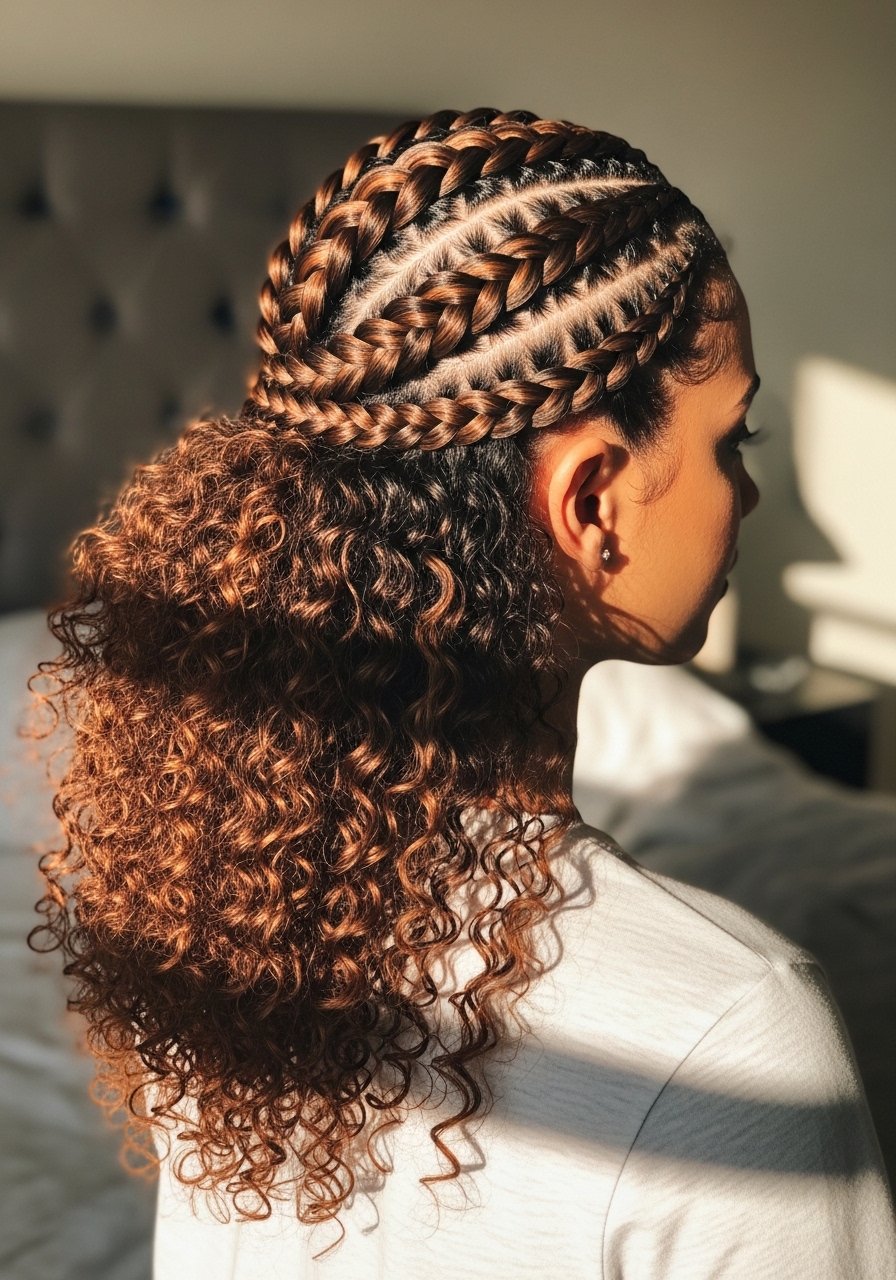
Dutch Braid For Active Days
If you sweat at the gym or chase kids around the park, a Dutch braid keeps hair secure. The main difference from a French braid is that you cross under rather than over, which creates a raised braid that hugs the head. Start tight at the hairline and keep sections about three quarter-inch wide for medium density hair. For coily textures, stretch each subsection gently before adding it in so the braid lies flat. Use an elastic with a fabric wrap that won’t snag. Heat warning if you plan to smooth edges with a flat iron, always apply heat protectant and keep irons below 350F for safety.
Fishtail Braid With Texture
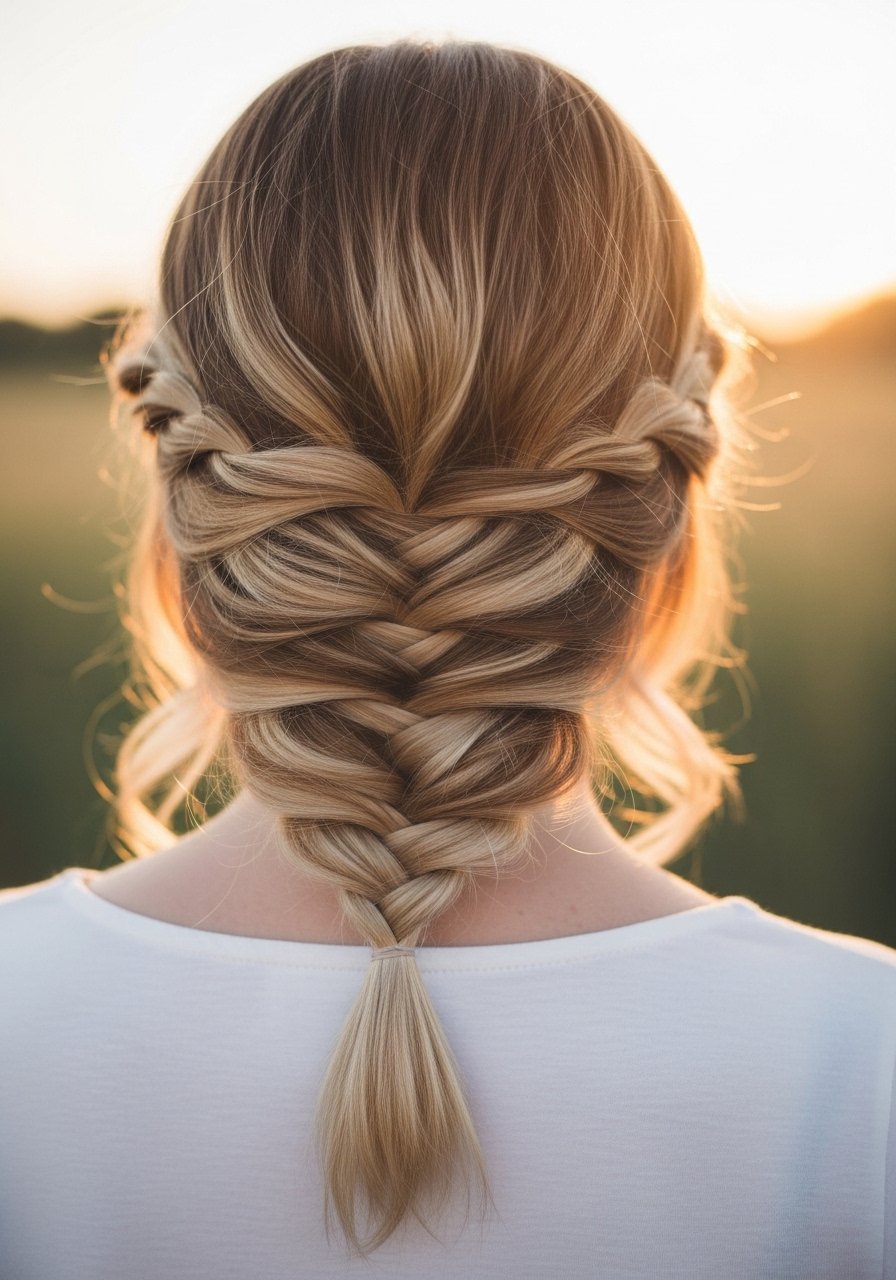
Fishtails look complicated but are just two large sections and small alternating pieces. For a clean fishtail, split hair into two even halves, then take 1/2-inch strands from the outer edge of one half and cross them over. I find that using a pea-sized amount of a paste on the tips prevents the braid from fraying by lunchtime. For thicker hair, make the pieces slightly larger and aim for 12 to 16 crossovers down the length so the pattern reads clearly. A common misstep is rushing the first five centimeters, which makes the whole braid lopsided. If you want a softer result, pull gently on alternating sides of the braid after finishing to pancake it.
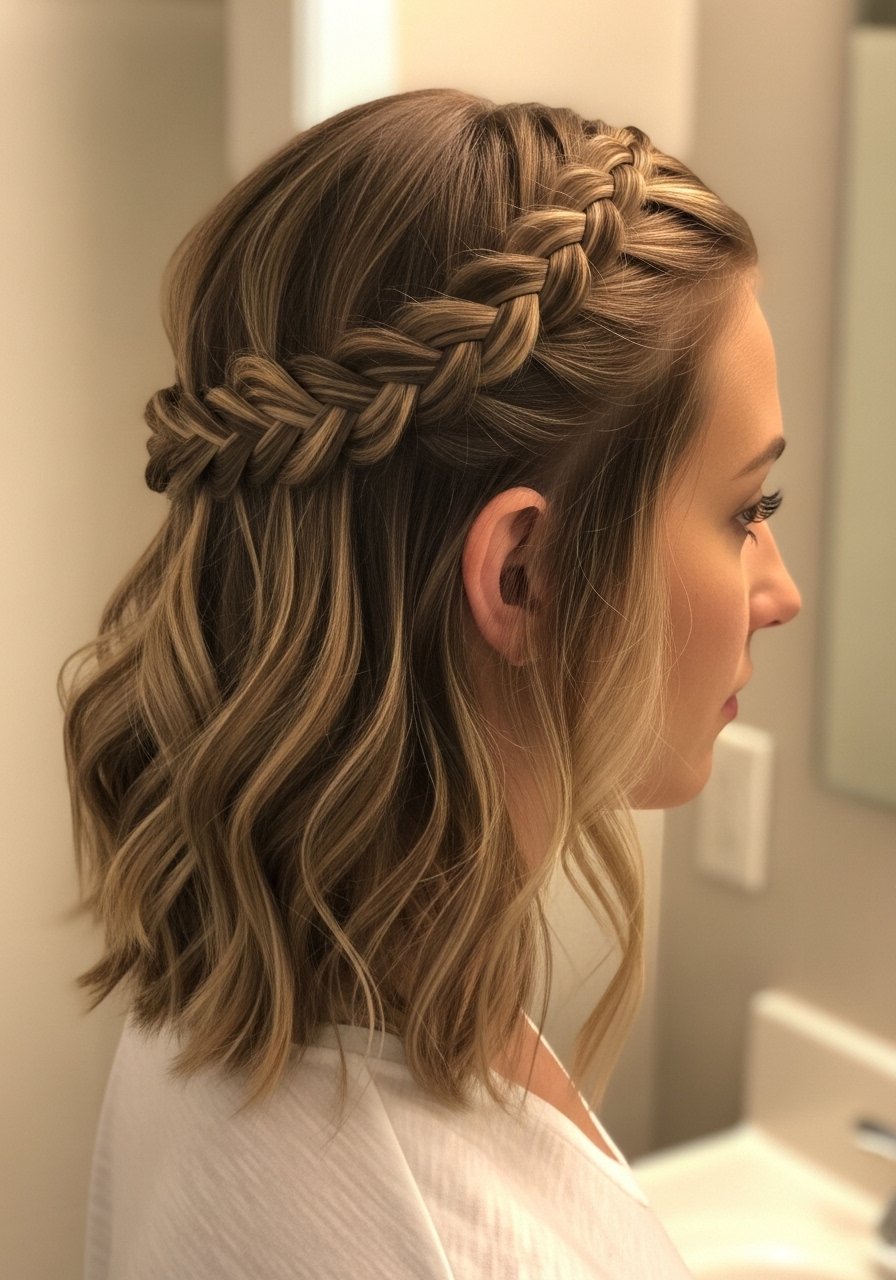
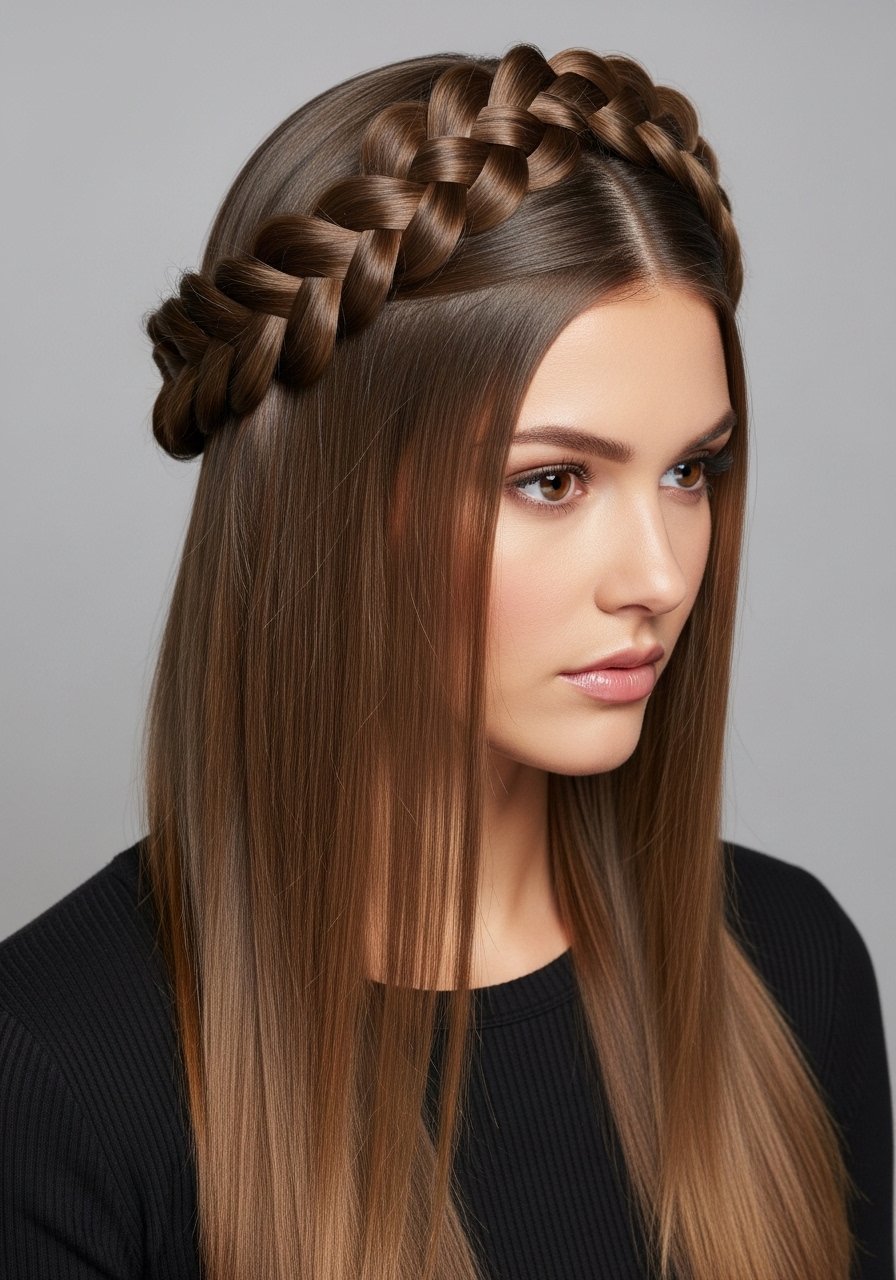
Crown Braid For Formal Looks
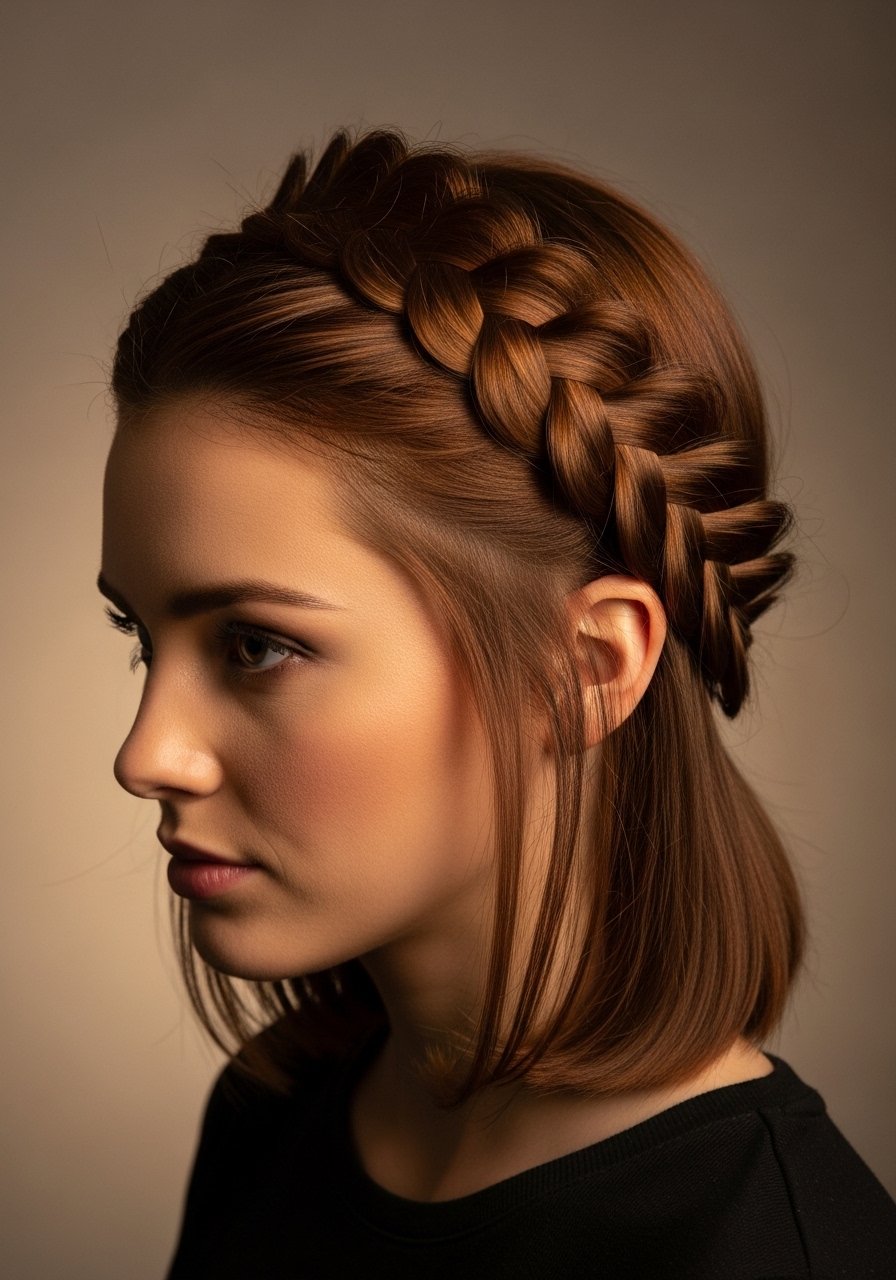
A crown braid looks expensive but is surprisingly doable at home if you section deliberately. Start at one temple, Dutch braid around the head, and pin each new piece under the braid with bobby pins placed at a 45 degree angle. For medium density hair, use about six 1-inch subsections per side. If your hair is slippery, a light dust of texture powder at the roots gives the braid something to grab. The mistake I made repeatedly was using too few pins. Aim for one pin every 1.5 inches along the underside. If you need a cleaner finish, a stylist can tidy the ends and hide pins with micro braids at the nape.
Waterfall Braid To Frame Your Face
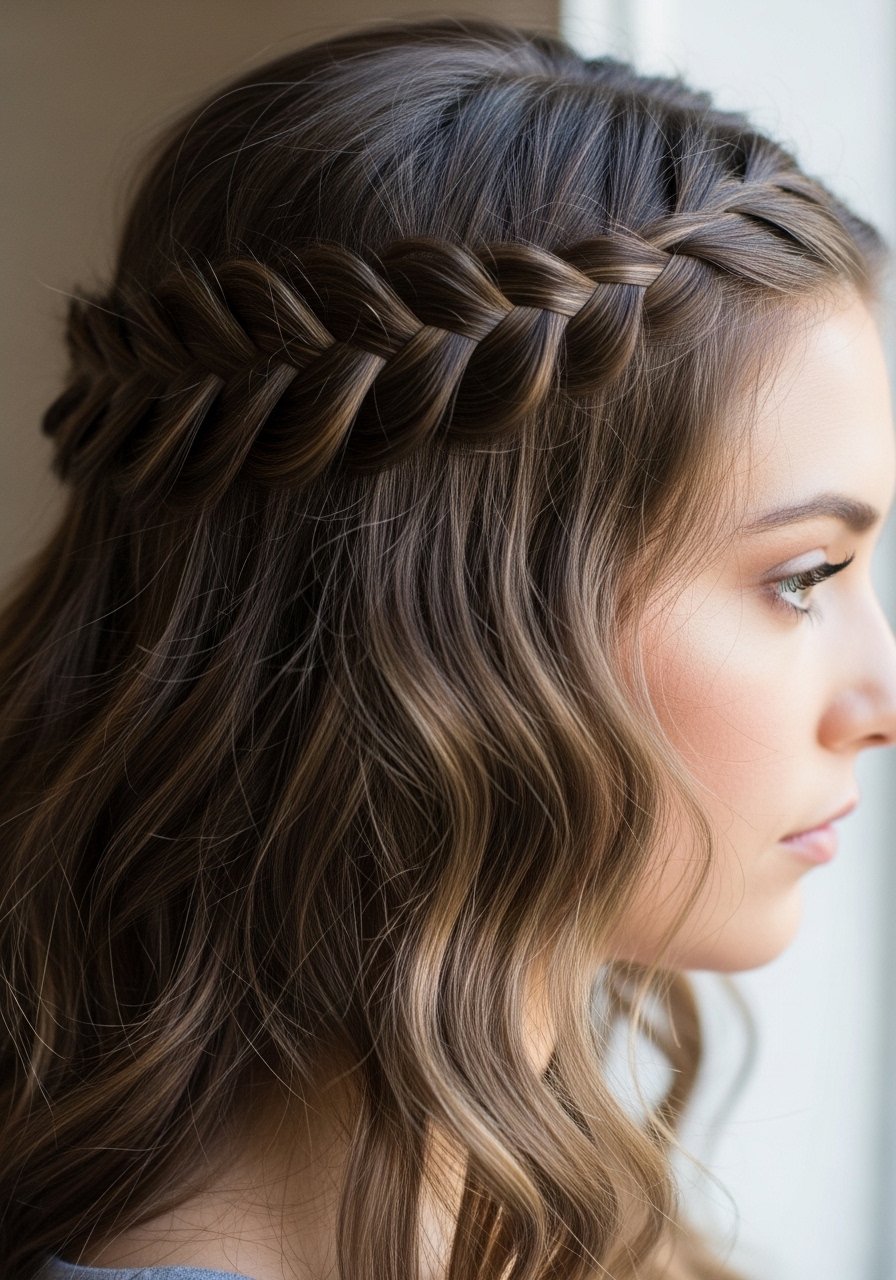
Waterfall braids give you a braided detail without pulling all the hair back. The technique is to drop one strand after each cross and pick up a new piece from underneath, creating cascading strands. It takes about three minutes per side for medium-length hair if you practice the pick-up motion. If your hair is fine, use a tiny amount of mousse on damp hair so the dropped pieces hold shape. A classic mistake is overloading the braid with product which makes the dropped strands limp. Want more hold without crunch? Finish the braid with one spritz of a flexible-hold spray and tuck the tail behind the ear.
Boxer Braids For Everyday Hold
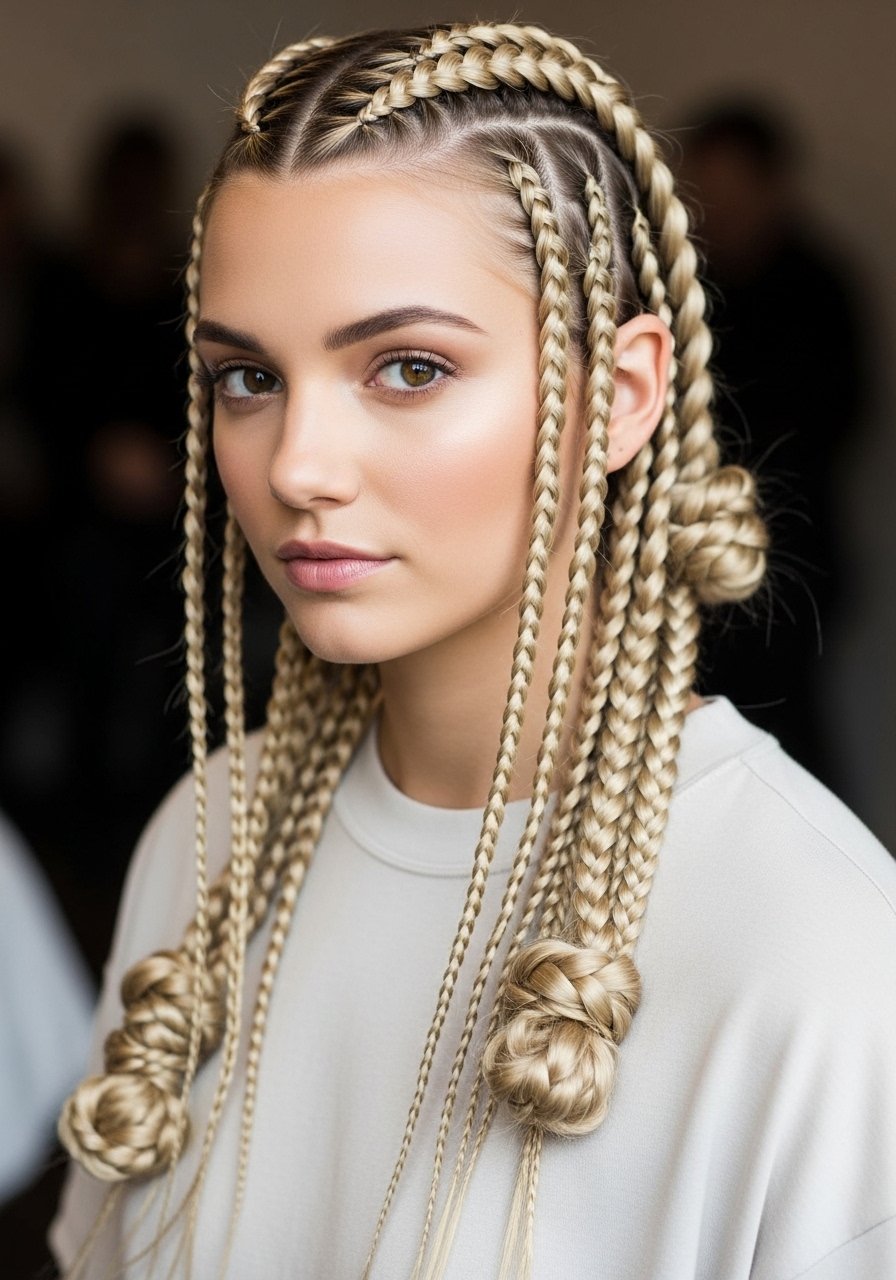
Boxer braids are my go-to for keeping hair in place while commuting or during workouts. The trick is a clean center part, equal tension on both sides, and securing each braid with a soft elastic before wrapping into a low bun if you need extra security. For medium to thick hair, divide each side into three subsections about one inch wide. Avoid over-brushing the hair right before you start. Too much fluff makes the braids puffy and harder to control. If you want shine at the end, run a palm-full of smoothing cream along the finished braids. These are DIY friendly and take under 10 minutes once you practice.
What I Keep In My Braid Kit
Denman brush for detangling ($12) for sectioning and smoothing$8)
Snag-free fabric elastics, 50-pack (
Light hold hairspray for flexible setting
Texturizing powder for instant grip
Boar bristle round brush, 1.5 inch for smoothing flyaways
Microfiber towel to start braid-friendly days fast
Small bobby pins, 200-count for hiding and securing ends
Flexible hair paste for piecey texture
Wide-tooth comb for detangling wet hair without breakage
Olaplex No. 3 Hair Perfector 3.3 oz If buying Olaplex on Amazon, check the official seller or grab it at Sephora to avoid counterfeits
Rope Braid For Quick Volume

Rope braids are two-strand twists that read fuller than a three-strand on medium to thick hair. Divide hair into two sections, twist each away from your face eight times, then twist both sections together toward the face. I count eight twists per section for shoulder-length hair to keep the pattern consistent. Apply a pea-sized dab of paste on the ends to reduce fraying. For slip-prone hair, mist lightly with salt spray before you start. The common mistake is not stretching the twists slightly after finishing which makes the braid look tight and small. Rope braids hold well overnight if you secure the end with a fabric elastic.
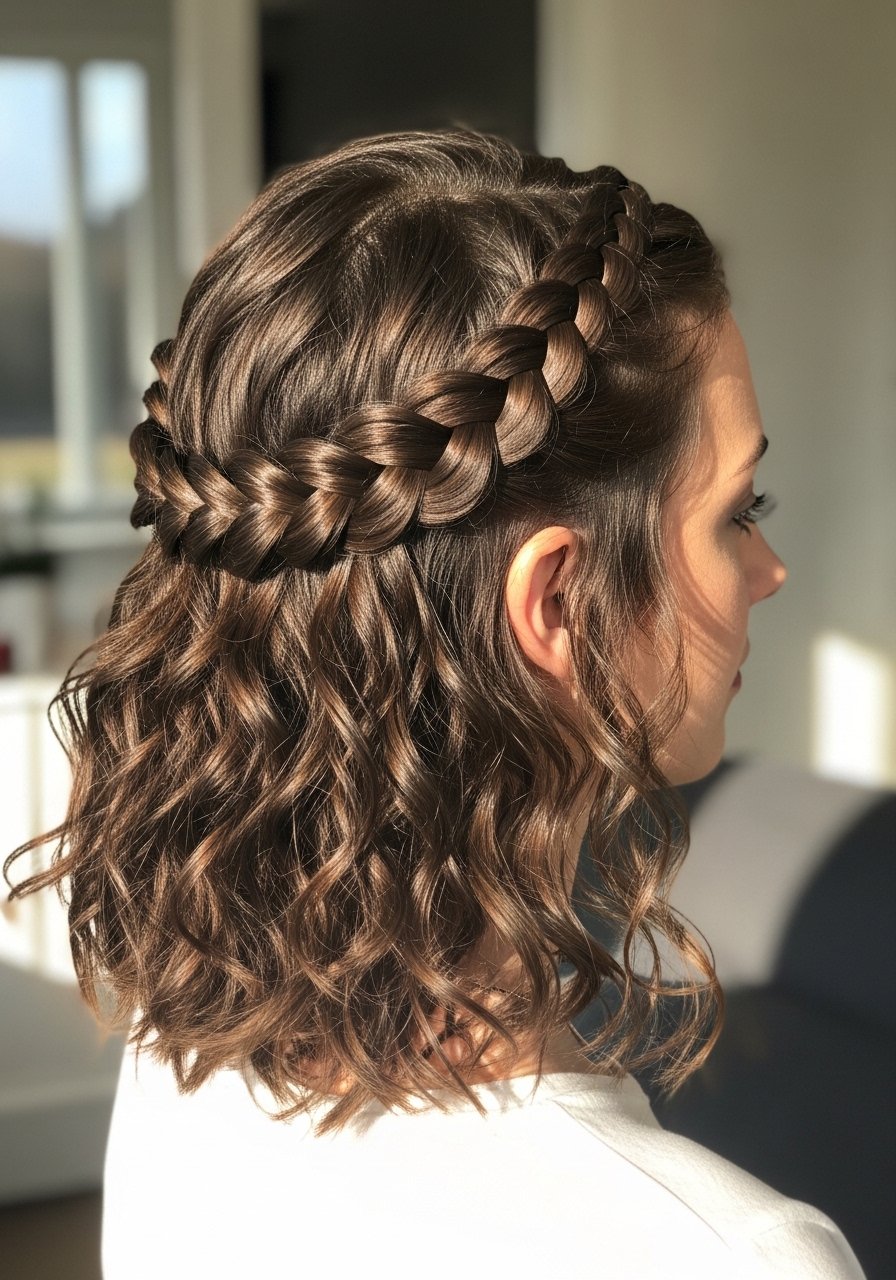
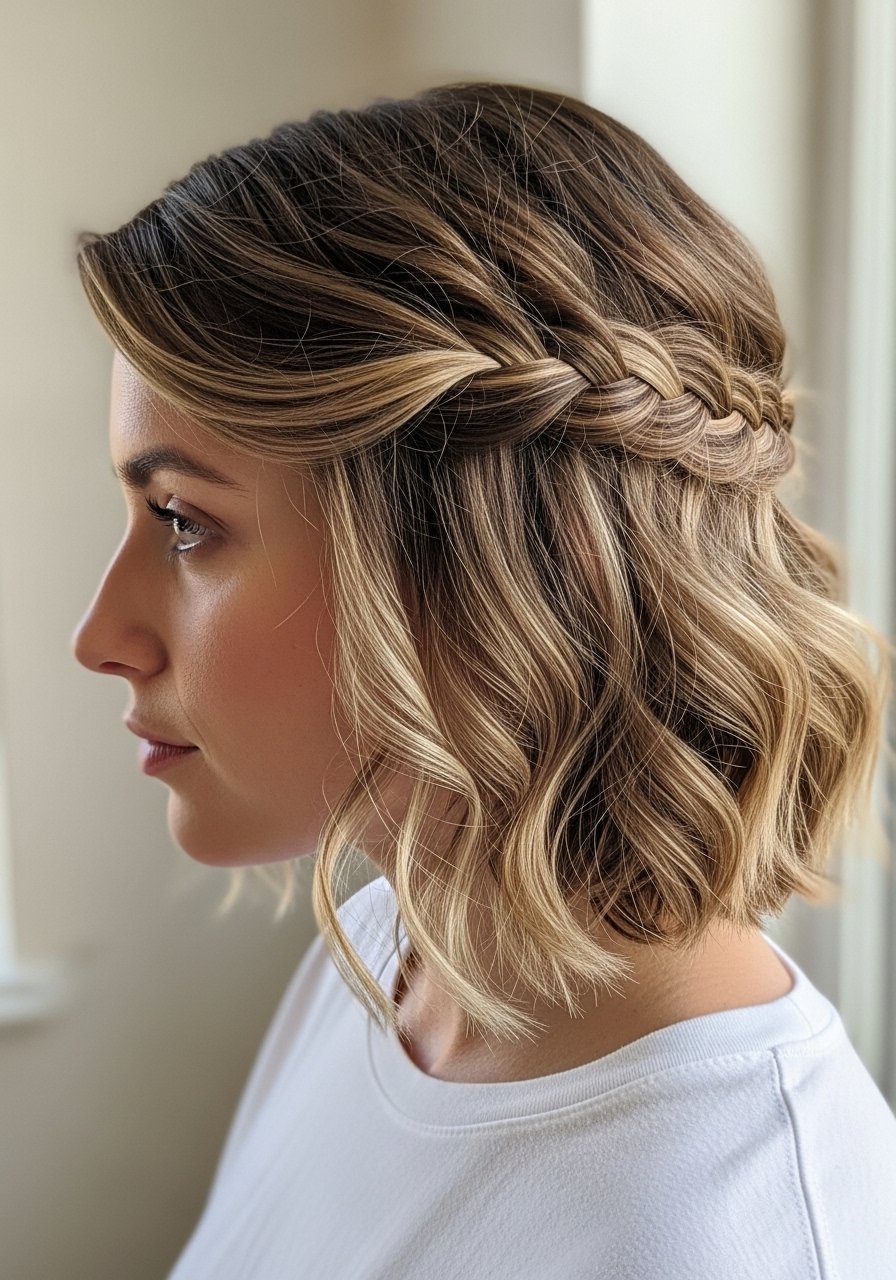
Half-Up Braided Crown For Second-Day Hair
Half-up crowns rescue second-day hair because the braid hides the greasy roots and adds shape. Section the top half of hair from ear to ear, braid that piece into a small crown, and pin across the back. For curly hair, I pick up 1-inch chunks so the braid doesn’t compress volume. If your curls are limp on day two, a single spritz of a lightweight refresher will revive bounce without weighing the braid down. A mistake I keep seeing is using heavy oils on the braid, which flattens the crown. If needed, pair this with a quick root tease for extra lift.
Milkmaid Braids With Hidden Elastics
Milkmaid braids look polished because the ends are tucked under and hidden. Make two braids, wrap them over the crown, and anchor with bobby pins. I use a fabric-wrapped elastic under each braid to start so the ends stay tidy when tucked. For medium density hair, two 14-inch braids usually do the job. If your hair is layered, pin small pieces strategically and add light hairspray to keep them in place. This is a style I would book at the salon if I needed perfect symmetry for a wedding photo because pros hide pins invisibly.
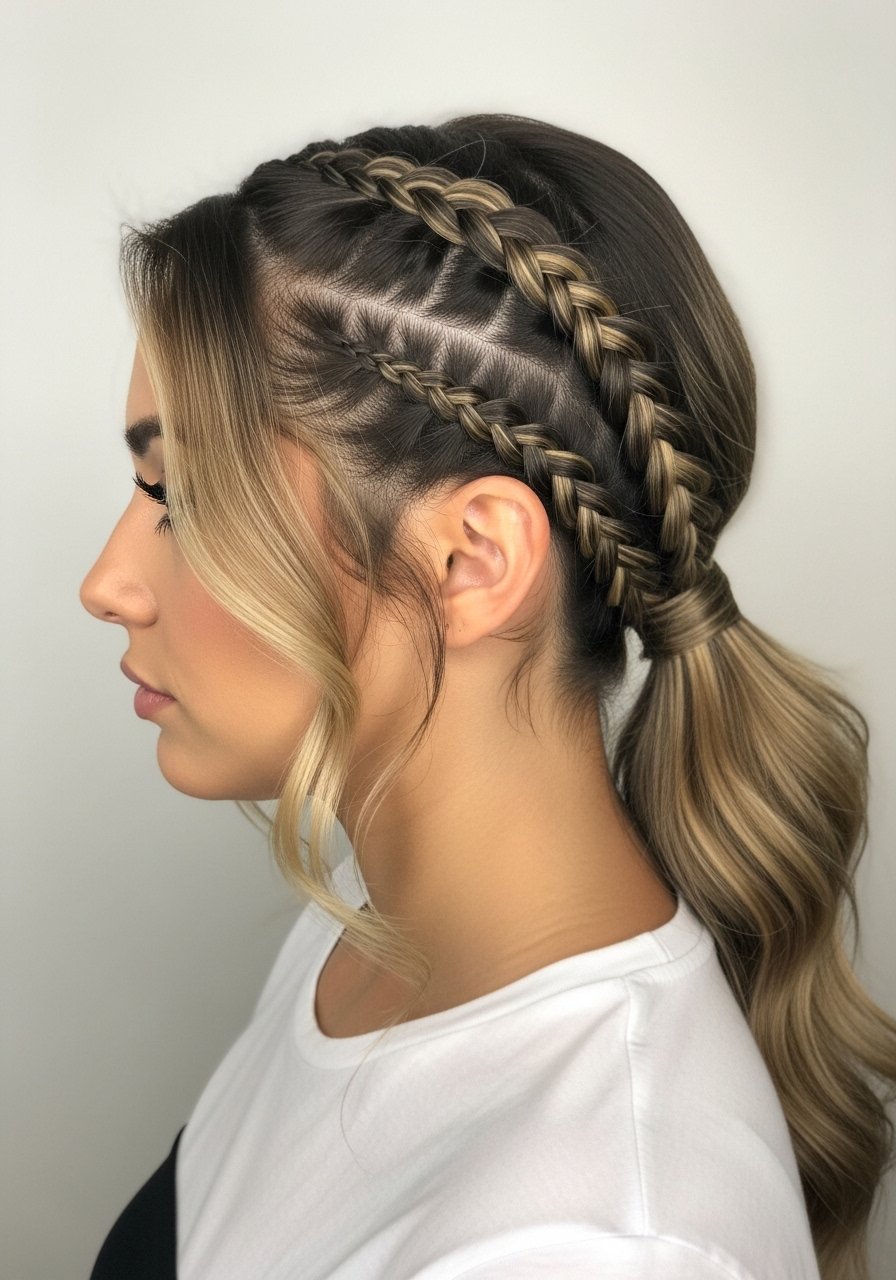
Side Braid With A Twist For Face Framing
Add a twist at the front before you braid to soften a square jaw or high cheekbones. Twist a one-inch front section away from the face, clip it, then gather the rest and braid to the side. Release the twist and wrap it into the braid for a subtle sculpting effect. I find two pumps of light cream on the twist stops flyaways without making the section stiff. Mist the finished braid with flexible-hold spray. If you have very thick hair, do a three-strand braid for the main length then add the twist as a decorative overlay so it does not overwhelm your neckline.
Braided Ponytail That Stays Put
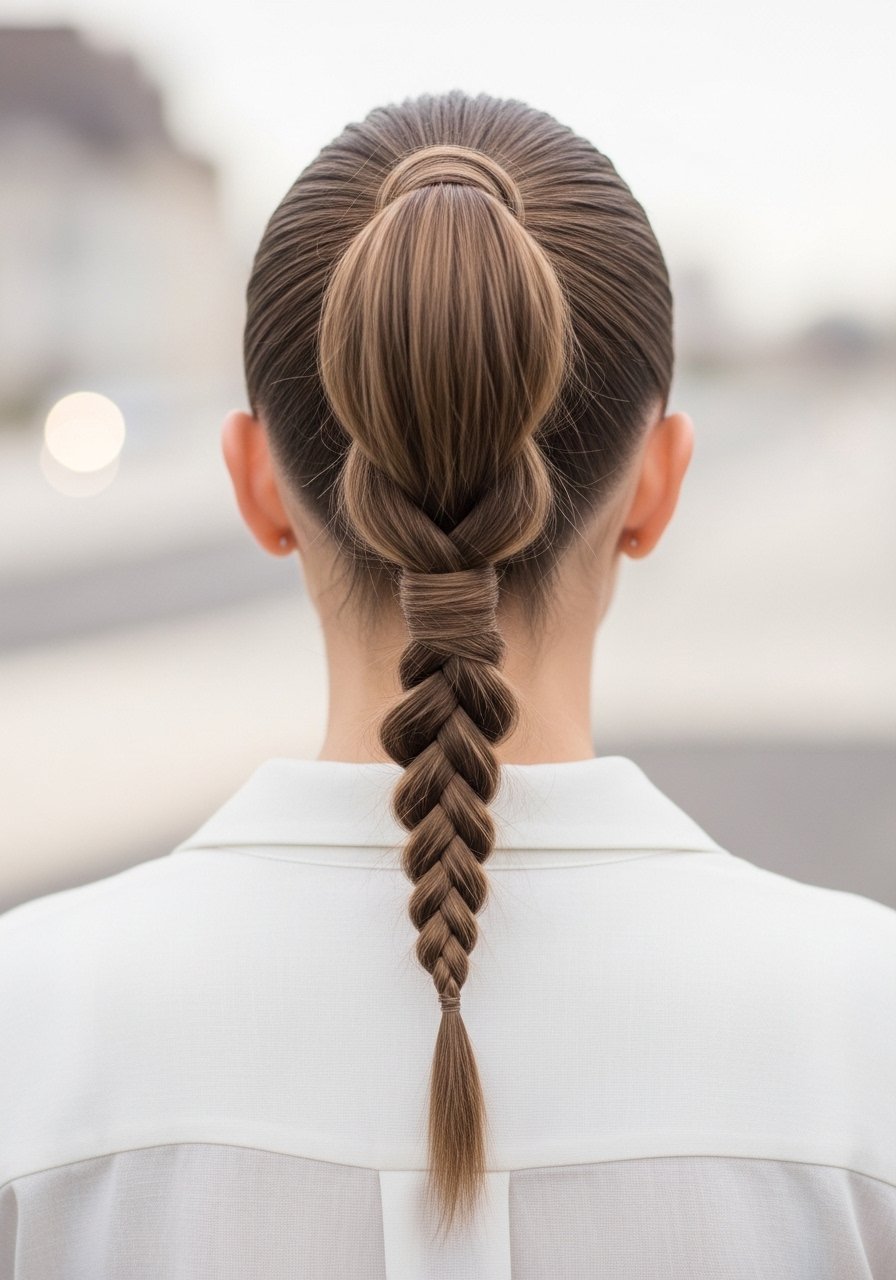
Turn a regular ponytail into a statement by braiding the tail. Pull hair into a high pony, secure with a firm elastic, then braid the ponytail. For a thicker-looking braid, split the ponytail into three and do a standard three-strand, or do a fishtail for texture. I add one inch of elastic above the base after braiding to keep it from slipping. Common mistake is starting with a messy base which makes the whole style look unfinished. If the elastic digs, switch to a wider fabric band. This is a low-effort salon or DIY style that lasts all day.
Braided Bun For Office-Friendly Hair
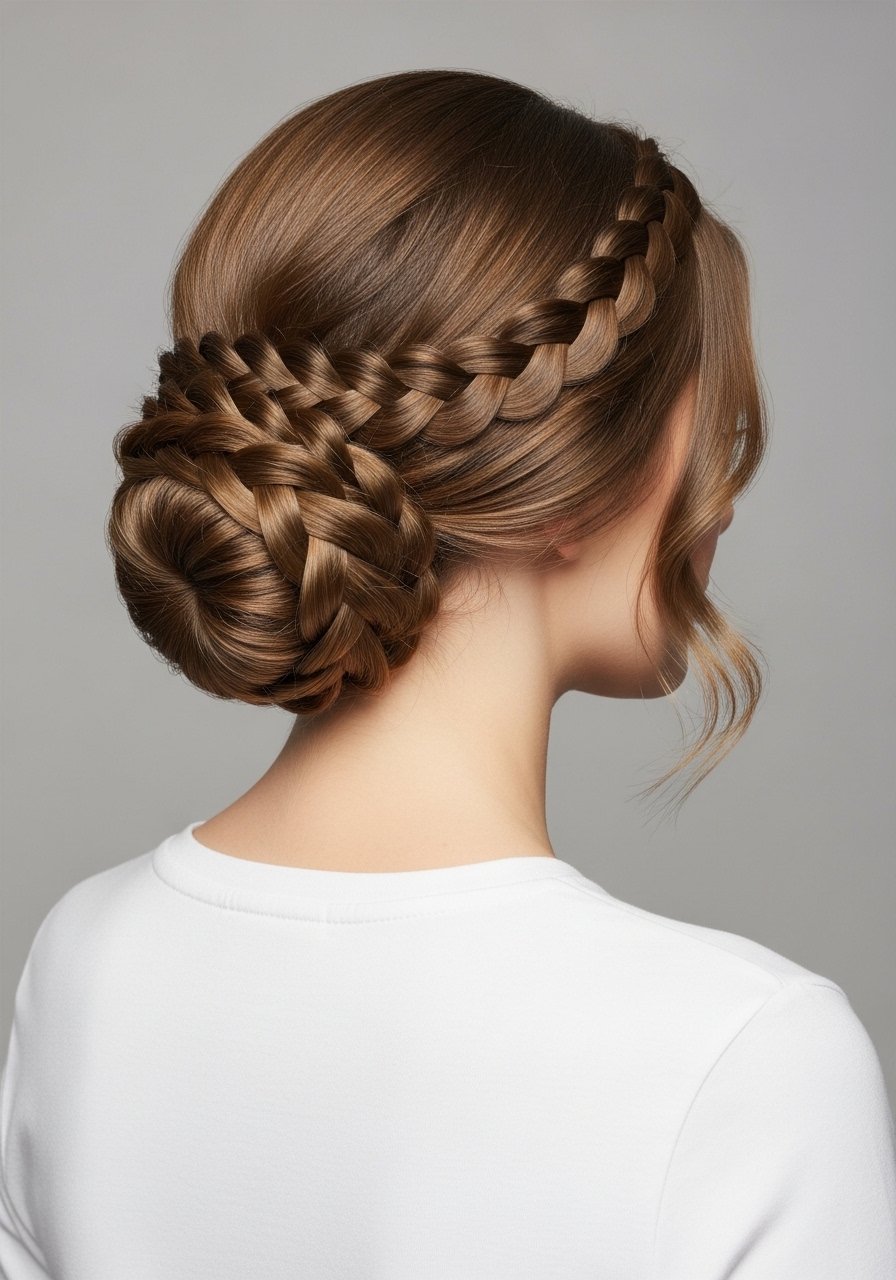
A braided bun looks neat and professional. Start with a low pony, fishtail or three-strand braid it, then coil the braid into a bun and pin. I secure with at least six pins placed under the braid so they do not show. For medium length, keep braid subsections at three quarter-inch so the bun looks uniform. A small mistake is using shiny pins that show through in daylight. If you want softness, pull a few threads loose around the face and spritz the bun with a mist that adds light hold. This is easy to do at your desk mirror.
Ladder Braid Accent For Detail
Ladder braids are decorative without being fussy. They involve picking up a small piece, crossing it over, then leaving a space that looks like a rung. I use 1/2-inch subsections for clear spacing on medium hair. This braid is all about consistent spacing. Use a little paste on the rungs to prevent frizz. People often overcomplicate the start. Keep the first two rungs neat and the rest follows. It pairs well with the crown braid idea earlier if you want a mixed look for special events.
Bubble Braid For Playful Texture
Bubble braids are not a traditional plait, but they are quick and give the same put-together vibe. Secure a high pony, then tube elastic every two inches and gently tug each segment to create rounded bubbles. Use a texturizing spray between elastics for grip. For long hair I do bubbles every two to three inches. The common mistake is pulling too hard and causing frizz. If your hair is fine, wrap a small strand around each elastic to hide it. Bubble braids are a favorite on airplane days since they survive hours of movement.
Braided Headband For Shorter Lengths

If your hair is too short for long braids, a tiny braid along the hairline creates a headband effect without extensions. Braid a 1-inch piece from temple to temple and pin it behind the ear. Use a small amount of gel on the starting piece to keep baby hairs down. The spacing of the braid is small so tidy fingers help. This look works especially well on straight to wavy bobs. A tip I learned is to slightly dampen the section before braiding to reduce flyaways while you work.
The Mistakes I Made So You Don’t Have To
- Heat before braid styling matters only when you smooth edges. Most heat protectants you spray on dry hair before flat ironing barely work. They need to absorb into damp or just-dried hair to actually shield the cuticle. Grab a reliable heat protectant spray and apply on damp hair, wait 30 seconds, then style.
- Use a microfiber towel like this one to reduce frizz before braiding. It cuts drying time and helps braids hold.
- Hair grows about half an inch a month at most, regardless of what biotin gummies promise you. If you want length retention, focus on preventing breakage with weekly bond treatments such as Olaplex No. 3 and gentle detangling.
- For grip, texture powder at the roots is better than heavy wax which can make braids stiff. I keep a travel-size powder in my kit.
Frequently Asked Questions
Q: Can I braid freshly washed hair or is second-day hair better?
A: Second-day hair often holds braids better because natural oils and texture give grip. If you must braid fresh hair, use a light texturizing spray and let hair dry to almost-damp before you start. For very fine hair, wash the night before and sleep on a silk pillow to reduce frizz.
Q: How do I stop braids from loosening by midday?
A: Secure the end with a fabric elastic, mist lightly with flexible-hold spray, and for slippery hair add a one-inch strip of texturizing powder at the braid start. If your hair is straight and fine, make subsections slightly smaller and flip the braid under at the nape to use gravity to your advantage.
Q: Are there special products to prevent braid-induced breakage?
A: The key is gentle detangling and protecting the mid-lengths and ends. Use a wide-tooth comb on wet hair and a leave-in like a lightweight cream. Weekly bond-building treatments can reduce breakage from repeated styles. Avoid pulling too tight at the hairline.
Q: Can I sleep in braids every night?
A: Sleeping in loose protective braids occasionally is fine. For nightly braiding, switch the braid location to reduce constant tension on the same follicles and sleep on a silk pillowcase to minimize friction. If you notice soreness or thinning, give the scalp a break and try looser styles.
Q: What's the best elastic to use for braids?
A: Fabric-wrapped elastics are my preference because they grip and do not snap the hair. I keep a 50-pack in my kit. Avoid metal clips and thin bands that cut into the hair, especially at the nape where friction is highest.
Q: Can I use extensions to make braids fuller without damage?
A: Tape-in and clip-in extensions are fine if applied by a pro or removed carefully. For clip-ins, secure them under the braid and braid over them to hide clips. If you use glue or sew-in methods, have a stylist apply and remove them to avoid breakage.
Q: How often should I deep condition if I braid a lot?
A: Once a week if your hair is styled frequently with braids and pulled tight. If your hair is only braided occasionally, every two weeks is fine. Over-conditioning can make hair limp, so follow with a light protein treatment if it feels mushy.

