
I tried a face-framing money piece once and ended up with orange strips that looked like a 90s throwback. After a few salon fixes and way too much bond builder, I learned how to get brown highlights on black hair without the banding or brass. These ideas are for 2A through 3C textures, shoulder to mid-back length mostly. Most looks can be done at home if you know developer choice and sectioning, though a few are salon-only. Budgets range from under $30 for a gloss to a $200 color appointment.
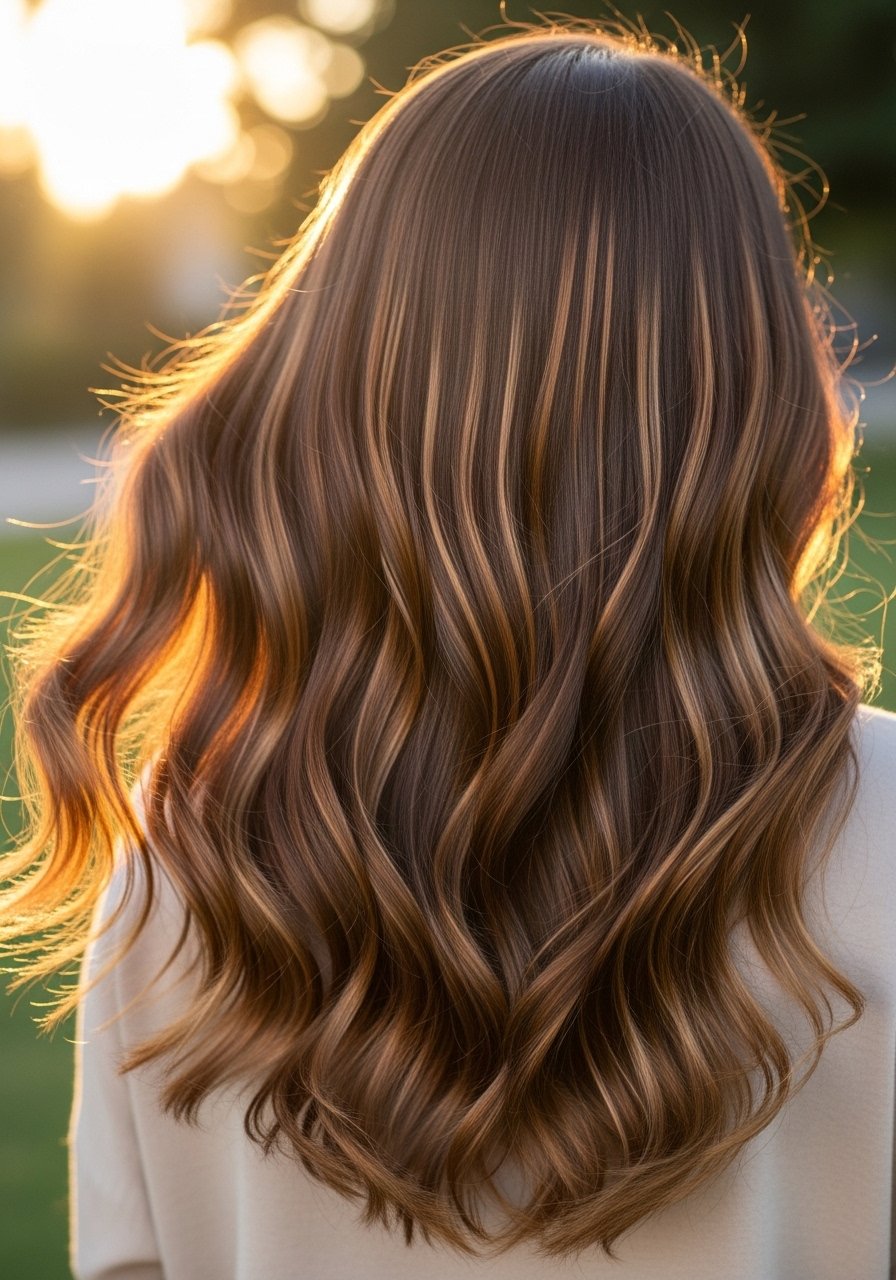
Soft Chocolate Babylights Along The Face
Babylights are tiny, packed foils that create the illusion of natural sun-kissed strands. On black hair, I ask for 1 to 2 shades warmer than my base so the contrast reads soft, not stripey. For at-home attempts, use a 10 volume developer for deposit or 20 volume for up to two levels of lift, and work in 1⁄4 inch subsections through the hairline only. One mistake is leaving larger slices which shows as harsh lines. After rinsing, a 10-minute brown gloss evens tone and adds shine. I finish the routine with two pumps of Olaplex No.3 hair perfector once a week to keep the fragility down. If your scalp is sensitive, patch test and avoid overlapping bleach on previously lightened hair.
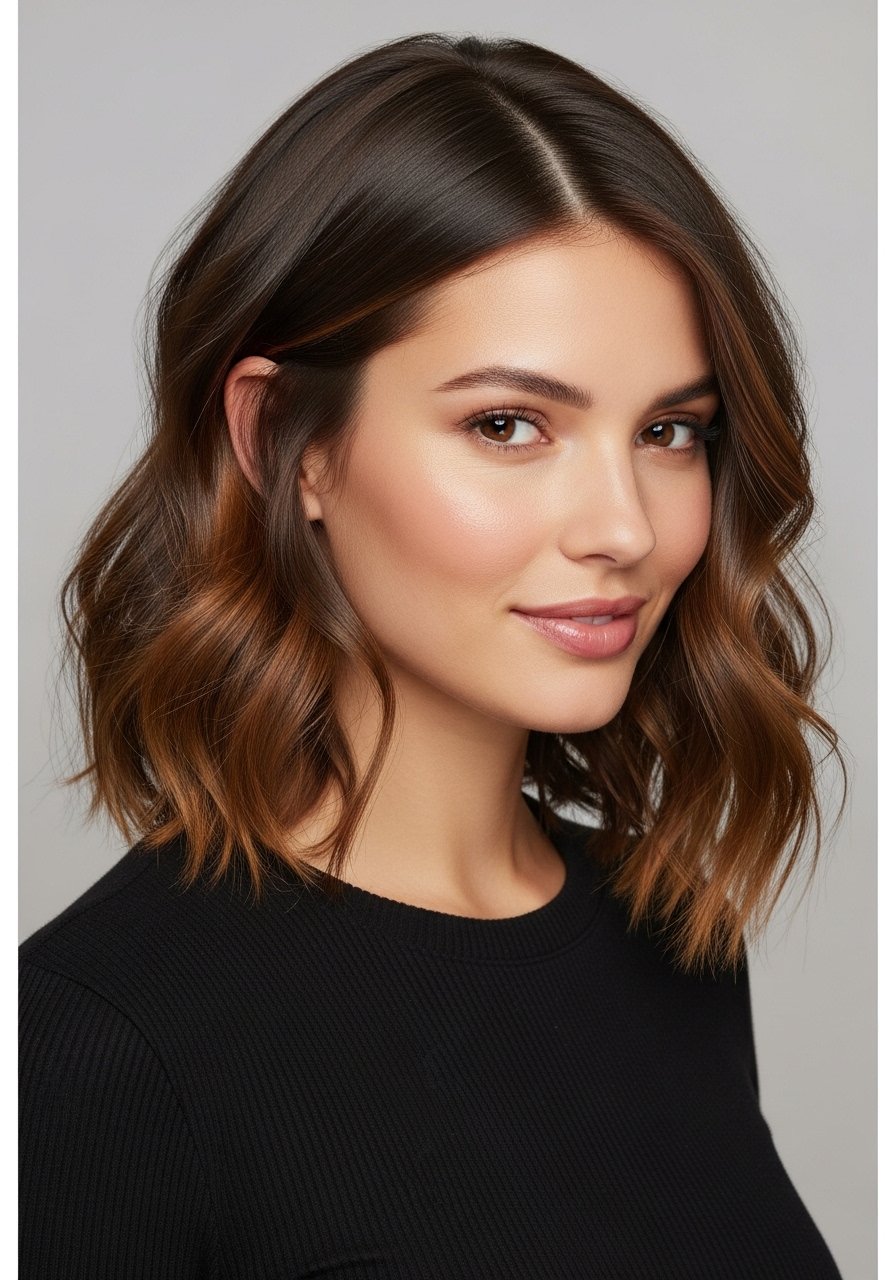
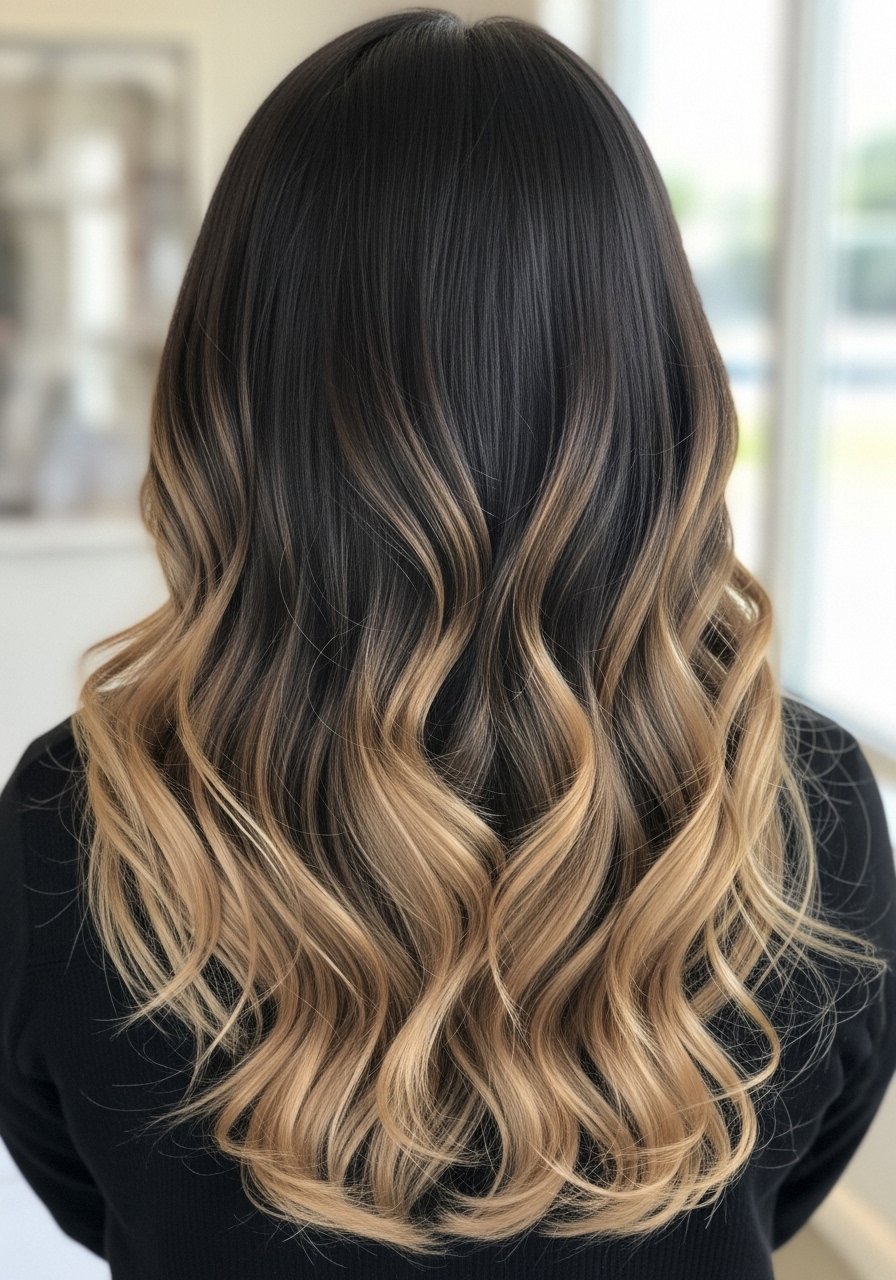
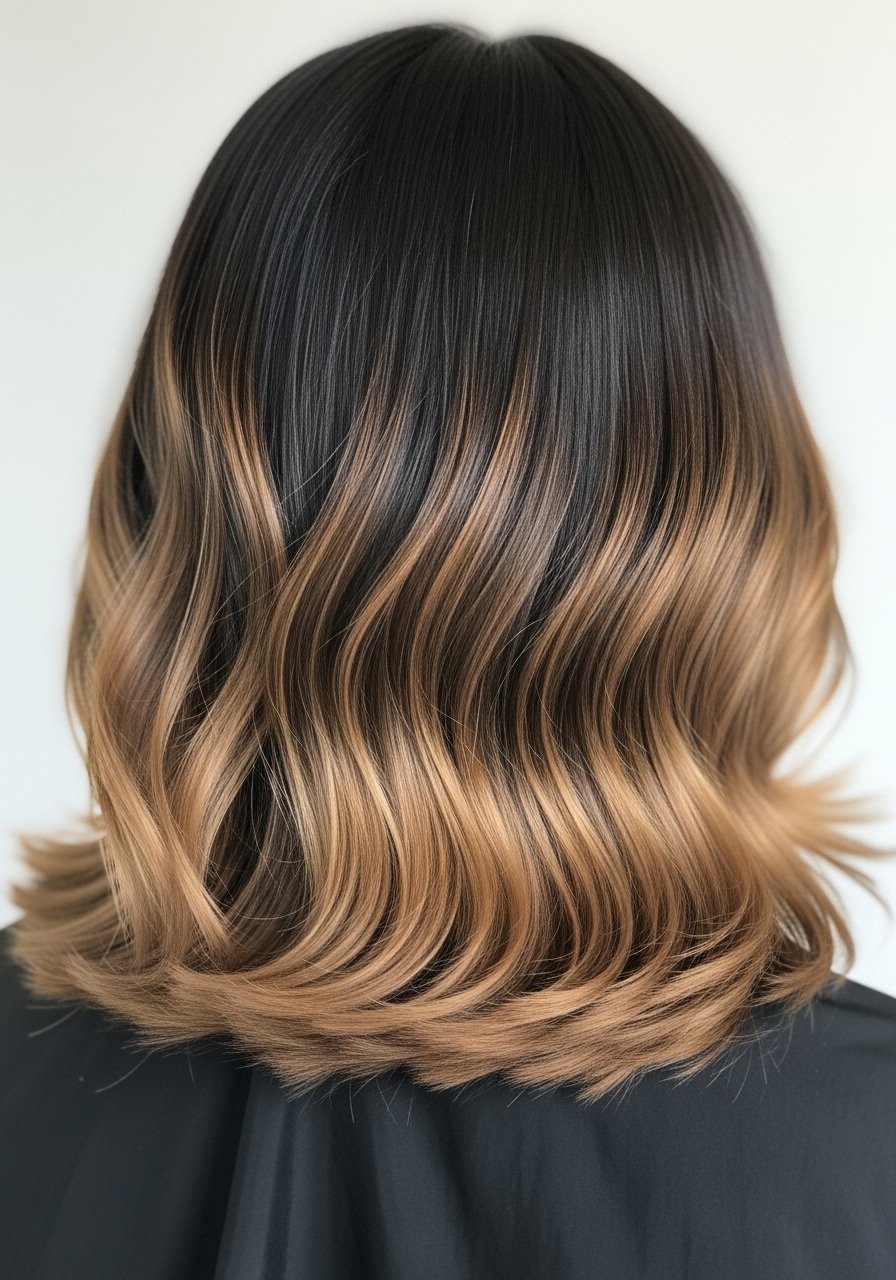
Warm Caramel Balayage For Medium Length Hair
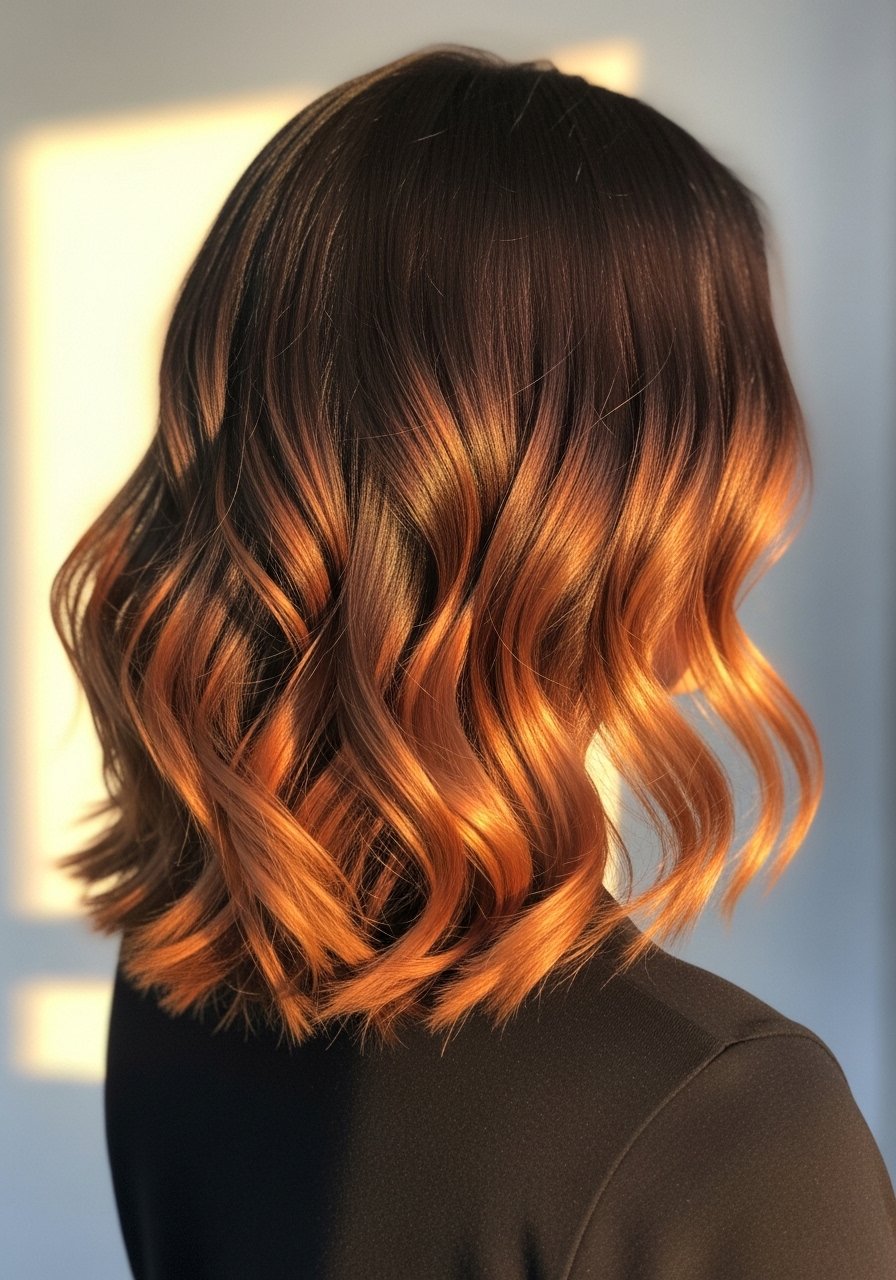
Balayage is my favorite for low-maintenance brown highlights on black hair subtle enough to grow out. The painter hand is everything. Ask for soft feathered strokes and avoid horizontal slices. A salon will use a freehand glaze and 6 to 10 panels depending on thickness. At home, use a tint brush and lift only the mid-lengths, never the root band. The result is soft dimension that takes heat styling well. If you blow dry on medium heat, use a heat protectant before any iron over 300F, and set your flat iron to 330F for fine hair or 370F for coarse hair. For the afterwash, a 6oz color-safe conditioner helps the shade hold longer, and a salon gloss every 6 to 8 weeks keeps brass down.
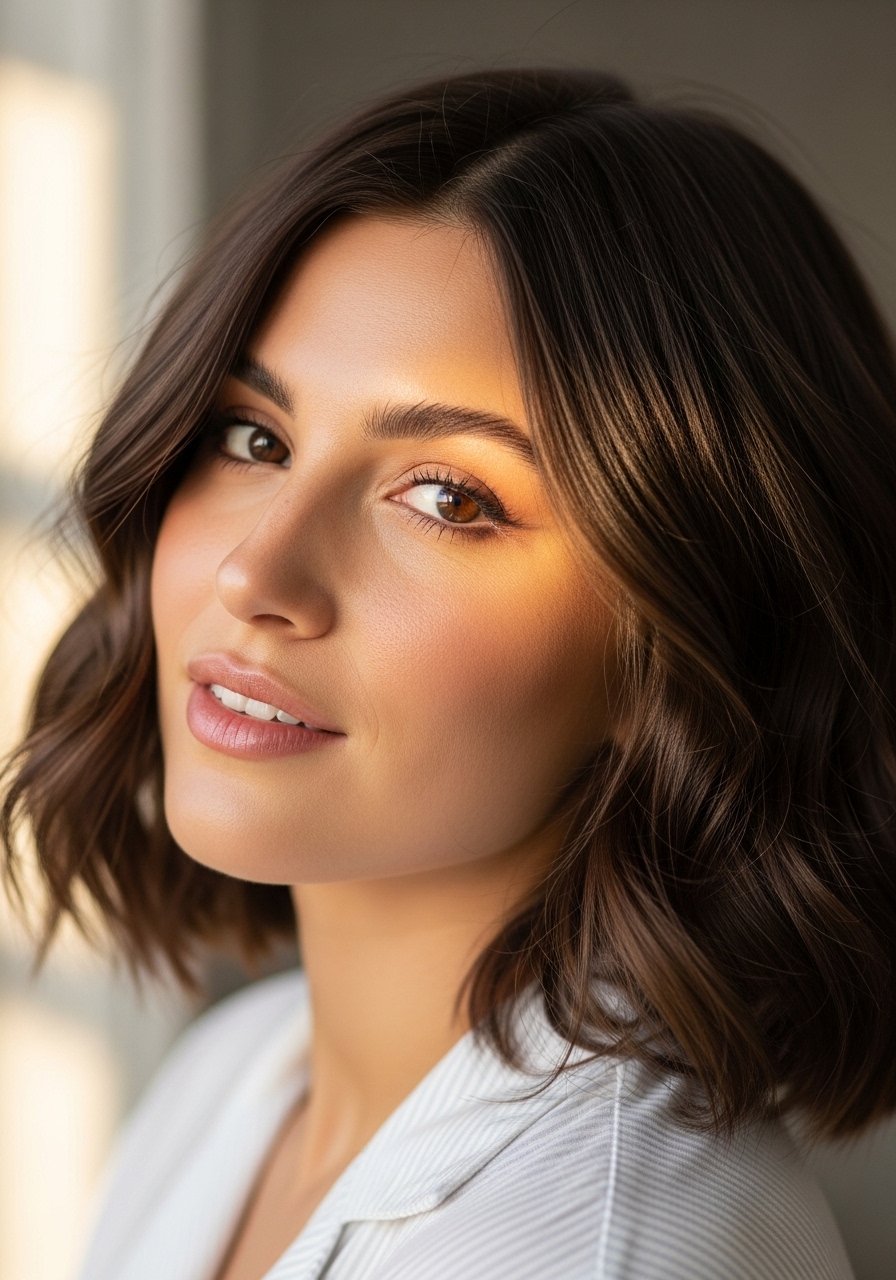
Subtle Money Piece To Frame The Face
The money piece is a front highlight that changes how your face reads without a full-head commitment. On black hair keep it only two shades lighter and ask for softer ends. Most stylists paint two to four face-framing slices depending on hair density. If you try it at home, pre-lighten the small slices with 10 to 20 volume developer for 6 to 12 minutes then glaze immediately to control tone. A common error is over-bleaching which makes the money piece scream. To stretch salon time, refresh the front slices with a demi-permanent gloss every six weeks. Use a small round brush while blow drying to bend the pieces away from the face for a lived-in look.
Gloss Glaze To Add Brown Tone Without Harsh Lift
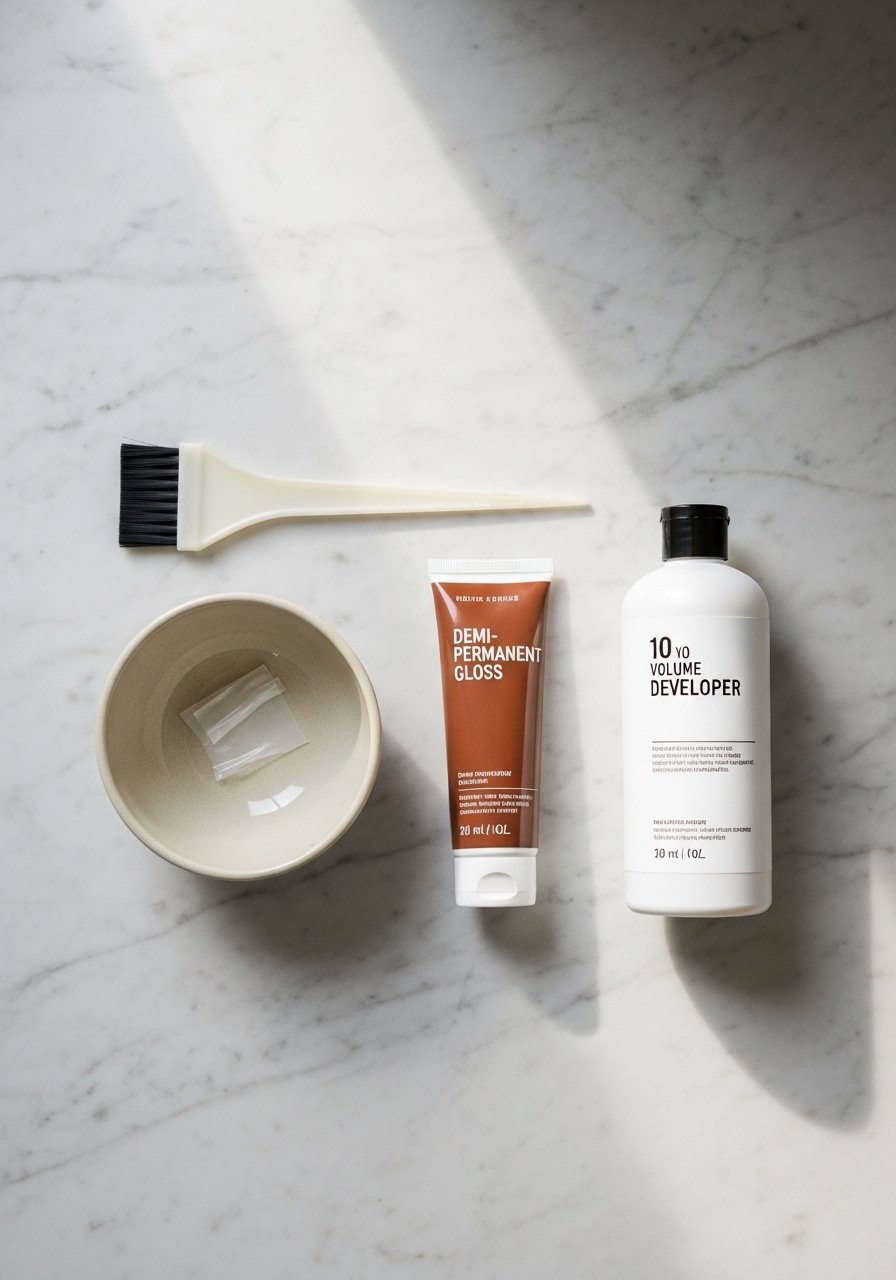
If you love the idea but hate bleach, a demi-permanent brown gloss is the trick. Gloss does not lift dramatically, it deposits tone so darker hair reads richer and slightly warmer without brassy lift. I use a 10-volume developer or a premixed gloss and leave it on for 10 to 15 minutes. The mistake is expecting it to create lightness. It perks up black hair by adding brown shimmer and hides the first inch of regrowth. Glosses last 4 to 6 weeks depending on shampoo frequency. For product, try a salon demi-permanent gloss or Wella Color Charm Demi Gloss option, and always buy premium glosses from the official brand store on Amazon or pick them up at Ulta to avoid counterfeits.
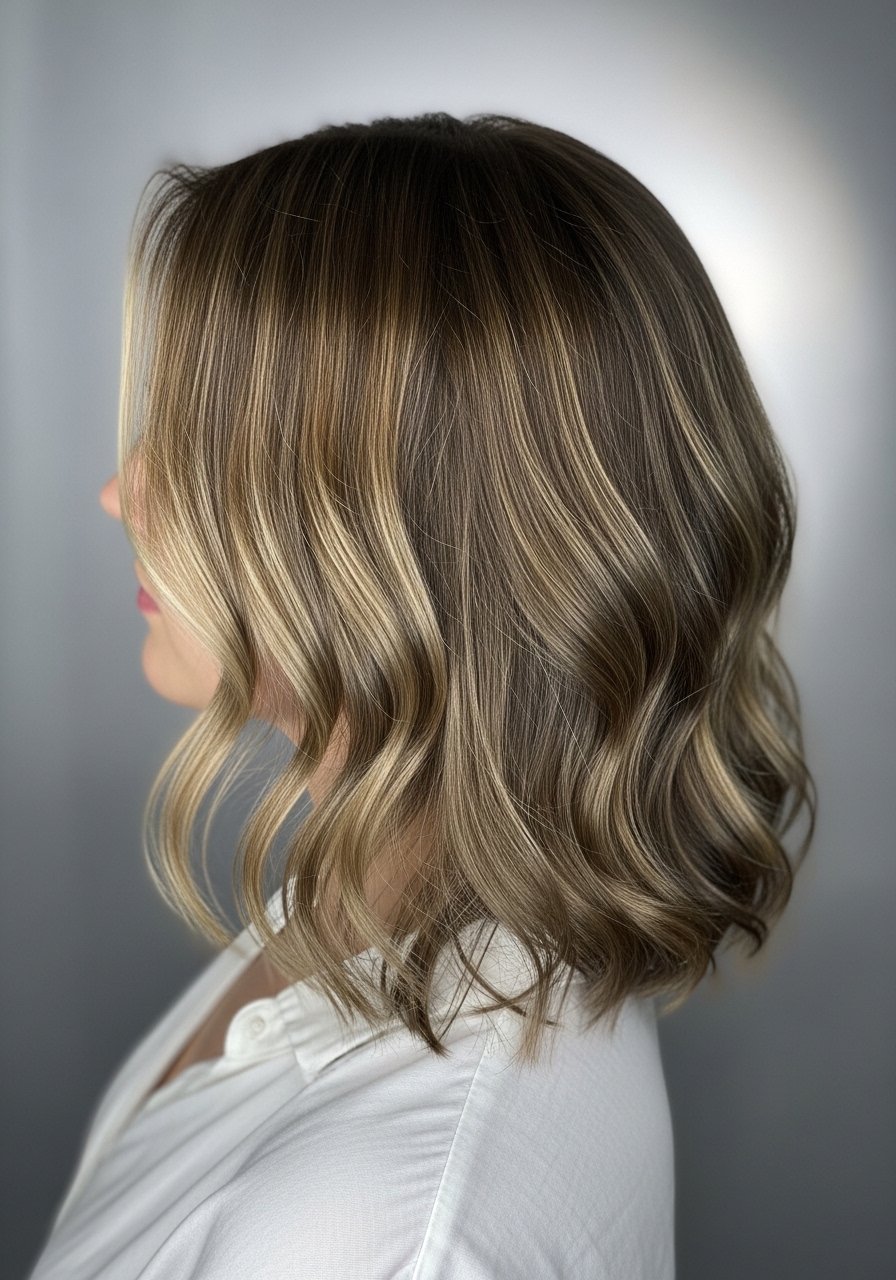
Peekaboo Brown Underlights For Volume Illusion

Underlights are dyed on the underside so color pops only when hair moves. For thick or densely curled hair, they create dimension without changing your overall base. Section the hair horizontally, and paint the under sections with a hand-painted technique. I usually do four to six horizontal panels for mid-back hair, each about one to two inches thick. Avoid going too light under previously colored hair, bleach-over-bleach breaks strands. One practical detail many stylists skip is drying the roots before rinsing the underlights, it helps the contrast stay intact. Maintenance is low, but use a sulfate-free shampoo and a weekly bond treatment if you heat style often.
Root Smudge To Blend Brown Into Natural Black
Root smudging keeps the transition from black roots to brown highlights seamless. The technique uses a slightly darker glaze at the root line to smudge lightened hair into the natural base. I ask for a 1⁄4 inch shadow at the root and a cool-down glaze over the panels. At home, a tinted root touch-up or a demi-gloss works for a DIY smudge. The most common mistake is using a too-dark smudge that reads muddy. Do it darker by only one shade and blend with a wide tooth comb. Smudges let you go 8 to 12 weeks between appointments and they reduce noticeable grow-out.
Milky Coffee Tips For Natural Grown Out Look
If you want hints of brown at the ends only, milky coffee tips are for that slow fade, low-maintenance vibe. Section in 6 to 8 vertical panels for long hair and paint only the last 2 to 4 inches. Use a balayage board or foil, and lift gently with 10 to 20 volume developer depending on how much change you want. A mistake is pulling the highlight too high which makes the look harsh. After rinsing, a deposit-only toner avoids brass. To keep ends from drying, apply a weekly protein or a maintenance bond treatment like K18 molecular repair mist in small amounts, and remember trims every 8 to 10 weeks keep the tips crisp.
What I Actually Keep In My Brown-On-Black Kit
Olaplex No.3 hair perfector weekly bond treatment, bought from the official Olaplex Amazon store to avoid counterfeits.
10-volume developer for deposit-only glosses, 20-volume developer for up to two levels of lift. Buy a small 8oz bottle.
A demi-permanent brown gloss for tone refreshes, leave on 10 to 15 minutes. Salon brands available at Ulta if you prefer.
Colour-safe sulfate-free shampoo 8oz to stop fading.
A narrow tint brush and bowl for painted highlights, it beats fingers for control.
A silk pillowcase queen size to reduce friction and frizz while you sleep.
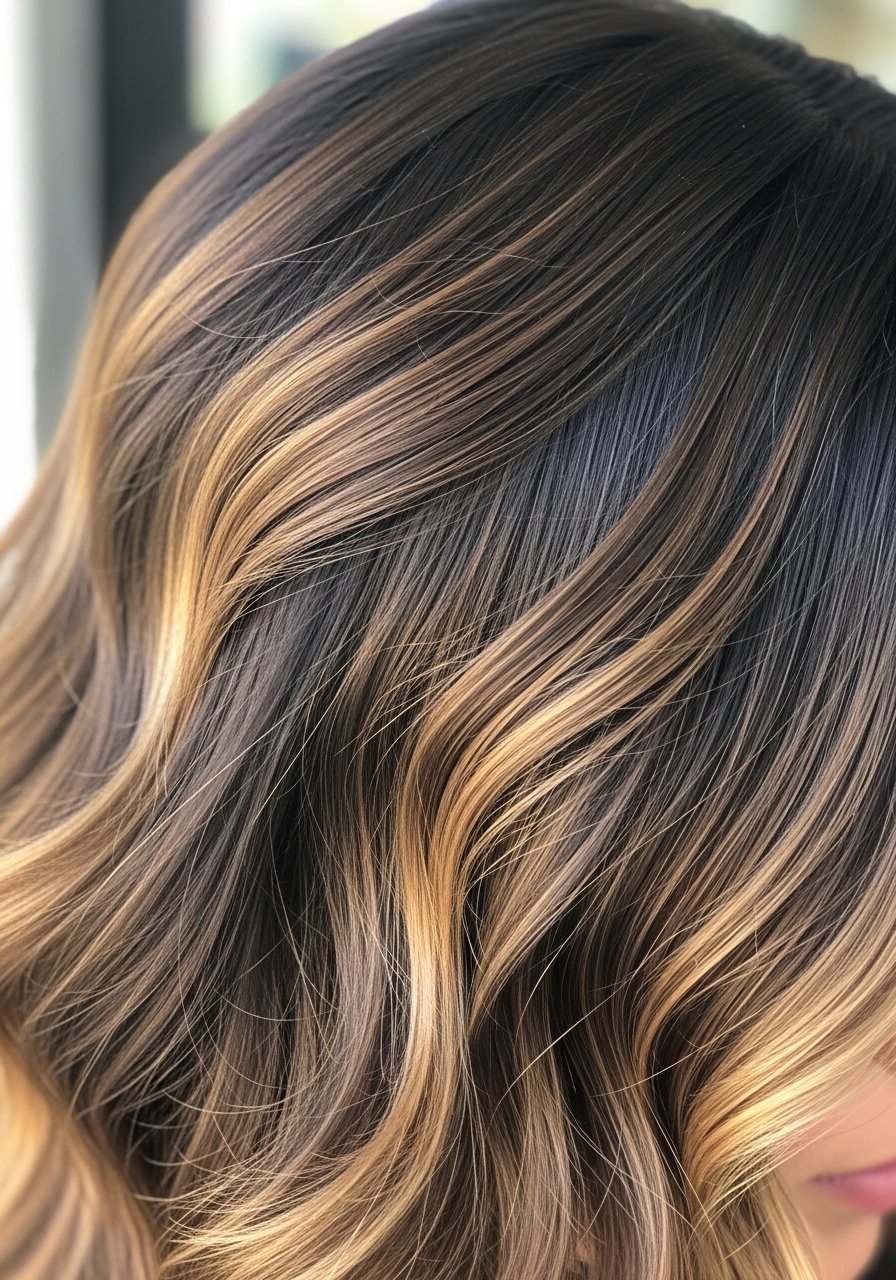
Sliced Babylights Through The Crown For Soft Dimension
Sliced babylights through the crown mimic how sunlight would naturally hit. The technique calls for micro sections, think 1⁄8 inch or less, exclusively through the top layers. On dense or coarse hair you will need more slices to read as subtle. A lot of people make the mistake of using large foils which show as bars in photos. Keep processing time short, and follow with a brown toner for 5 to 10 minutes to neutralize orange. The real detail is sectioning in an X pattern across the crown for even coverage. If you heat style, apply a heat protectant to damp hair before using an iron over 300F to avoid extra brittleness.
Bronze Shadow Root For A Slow Fade
A bronze shadow root adds warmth and gives highlights a lived-in fade. The root is painted one shade darker than the highlighted sections and blended with a feathered brush stroke. For curly hair, I ask stylists for a root paint in 4 to 6 panels to prevent patchiness, and they often use a blow-dry stretch to see how the curl will sit. DIYers should avoid overlapping bleach at the root and only use a glazing product if you are not comfortable with lifting. The safety note is important, do an allergy patch test with any permanent color and avoid scalp burns by keeping lightener off the scalp.
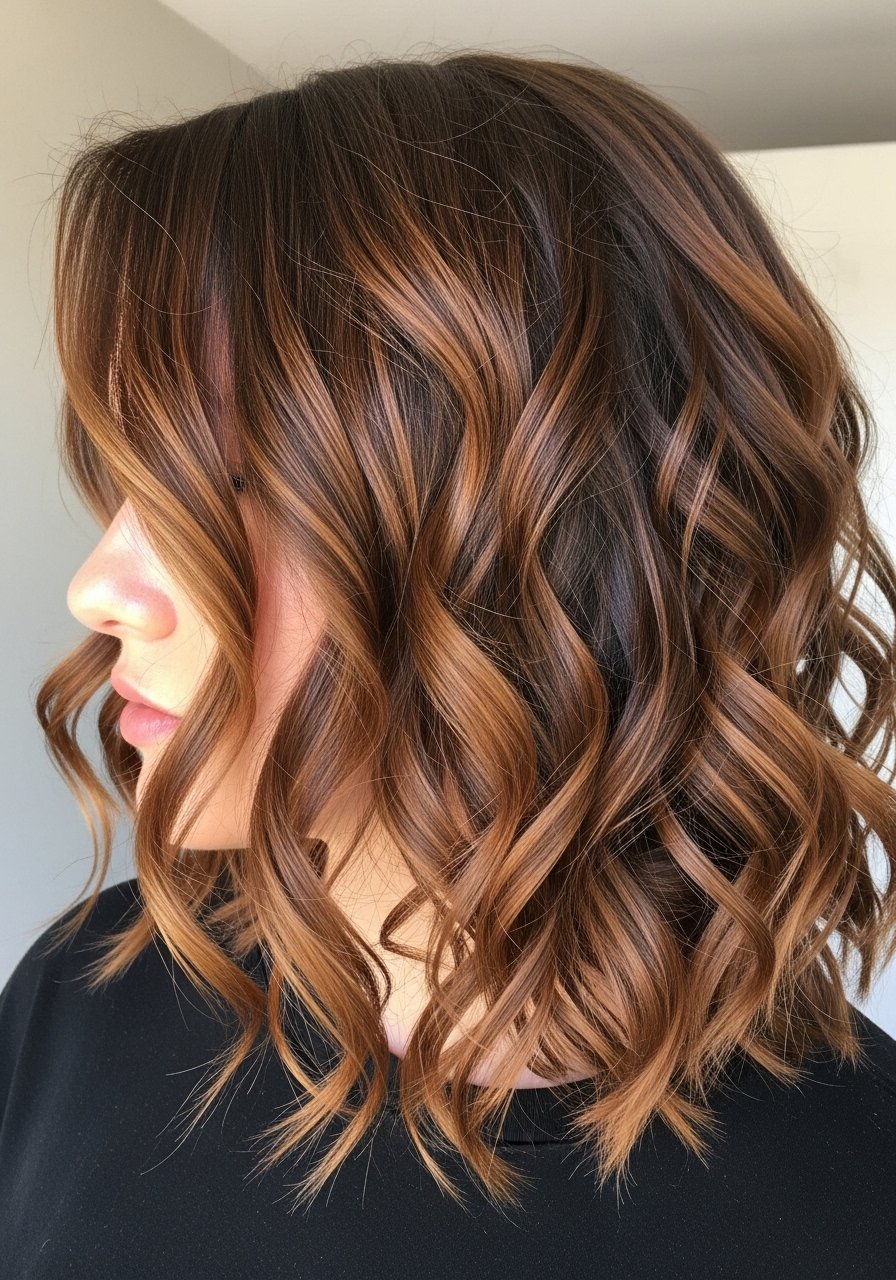
Hand-Painted Ribbon Highlights For Wavy Hair
Ribbon highlights are long, painted strokes that create a soft stripe of brown through waves. They are ideal for wavy textures because the movement displays the color without harsh sectioning. When I asked for this at the salon, they used spaced vertical panels about two fingers wide and feathered the ends. The trick at home is to tilt the foil at an angle when rinsing so the highlights blend organically. A common error is painting too many ribbons, which reads busy. Aim for three to five ribbons on each side for mid-back hair. Use a leave-in cream before heat styling to keep ribbons smooth and frizz at bay.
Low-Maintenance Color Melt For Busy Schedules
Color melts blur the line between dark roots and lighter ends so grow-out is forgiving. I once sat in the salon and watched my stylist paint in vertical blends while cross-checking every five minutes. That attention prevents banding. For DIY, choose two shades and blend on the mid-length with a paddle brush or fingers. The real detail is rinsing with lukewarm water while fingers run through hair to blur the line. If you shampoo less than three times a week, the melt lasts longer. Use a purple or blue shampoo only if you see unwanted warmth, and limit it to once a week to avoid dryness.
What I Wish Someone Told Me Before Getting Brown Highlights On Black Hair
- Heat protectant goes on damp hair, not dry. The cuticle is more open and the product actually absorbs. Color Wow heat protectant is one I keep on hand.
- Hair grows about half an inch a month at most, regardless of supplements. Trims every 8 to 10 weeks and reducing breakage preserve length better than any pill. A silk pillowcase and weekly bond treatments make length retention practical.
- If you have low porosity hair, apply glosses with gentle heat or a warm towel for five minutes to help absorption. A microfiber hair towel speeds drying without roughing the cuticle.
- Don’t lift over previously lightened hair at home. Multiple lifts over weeks is the safe route. If you need dramatic change, book a salon consult.
Frequently Asked Questions
Q: How subtle can brown highlights on black hair actually be without bleach?
A: Very subtle. A demi-permanent brown gloss deposits tone without lifting, so black hair looks richer with brown shimmer. Expect color to fade after 4 to 6 weeks depending on wash frequency.
Q: Can I do face-framing highlights at home without them going brassy?
A: Yes, if you use small slices, limit lift to one or two levels with 10 to 20 volume developer, and immediately tone with a demi-gloss. The common mistake is leaving foil on too long or using too-strong developer.
Q: How often should I use a bond builder after highlights?
A: Use a bond builder like Olaplex No.3 hair perfector once weekly after highlighting sessions for three months if you heat style a lot. Buy from the official Amazon store or Ulta to avoid counterfeits.
Q: Will highlights make my curly hair drier and how do I prevent it?
A: Lightening opens the cuticle and increases porosity which can feel drier. Prevent this with shorter processing times, a protein-weekly treatment if hair feels mushy, and leave-in cream before heat. Avoid overlapping bleach on previously lightened areas.
Q: Is a root smudge necessary with brown highlights on black hair?
A: Not necessary, but it is helpful. A root smudge blends the lift and stretches the time between salon visits to 8 to 12 weeks, which is great if you prefer low upkeep.

