
I ruined a dye job trying to save $200 and then paid a stylist $400 to fix the brassiness. Since then I learned which updos survive long photoshoots, which need a mid-reveal touchup, and which tools are worth splurging on. These wedding updos work across straight 1B hair to looser 3C curls with adjustments. Most take 15 to 45 minutes, a few are 5 minutes when you already have textured second-day hair. Budget ranges from under $10 for pins to a $150 tool I actually use.
Classic Low Chignon With Face-Framing Pieces
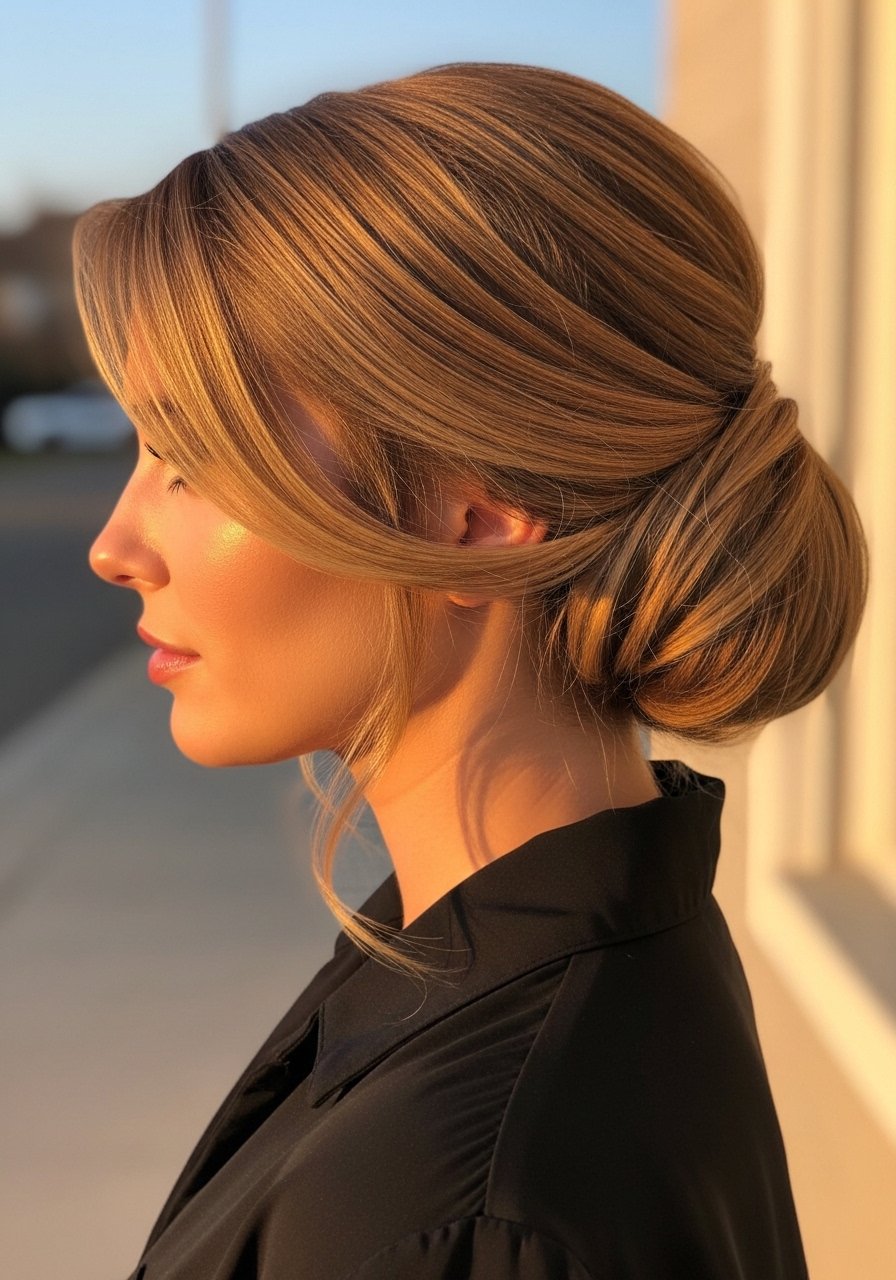
This is the one I suggest when someone wants something clean and photo-proof. It sits at the nape so it flatters long and oval faces, and it works on straight to wavy hair. Rough-dry hair with two spritzes of a medium-hold texturizing spray then make three horizontal sections, twist each toward the nape, and pin into a soft knot. I set my flat iron to 325 F when I smooth flyaways first. Common mistake is using too much product and weighing the chignon down. This is DIY friendly, but ask a stylist for a sleek finish if your hair is very fine.
Messy Donut Bun With Hidden Pins
If you want volume without backcombing, this is your move. Use a medium donut sponge and wrap pre-textured sections loosely around it using five to seven bobby pins tucked horizontally. For 3A to 3C textures, skip heavy gel and instead apply two pumps of a curl-defining cream before pinning so the bun holds without crunch. Budget is under $15 for the sponge and pins. The mistake is making the bun too tight, which kills the soft wedding look. Salon tip, ask them to pin in a handful of micro-extensions if you need more width.
Twisted Low Knot With Ribbon Accent
This feels romantic but is forgiving if you are learning pins. Divide hair into two, twist each section once, cross them, and tuck the ends into the base, using four grips. I add a 1/4 inch silk ribbon tied once for photos. Works best on straight to slightly wavy hair and takes 10 minutes. The usual error is tying the ribbon too tight, which flattens the twist. Use a dab of a light-hold hairspray on the outer layer only. DIY is straightforward and the ribbon hides imperfect pin placement.
Braided Crown That Keeps Its Shape
Crown braids are amazing for medium to thick 2B through 3C hair because the braid tucks volume while keeping the face clear. Start with a Dutch braid on one side, pick up three small pieces every half inch for a tight, secure braid. The trick I learned is to pin the braid down with pins placed every 1.5 inches, not just at the ends. Mistakes include using slick oil before braiding which makes strands slip out. This takes 20 to 30 minutes at home. If you want extra hold, weave in a ribbon or do a light mist of anti-frizz spray after pinning.
Low Bun With Veil Loop
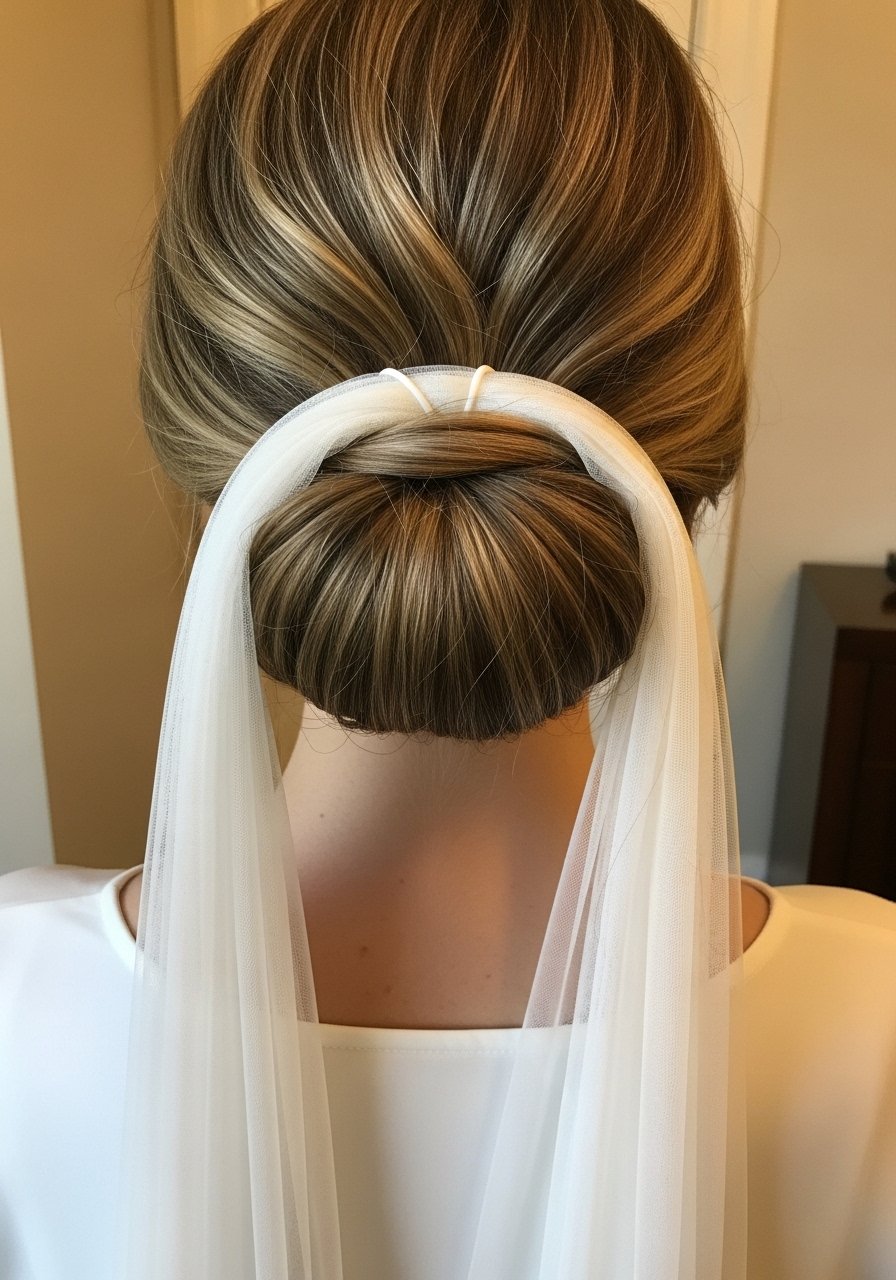
If your veil will attach to the updo, plan the anchor first. Construct the low bun, leave a small loop of hair at the base, and tuck the veil comb into that loop before securing with pins. This secures heavier veils for all hair densities. Pro tip, place a small U-shaped pin under the comb as a safety. Common problem is attaching the veil last, which shifts the whole bun. Time is 10 to 20 minutes depending on practice. If your veil is heavy, book a stylist for reinforcement on the day.
Sleek High Bun With No Flyaways
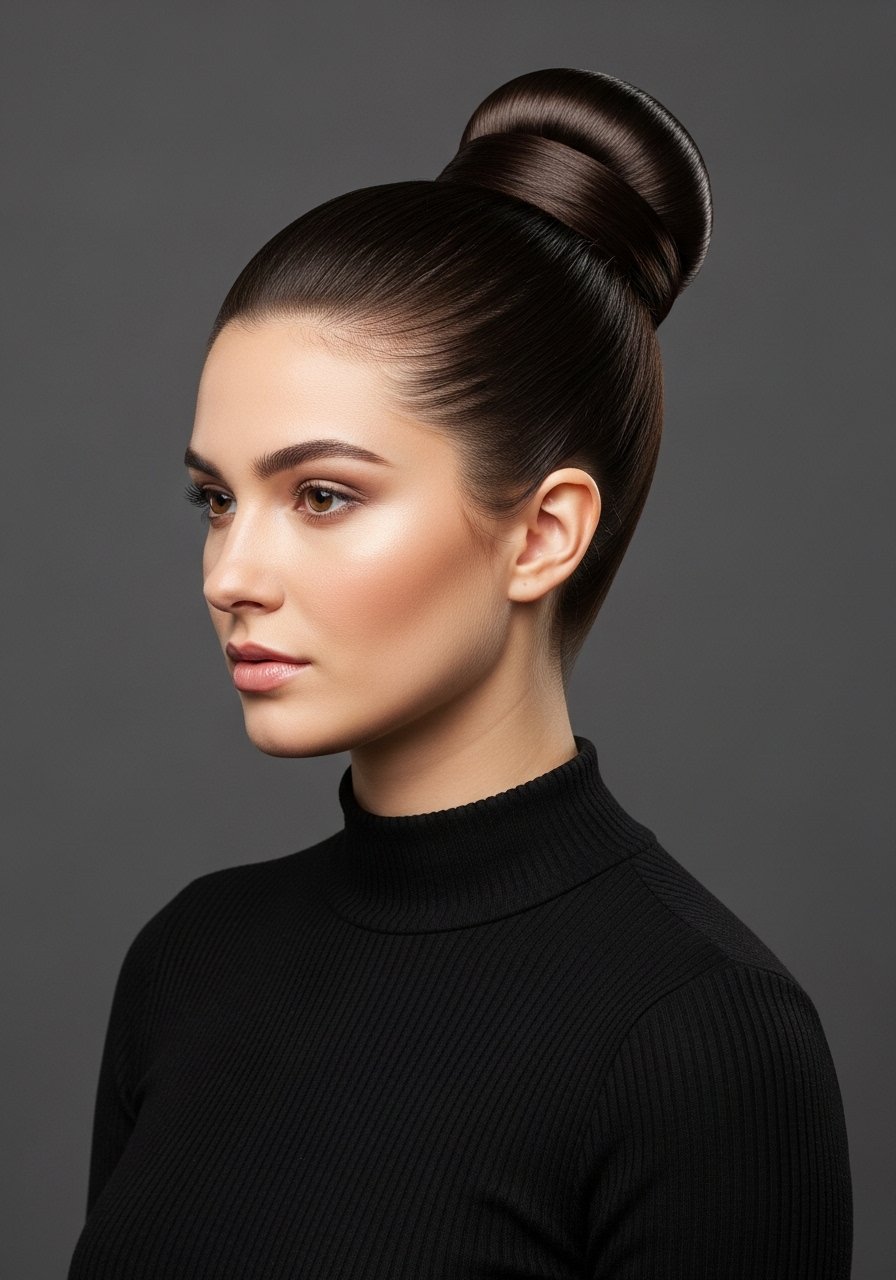
For fine hair that needs structure, the key is product placement. Apply one nickel-size amount of a smoothing cream to damp roots, blow-dry on medium heat with a round brush, and set your flat iron at 300 F to tame the last 1 to 2 inches for a glassy finish. Use a boar-bristle brush to gather hair into a high pony, then coil into a bun. Most people over-spray and end up crunchy. Mist sparingly with a flexible hold hairspray and smooth remaining baby hairs with a toothbrush spritzed lightly with spray. Salon-level finish is easy if you practice the brush technique.
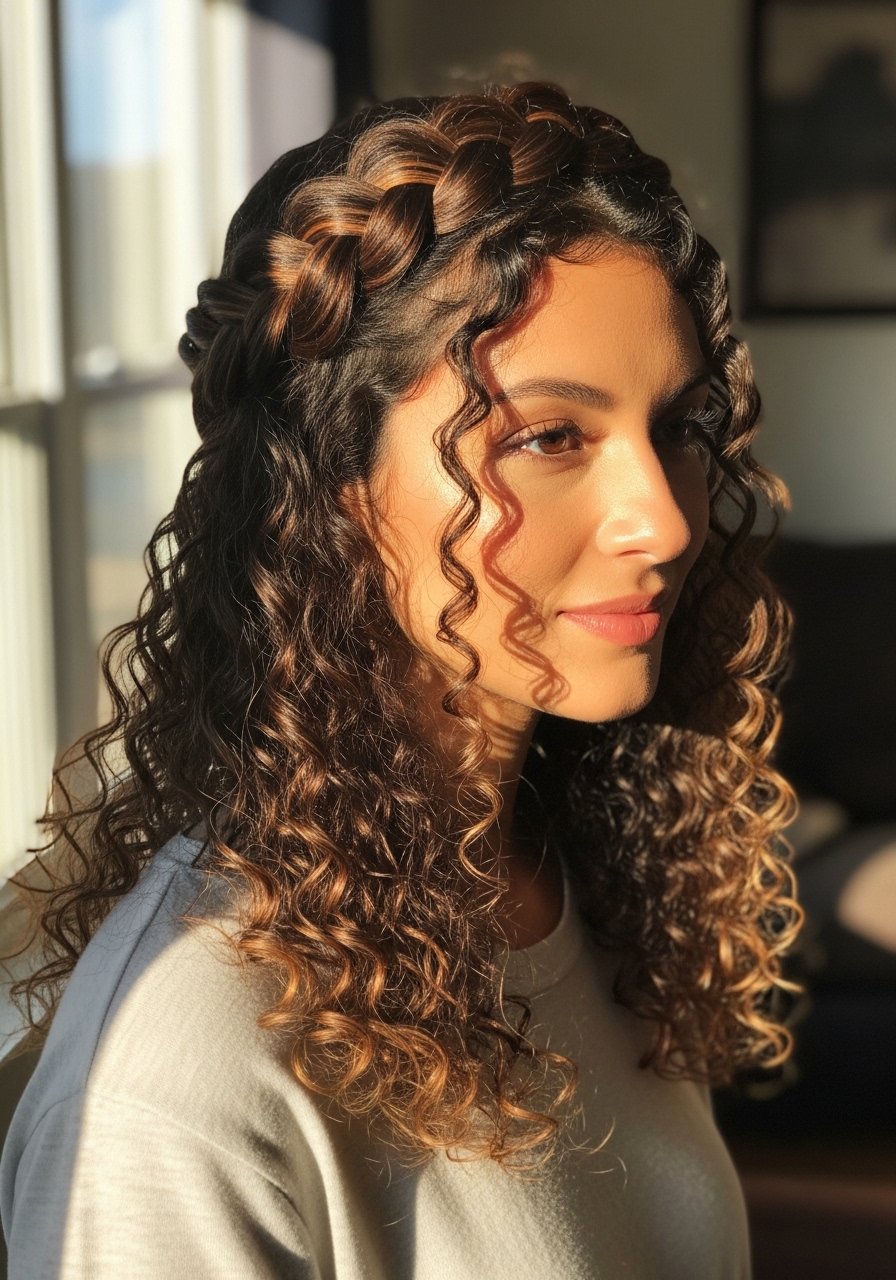
Textured Half-Up Twisted Crown
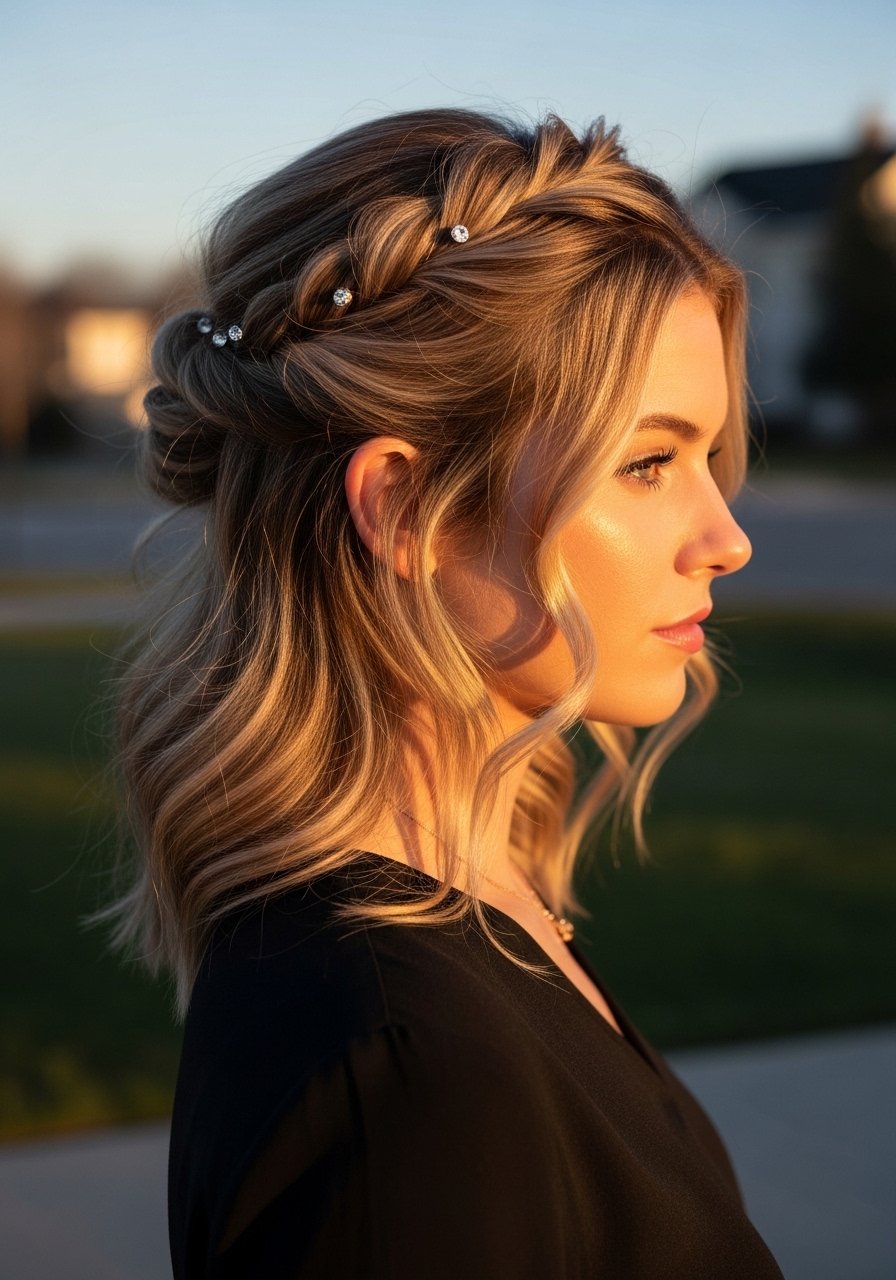
This is for anyone who wants updo vibes but also hair down. Take 1.5 inch sections from each temple, twist back and secure with pins, repeating every two inches to create a band. For fine or slippery hair add a quick 1/4 teaspoon of dry shampoo at the roots to create grip. The usual frustration is the twists loosening during the reception. If you expect a lot of dancing, anchor the last twist with a small comb or two pins crossed. Works on 1B through 3A hair, 15 minutes at home.
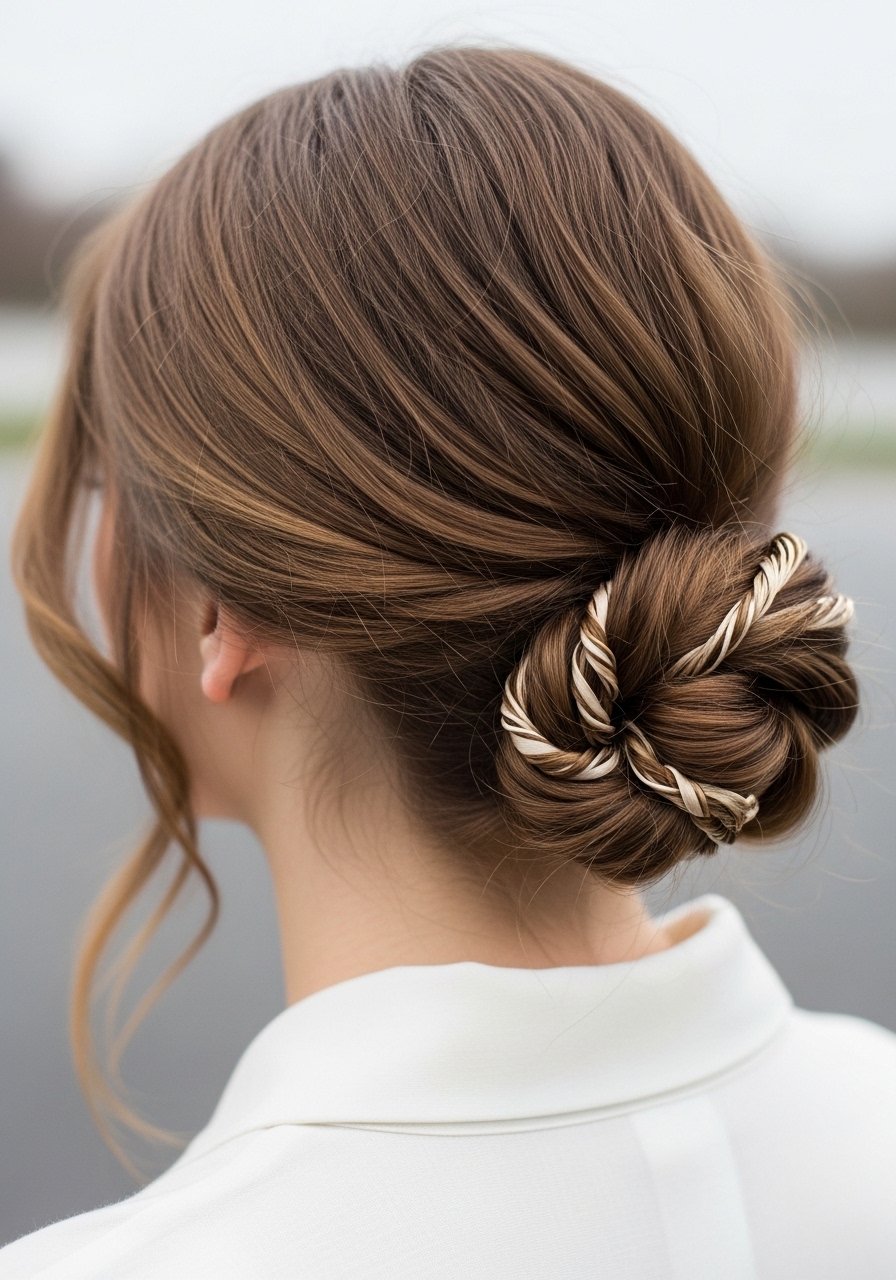
Fishtail Braid Pulled Into a Low Knot
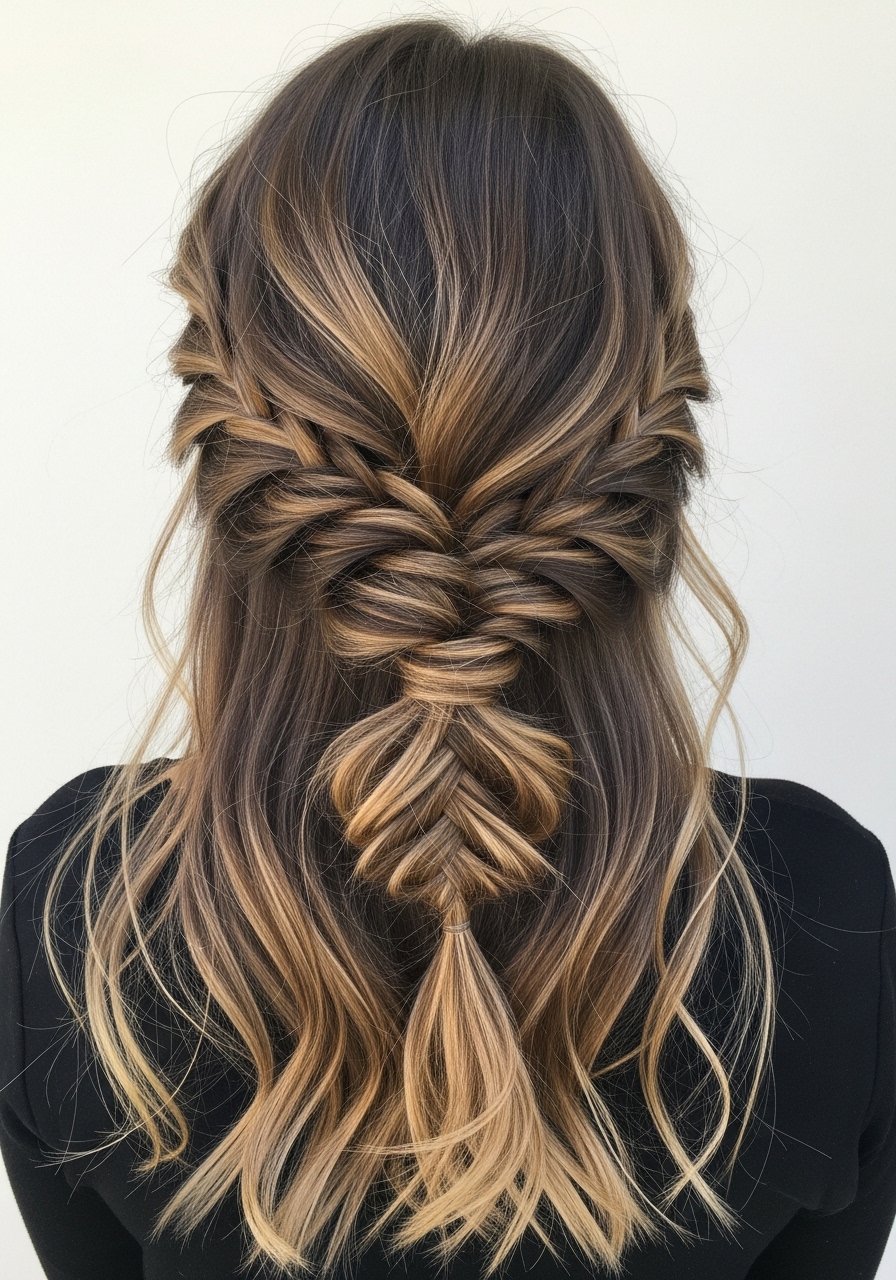
Fishtails look intricate but are forgiving. Start with a standard fishtail on the left side, pull the braid apart in five spots to pancake it, then wrap into a low knot and pin. This gives a romantic, messy look suitable for thick and textured hair. People make the mistake of overdoing the pancaking making the braid fall apart. Keep twelve to fifteen pins handy for secure placement. I like to add three drops of a shine serum on the ends only. DIY is doable for long hair, but short long layers may need a stylist.
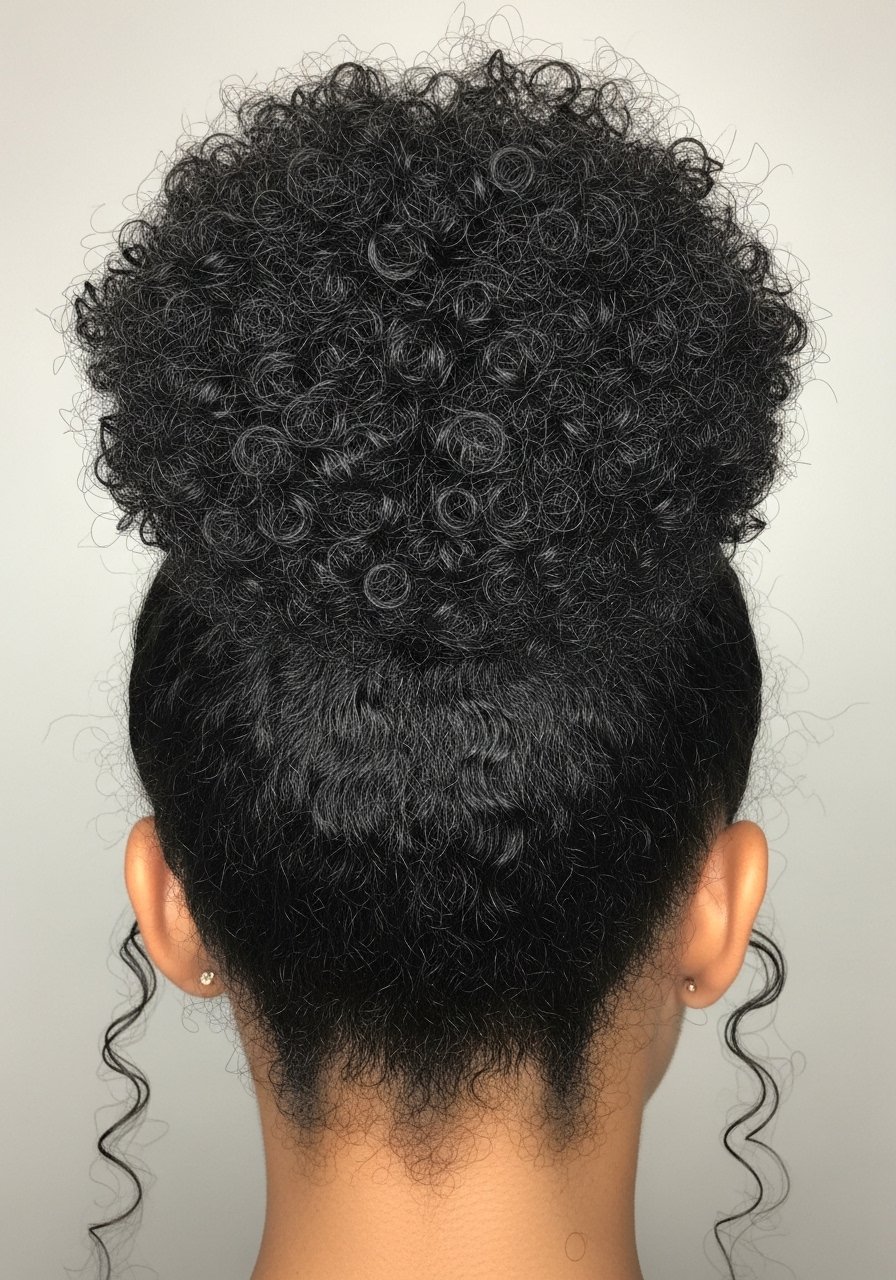
Rope Braid Chignon For Curly Hair
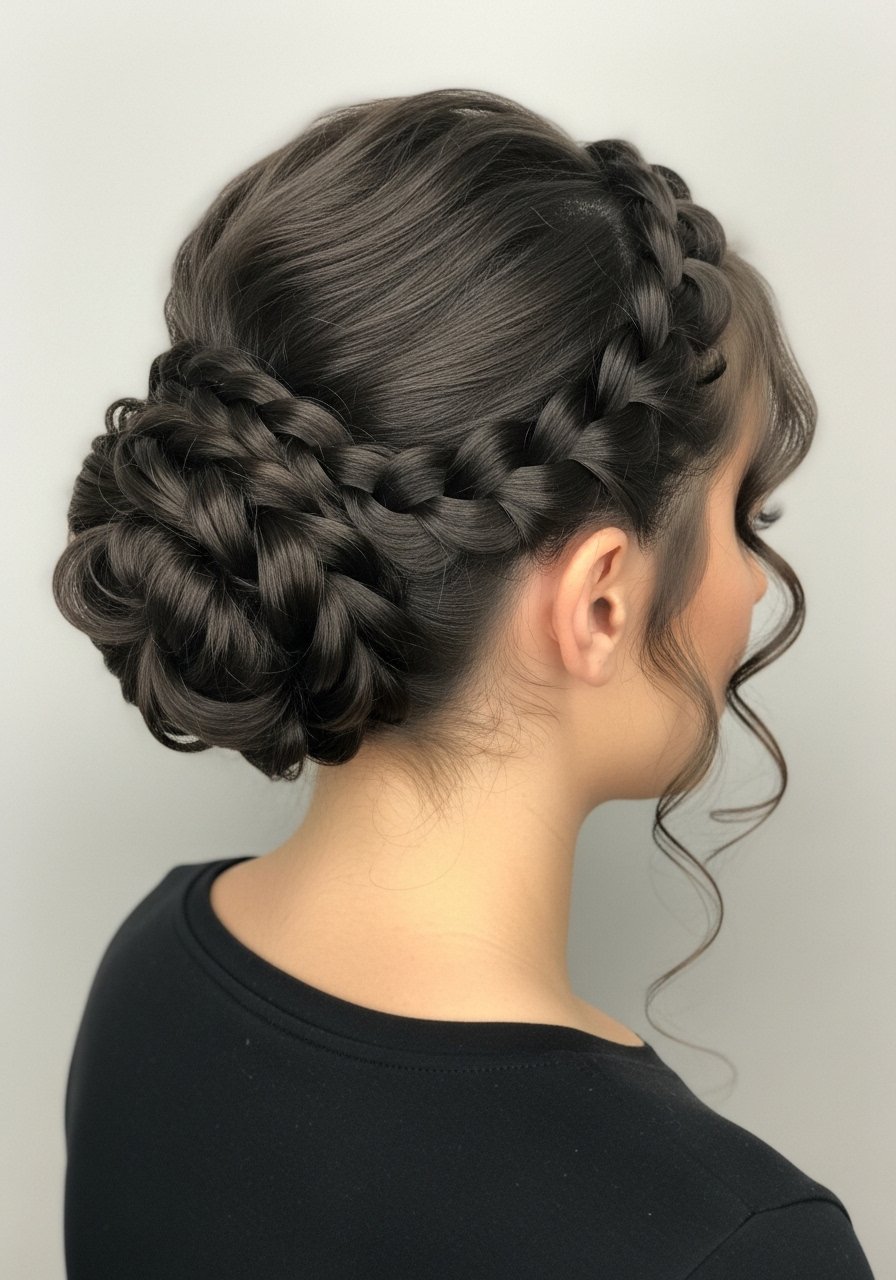
For coily and curly textures, rope braids hold better than three-strand braids because they compress the curls. Section hair into two and twist each section toward the face, then wrap them opposite for a rope braid. Coil the braid into a chignon and anchor with long pins. Avoid brushing the hair out first which creates frizz. This takes 25 to 35 minutes and is a great DIY if you practice the twist tension. If your hair is fragile, apply a lightweight leave-in cream before twisting, and avoid any heat over 300 F without protectant.
Braided Halo With Fresh Flowers

Halo braids are unbeatable for outdoor ceremonies. Use a Dutch braid starting at one ear, work around the hairline and pin at the opposite ear. Tuck real or silk flowers into the braid with hairpins. The common mistake is braiding too tight which gives a crown-like headache. This style is better for medium to thick hair; thin hair can get the same look with filler braids or micro-extensions. If you're using fresh flowers, pin them into the braid at the last minute and refrigerate them beforehand.
Low Twisted Pony With Hair Wrap
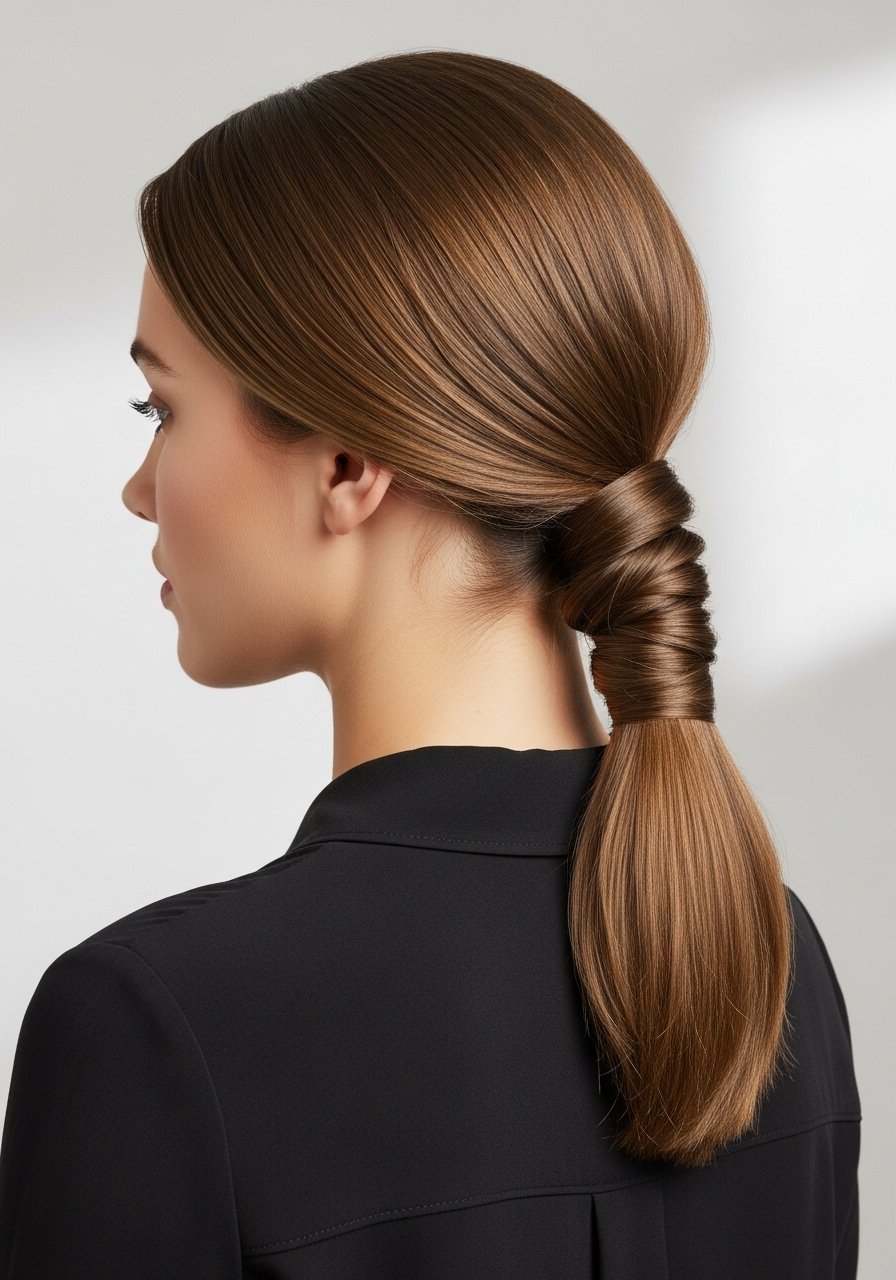
When time is limited, a polished low pony looks bridal with little effort. Secure a low pony with a snag-free elastic, then take a 1-inch section from underneath, wrap it around the elastic twice and pin hidden underneath. For straight and fine hair, roughen the ponytail with one or two passes of a 1-inch curling iron at 275 F to add texture. The mistake is skipping the hidden pins, which makes the wrap unravel mid-reception. This takes five to ten minutes and is great for second-day hair.
Vintage Roll With Soft Volume
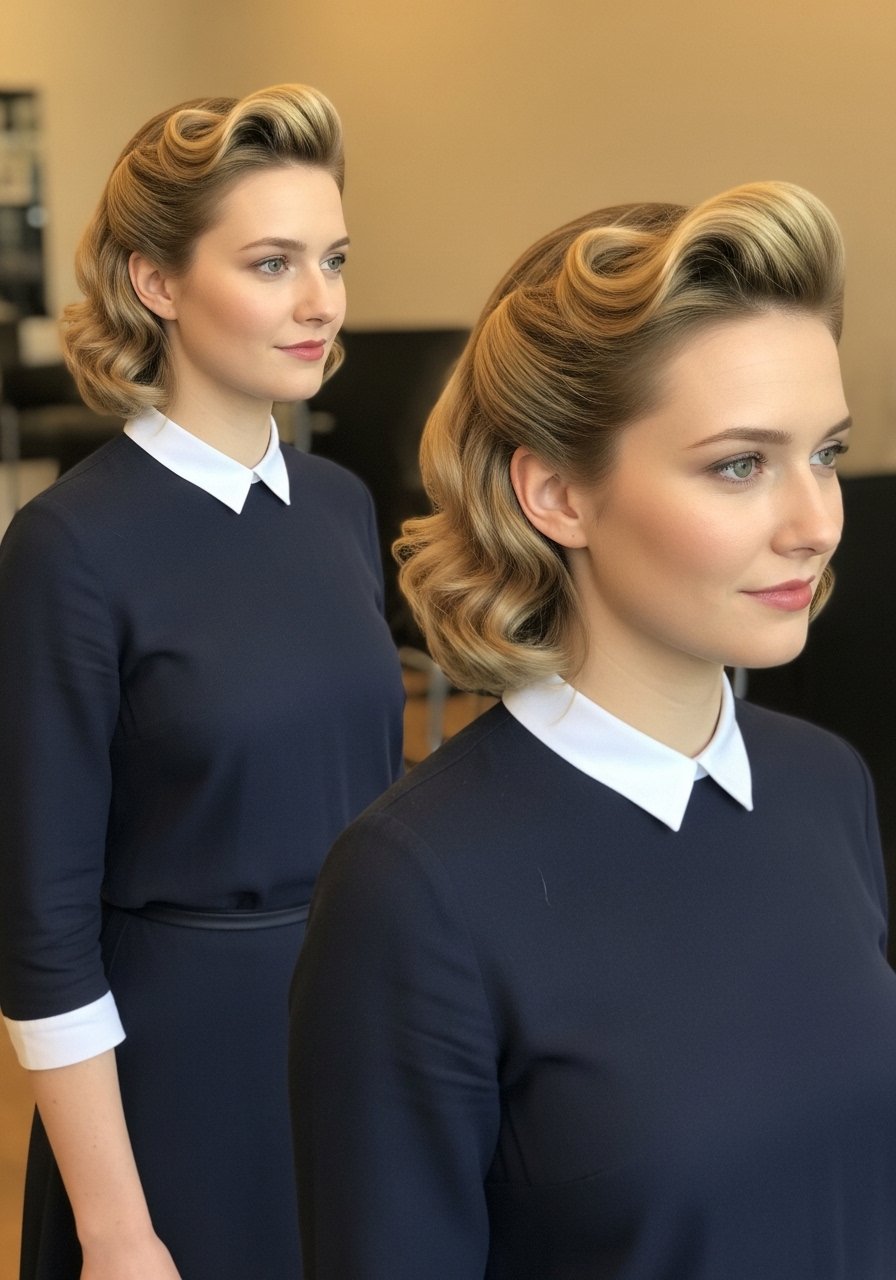
Vintage rolls frame the face and photograph well. Backcomb a 2-inch top section at the roots in three sub-sections, smooth the top layer gently, and roll under toward the scalp, pinning every inch. Use only a pea-size of smoothing cream on the outer layer. People over-backcomb which makes the roll look lumpy and fragile. This takes about 20 minutes and is best for shoulder-length to long hair. If you have scalp sensitivity, do a patch test for strong-hold sprays.
Knotless Braided Updo For Heavy Hair
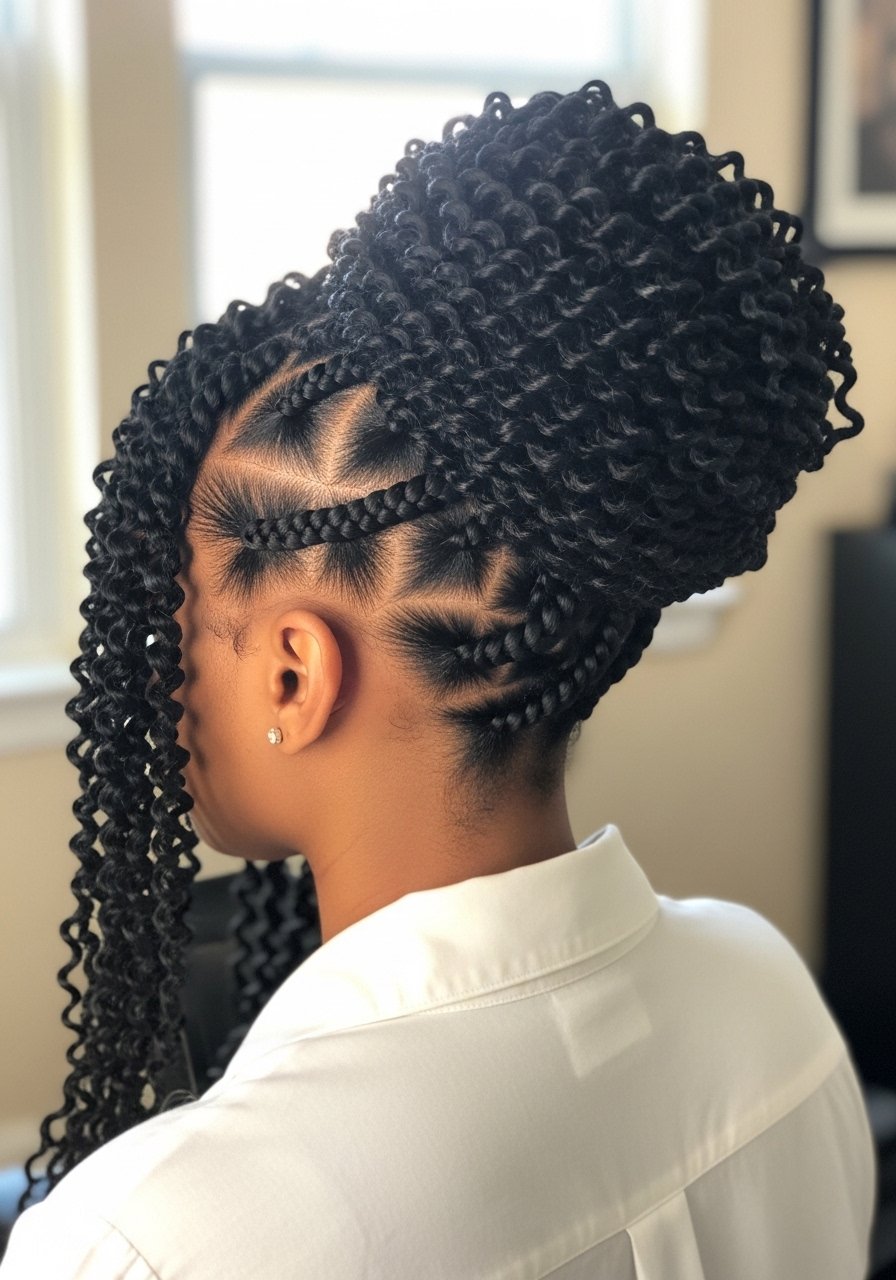
For very thick hair that would otherwise droop, knotless braids distribute weight evenly and create an updo that lasts. Start the braid with your natural hair, feed-in extensions if needed, and coil the braids into a high bun. I recommend using braiding hair rated for heatless styling and anchoring the base with three to four long pins. This is a salon-level DIY if you have braid practice. Mistakes include using synthetic hair that frizzes with humidity. Ask your braider about hair weight and secure the style with a lightweight oil on the ends.
Soft Boho Updo With Face-Framing Curls
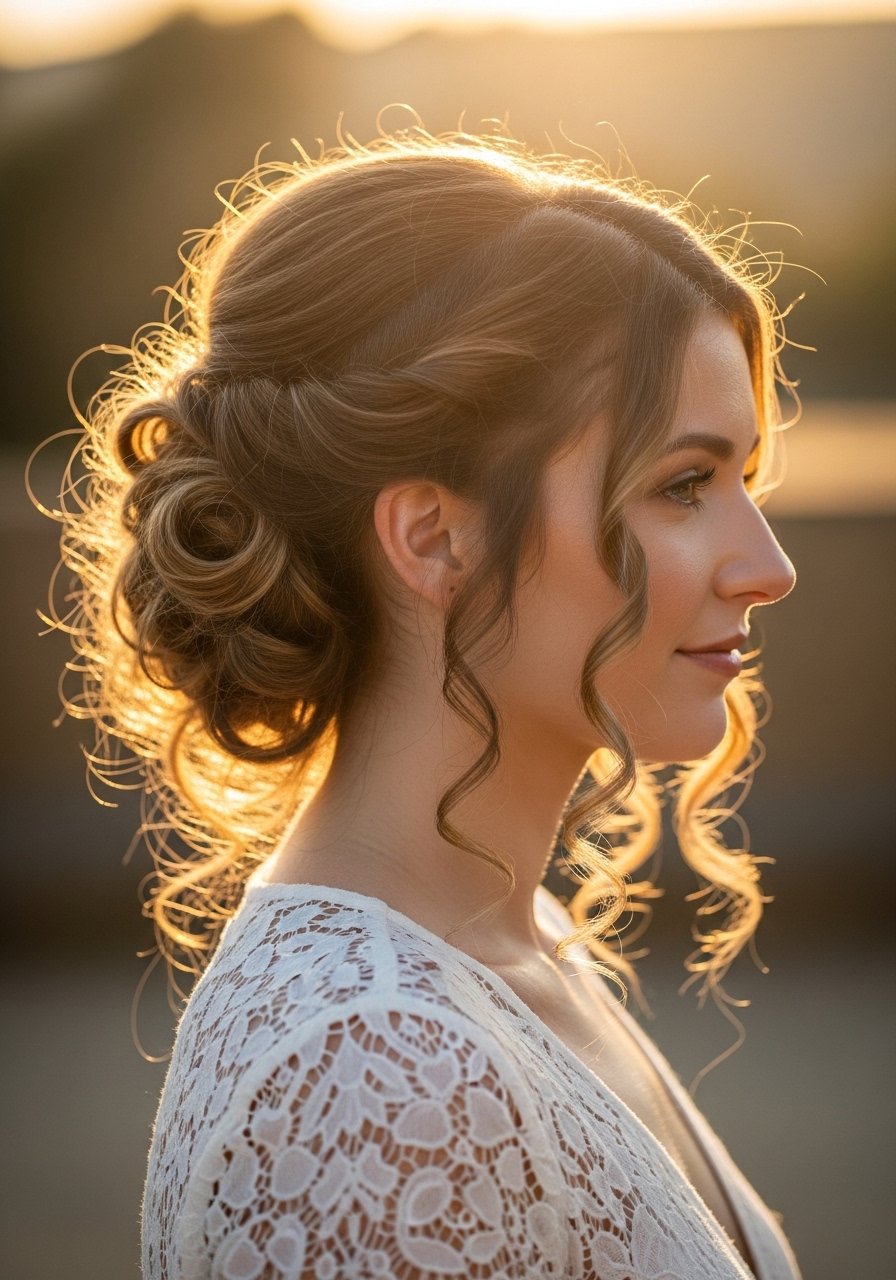
This is my go-to for brides who want a relaxed look that still photographs. Section hair into four panels, loosely twist and pin each panel into the center, leaving small curls out around the face. For curly hair, I apply a dime-sized amount of cream to define only the pieces that will frame the face. The big mistake is overloading the pins in one spot which creates tension and pulls. This style is DIY friendly for 2B through 3C types. For extra hold without crunch, mist with a humidity shield spray.
Sculpted Side Roll With Pin Detail
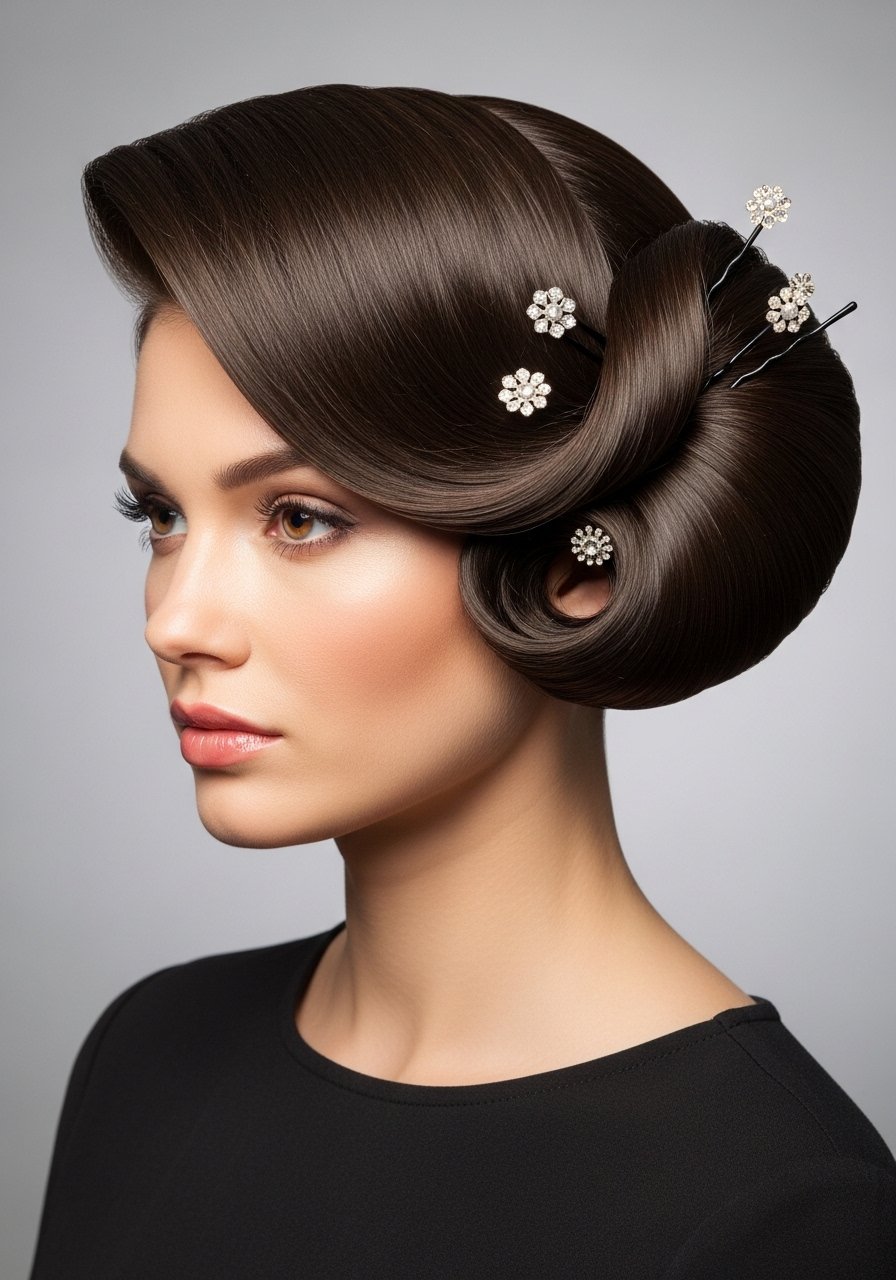
The side roll is an elegant option when you want vintage lines without full updos. Blow-dry with a round brush for root lift, then roll the hair inward toward the face from mid-length and pin discreetly behind the ear. Add two to three decorative pins for sparkle. Common error is letting the roll sit too low which hides the jawline. This takes 15 minutes and works well on straight to wavy hair. If you use heat, always spray heat protectant on damp hair first.
What I Actually Keep In My Wedding Updo Kit
- Honestly the hairpins are life. Assorted bobby pins and U-pins (~$6) in bulk, I buy matte black and brass.
- For hold without crunch I reach for a flexible hold hairspray (~$12).
- For repairing light damage between styling, Olaplex No. 3 hair perfector 3.3 oz. Watch for counterfeits, buy from the official Olaplex store on Amazon or Sephora.
- A silk option for prevention, a silk pillowcase queen size under $25 reduced morning frizz.
- For texture on straight hair, a medium texturizing spray that is salt-free.
- For curls, flexi rods set to create heatless shaping.
- A sturdy elastic pack, snag-free elastics (~$6).
- Decorative pins, bridal hair pins set for photos.
- For smoothing and protectant, a Color Wow heat protectant or similar spray.
- For on-the-day fixes, a travel size dry shampoo to add texture and absorb oils.
The Mistakes I Made So You Don't Have To
- Heat protectant goes on damp hair, not dry. The cuticle is more open and the product actually absorbs. A lightweight heat protectant spray is a small purchase that prevents fried ends.
- If your curls look defined the moment you finish styling them and frizz back into a triangle by the time you sit down at your desk, this is for you. Add a leave-in cream under gel and skip gel-only methods for better lasting hold.
- Hair grows about half an inch a month at most, regardless of what biotin gummies promise you. The thing that helps length retention is reducing breakage with a silk pillowcase and weekly bond treatments.
- For pins, place them at a 45 degree angle and cross two for an anchor point. One pin perpendicular will not hold under dance-floor force.
- Drugstore shampoo is fine. Where you actually need to spend money is on a conditioner and a bond builder. Olaplex No. 5 conditioner tends to make damaged hair easier to style between trims.
Frequently Asked Questions
Q: How often should I use Olaplex No. 3 before a big event?
A: Once a week for three weeks before the wedding usually smooths and strengthens the hair enough for styling, without making hair feel gummy. If your hair is only slightly dry, two treatments spaced a week apart are enough. Buy from the official store on Amazon or a salon to avoid fakes.
Q: Can I do these updos on second-day hair or does it need to be freshly washed?
A: Most of these updos actually prefer second-day hair because the natural oils and texture give grip. If your hair is freshly washed and silky, add a dry shampoo and a few spritzes of texturizing spray, then let it sit five minutes before styling.
Q: Is heatless styling better for wedding hair when I have damaged ends?
A: Heatless methods reduce additional stress, but they do not fix split ends. Knotless braids and flexi rods are good options if you want no heat. For appearance, a bond builder once a week smooths the look until you can trim.
Q: How do I secure a veil to a messy bun without it drooping?
A: Create a small loop or pin base at the nape first, insert the veil comb into that loop, then anchor with a U-pin beneath the comb. If the veil is heavy, plan for reinforcement with an extra row of pins or see a stylist for a reinforced base.
Q: My scalp burns with strong-hold sprayed near the roots. What should I do?
A: If you have scalp sensitivity, avoid spraying directly on the scalp. Hold the can 10 inches away and mist the outer layer only. If irritation continues, test any product behind the ear 48 hours prior and consult a dermatologist if you see a reaction.
Q: How do I keep braids from loosening during a long reception?
A: Secure each braid with pins every 1.5 to 2 inches, not just at the ends. Lightly mist the braid with a flexible hold spray and tuck the ends into the base. For very active receptions, ask your stylist to add a few sewn-in anchors or tiny clear elastics at internal pressure points.

