
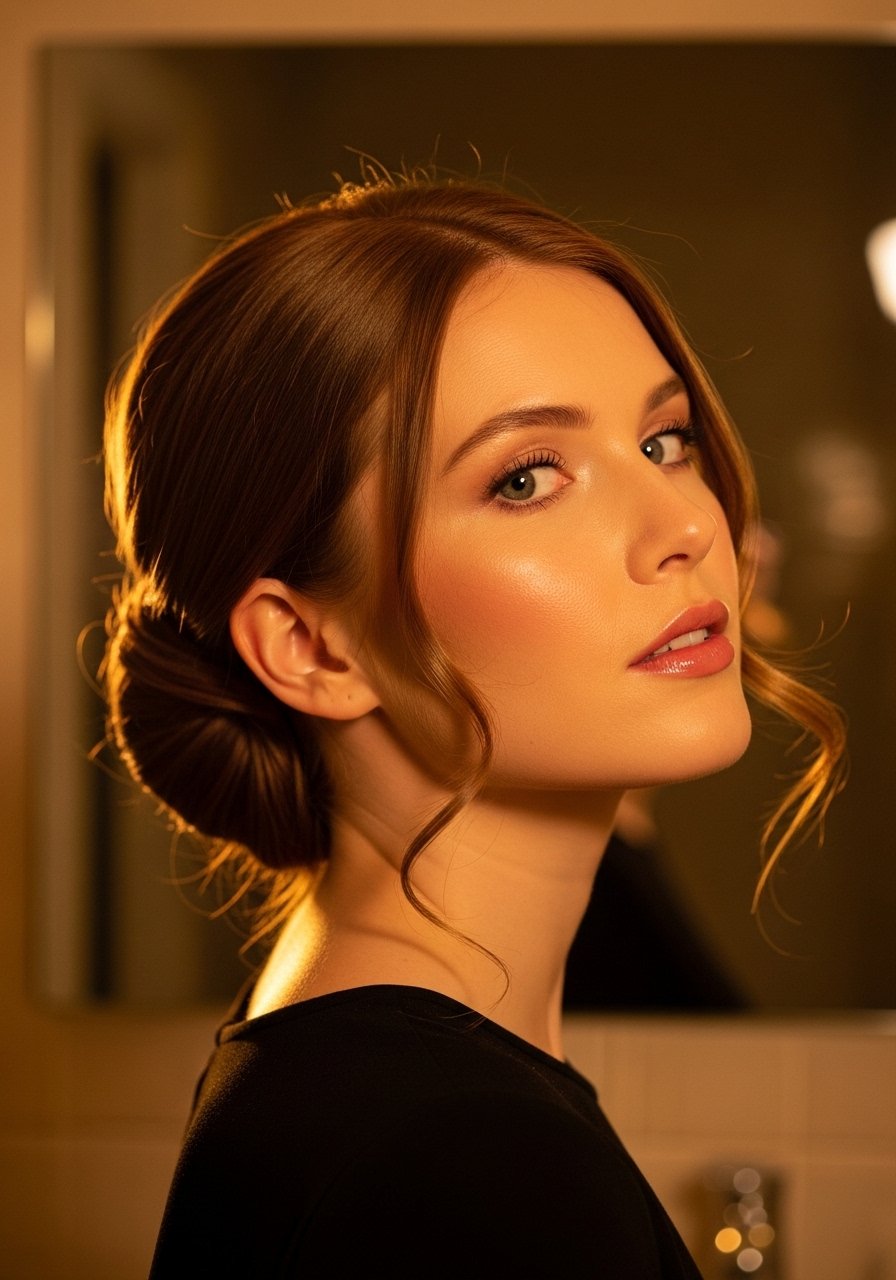
I was the maid of honor once and spent the ceremony tucking stray pins into a low bun that kept slipping, so I learned what actually holds a nape-updo for pictures and dancing. These are real solutions I have tested on friends and myself, from fine straight hair to coily textures with adjustments noted. Expect beginner to intermediate techniques, 10 to 45 minutes each, mostly under $40 unless you want a hairpiece splurge. A few styles are worth booking a stylist for, I say so where it matters.
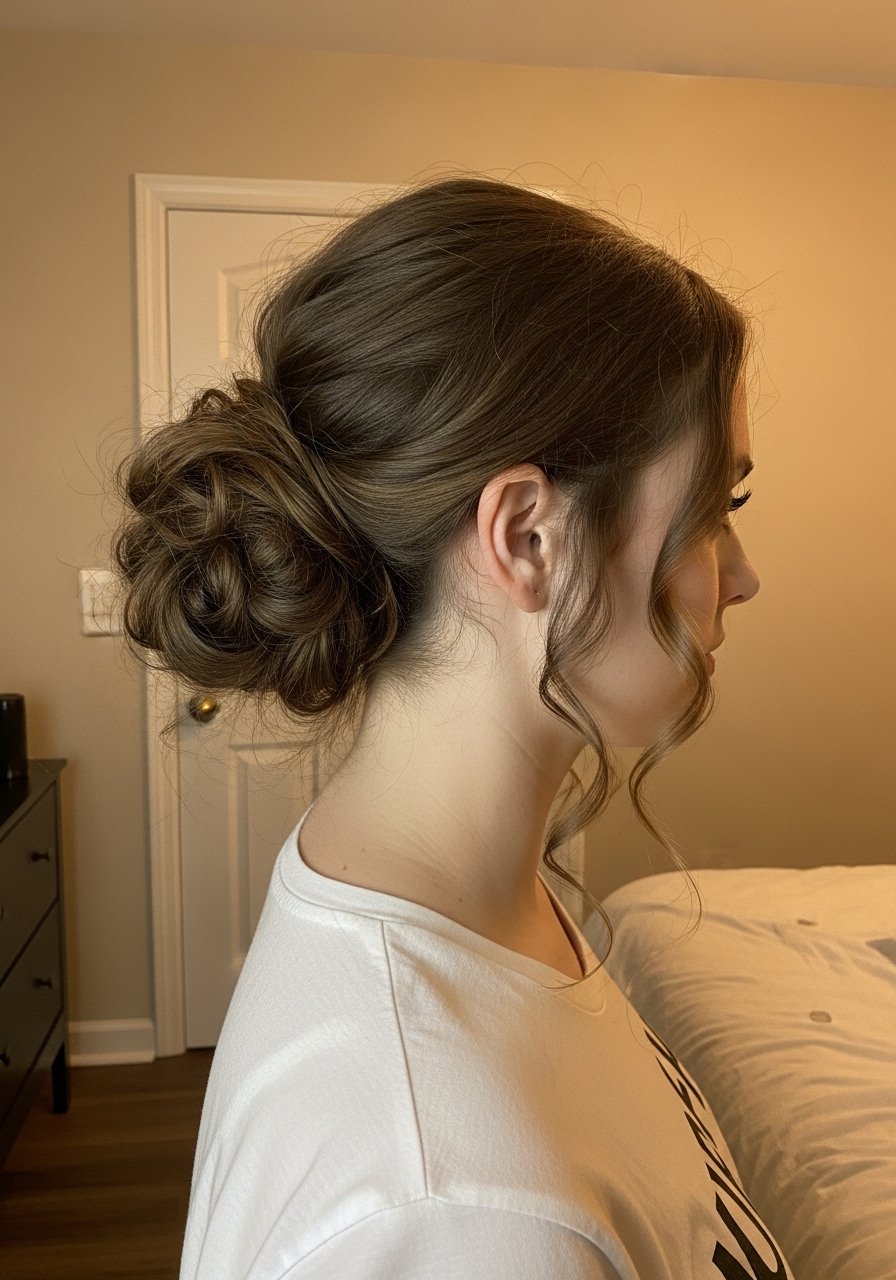
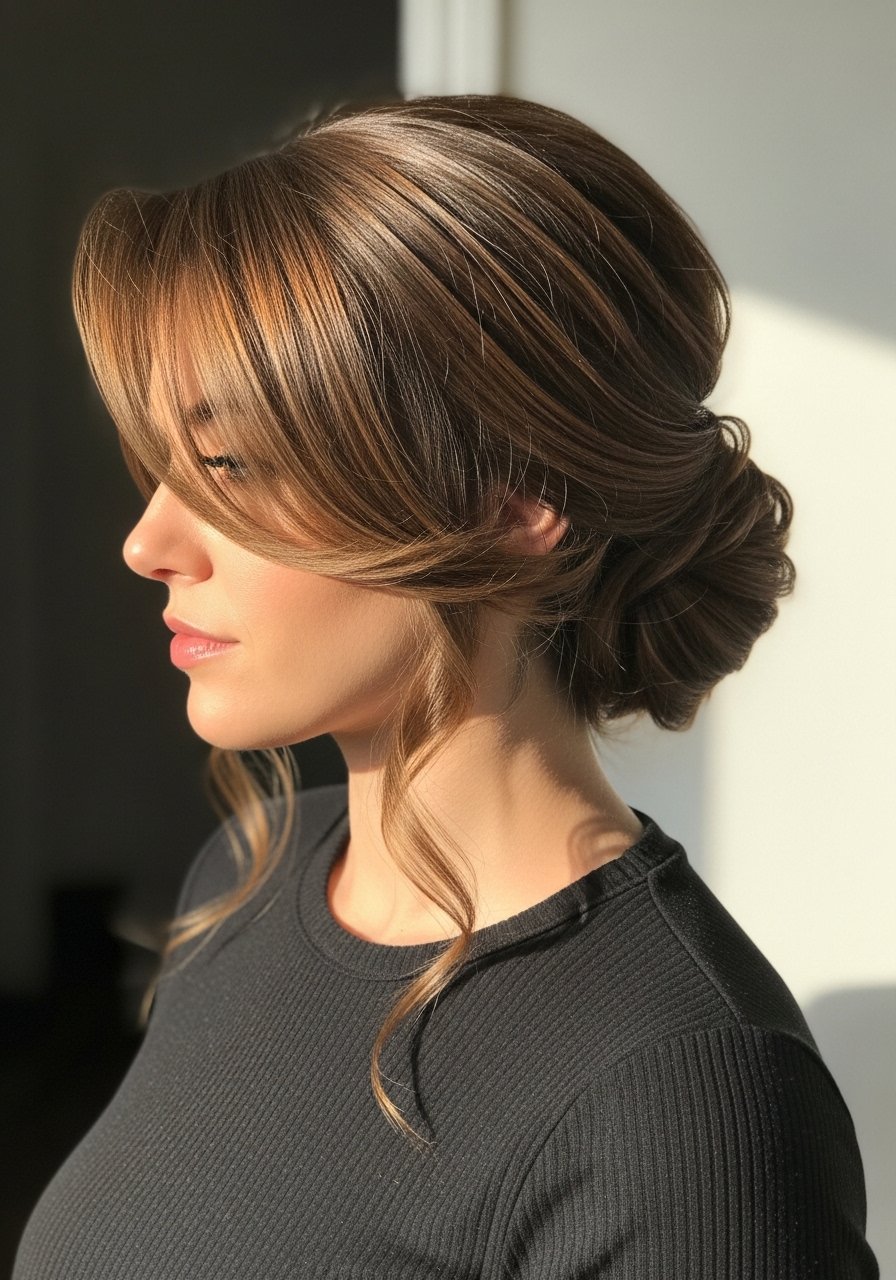
Classic Low Chignon With Face-Framing Tendrils
What makes it work, honestly, is tension and clean sections. Divide hair into three horizontal panels, clip the top two out of the way, twist the middle into a low chignon and anchor with two U-pins in an X pattern. For fine hair, tease a 1-inch ridge at the nape with a fine-tooth comb to give pins something to bite into. I like two spritzes of a medium hold hairspray before pinning, and a pea-sized amount of smoothing serum through the ends if humidity is a concern. This look suits straight to slightly wavy hair, takes 12 to 20 minutes, and is DIY friendly. Common mistake is overloading with oil, which makes pins slip. If your hair has been lightened repeatedly, do a bond builder treatment a week prior, and avoid aggressive backcombing on fragile strands.
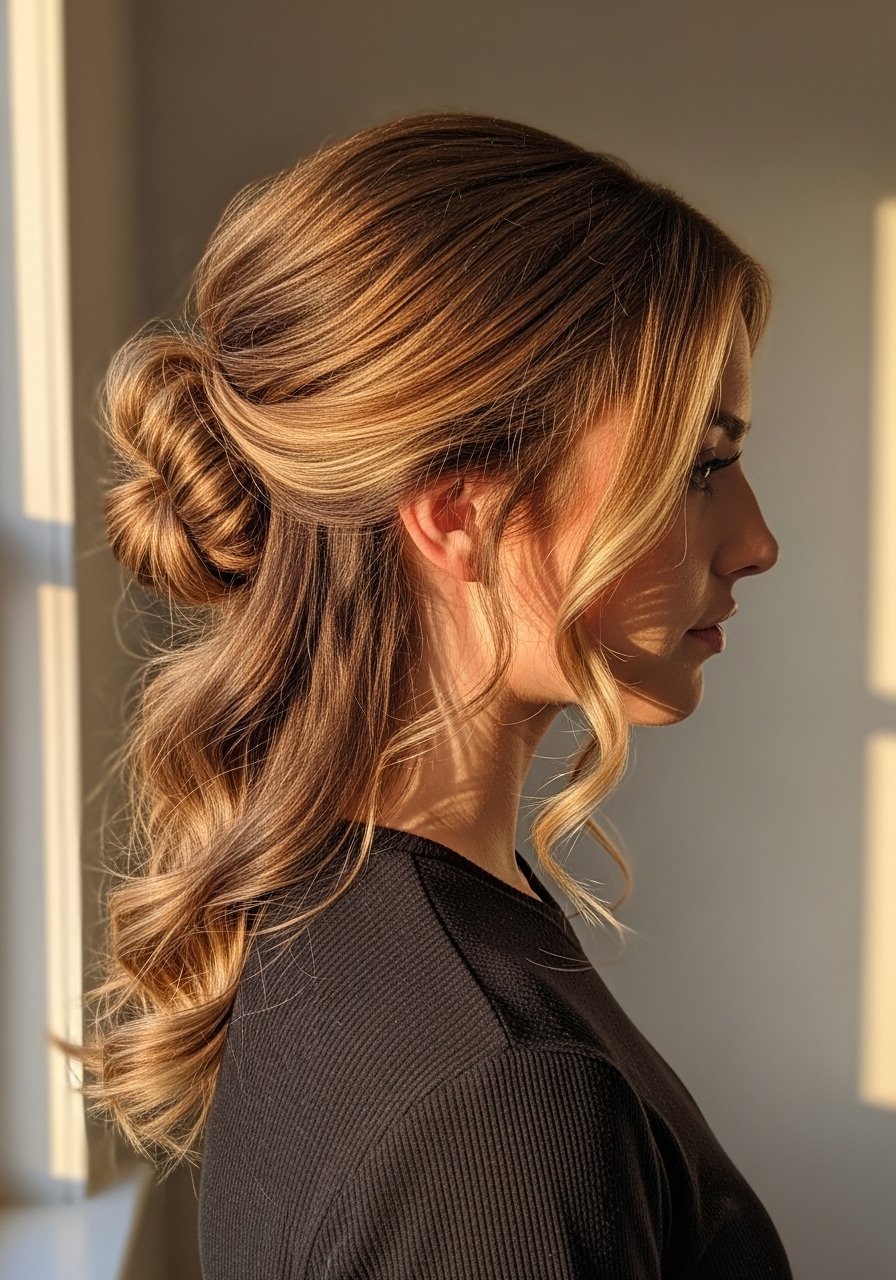
Textured Low Bun For Wavy Hair With Salt Spray
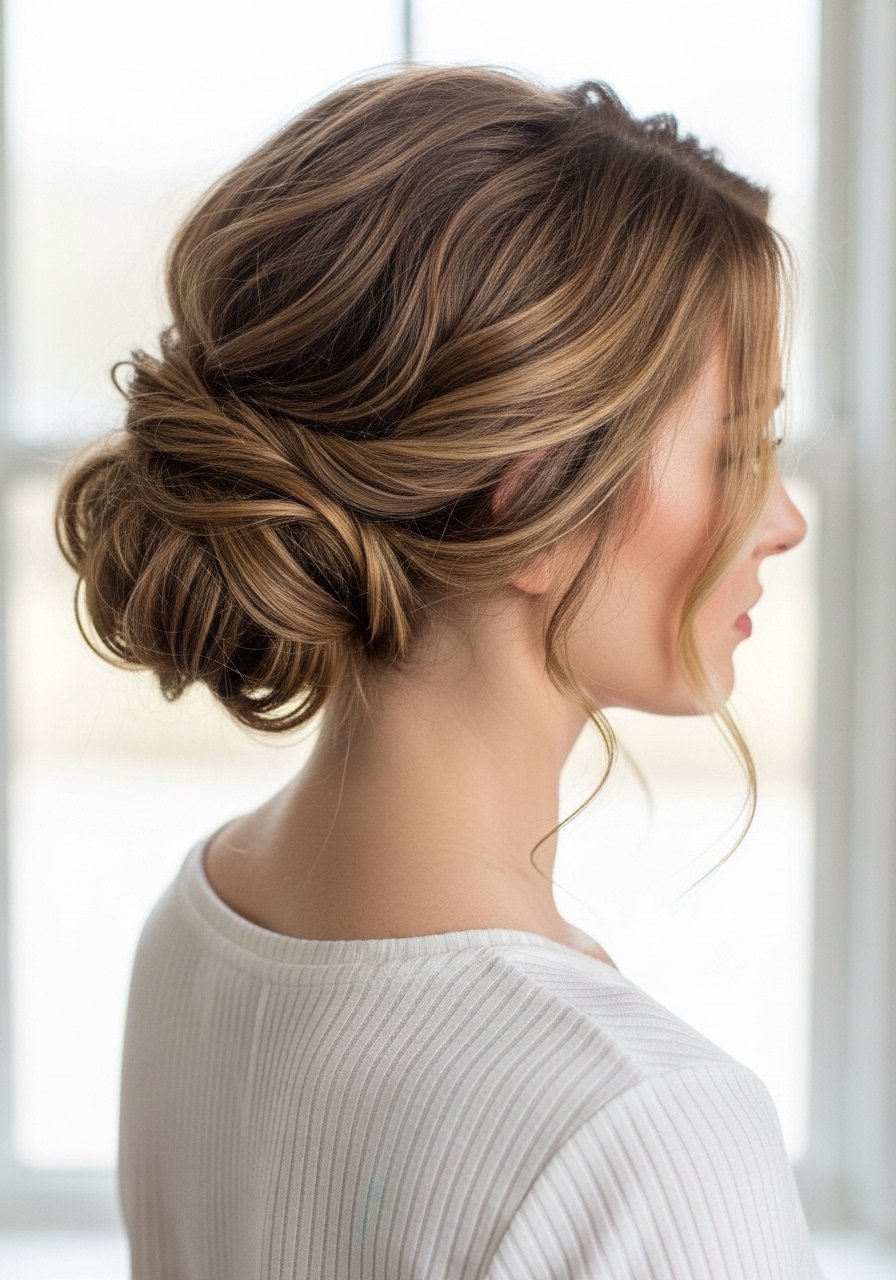
I stopped trying to smooth every wave and started enhancing texture, and my wedding photos stopped looking like helmet heads. Two spritzes of surf-style salt spray through damp hair, scrunch, then diffuse on low heat until 80 percent dry helps the bun read as soft and romantic. Section into three, loosely twist each section toward the nape, and pin where the twists overlap rather than trying to hide the pins. If you use a curling iron, keep it at 300F for fine hair and 350F for coarse hair, and always spray heat protectant first. This style fits 2A to 3C waves, takes about 20 minutes, and pairs beautifully with a light-hold flexible hairspray. Mistake to avoid, over-brushing after product drys, which flattens the texture.
Sleek Low Bun For Fine Straight Hair With Polish
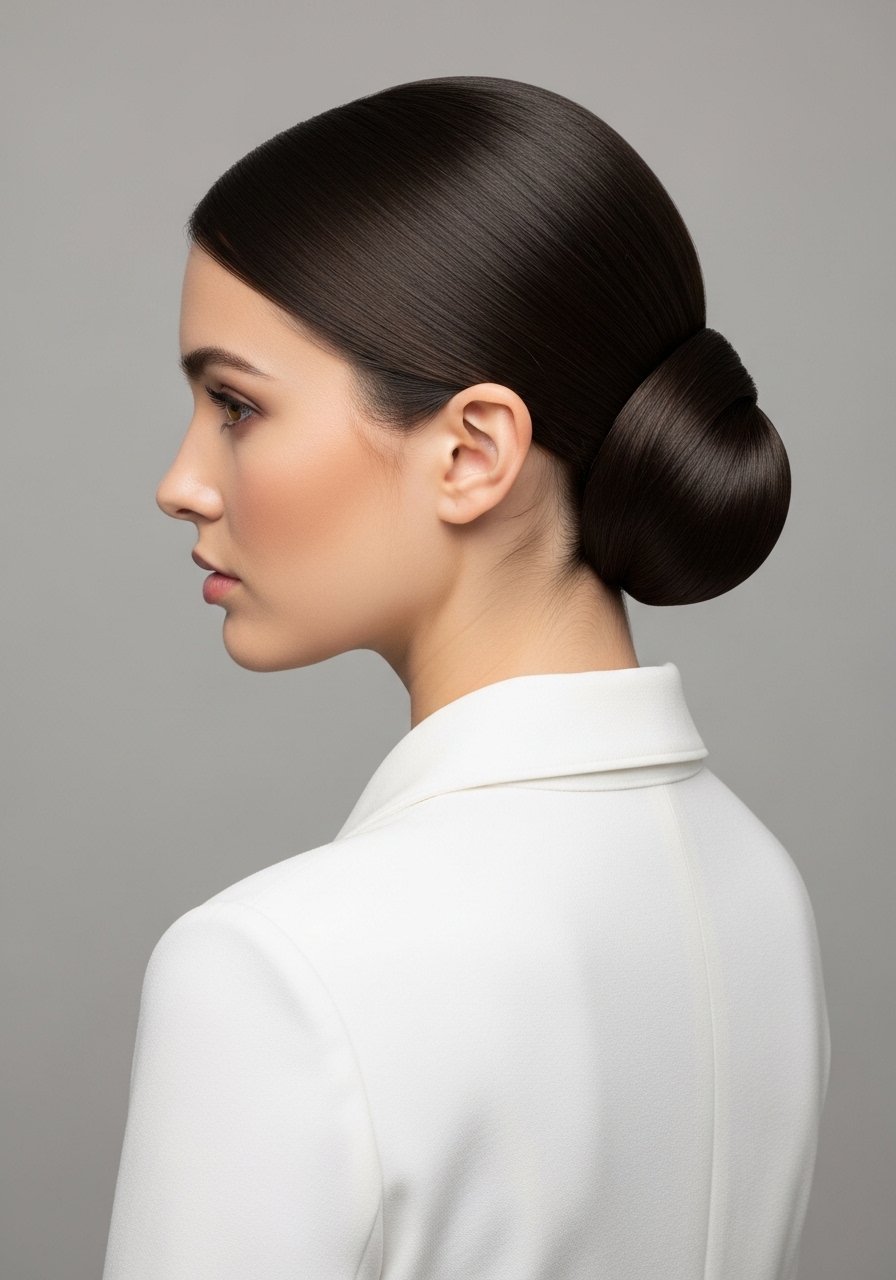
Fine hair needs control without weight. Work on damp hair, apply a dime-sized heat protectant and smoothing cream concentrated on mid-lengths and ends, not the roots. Blow-dry with a flat paddle brush on medium heat, finish with a light mist of anti-frizz spray and gather into a low bun, wrapping the hair tightly and securing with small ergonomic pins. One product that helps lock the look without stiffness is a light anti-humidity spray applied after styling. If you start with limp roots, a little dry shampoo at the root before pinning gives traction. DIY time is 15 to 25 minutes. Overuse of oil at the crown is the number one reason this style looks greasy in photos.
Braided Low Bun That Holds a Veil
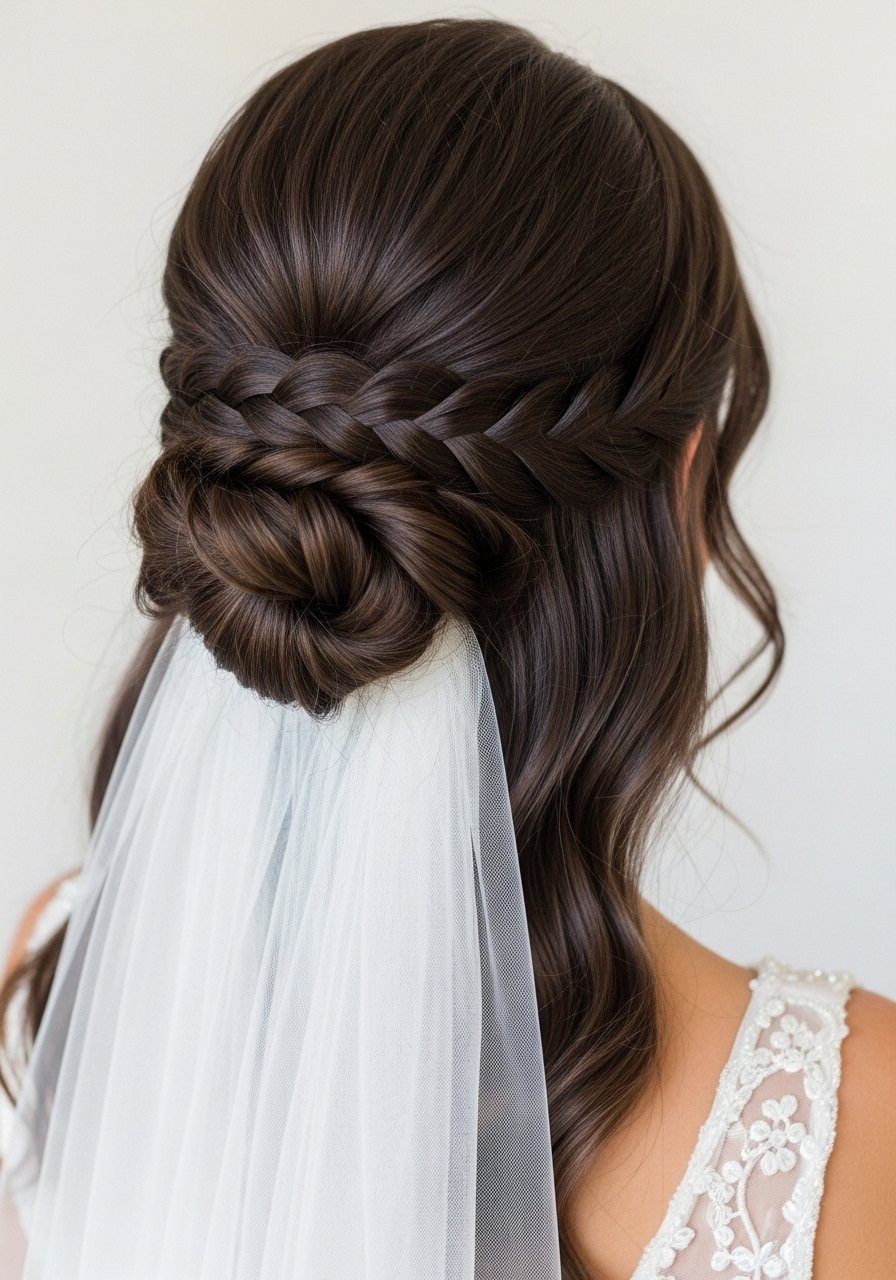
If you need a veil that will not droop during the reception, braid first. Make a loose three-strand braid along the nape underlayer, pin it flat, then build a low bun over it as your anchor. Use 2 to 3 U-pins through the braid into the scalp to prevent slipping. This is great for thicker hair and long wavy hair, and it saves you from wrestling with combs that will slide out of fine-haired buns. Budget friendly, about 20 to 40 minutes depending on braiding speed. Salon pros will sew the comb for extra security if the veil is heavy. Do not backcomb heavily on chemically compromised hair, instead use lightweight padding or a soft hairpiece.
Messy Low Bun For Curly Hair That Actually Lasts
My curls looked great on TikTok and like wet noodles by 11am. I finally fixed this by switching to a layering approach under gel. After washing, apply a palm-sized leave-in cream through damp curls, then two pumps of a light gel on top, scrunch and let set. For the bun, gather hair low with a loose elastic, pull the ponytail through once to create a loop, then tuck and pin sections to keep curl shape. Edge control on baby hairs is applied with a soft toothbrush, not fingers, for cleaner lines. This works best for 3A to 4A curls and takes 20 to 30 minutes post-wash. Mistake to avoid, skipping the leave-in under the gel, which makes curls collapse later.
Low Bun With Twists And Pearls For Soft Romance
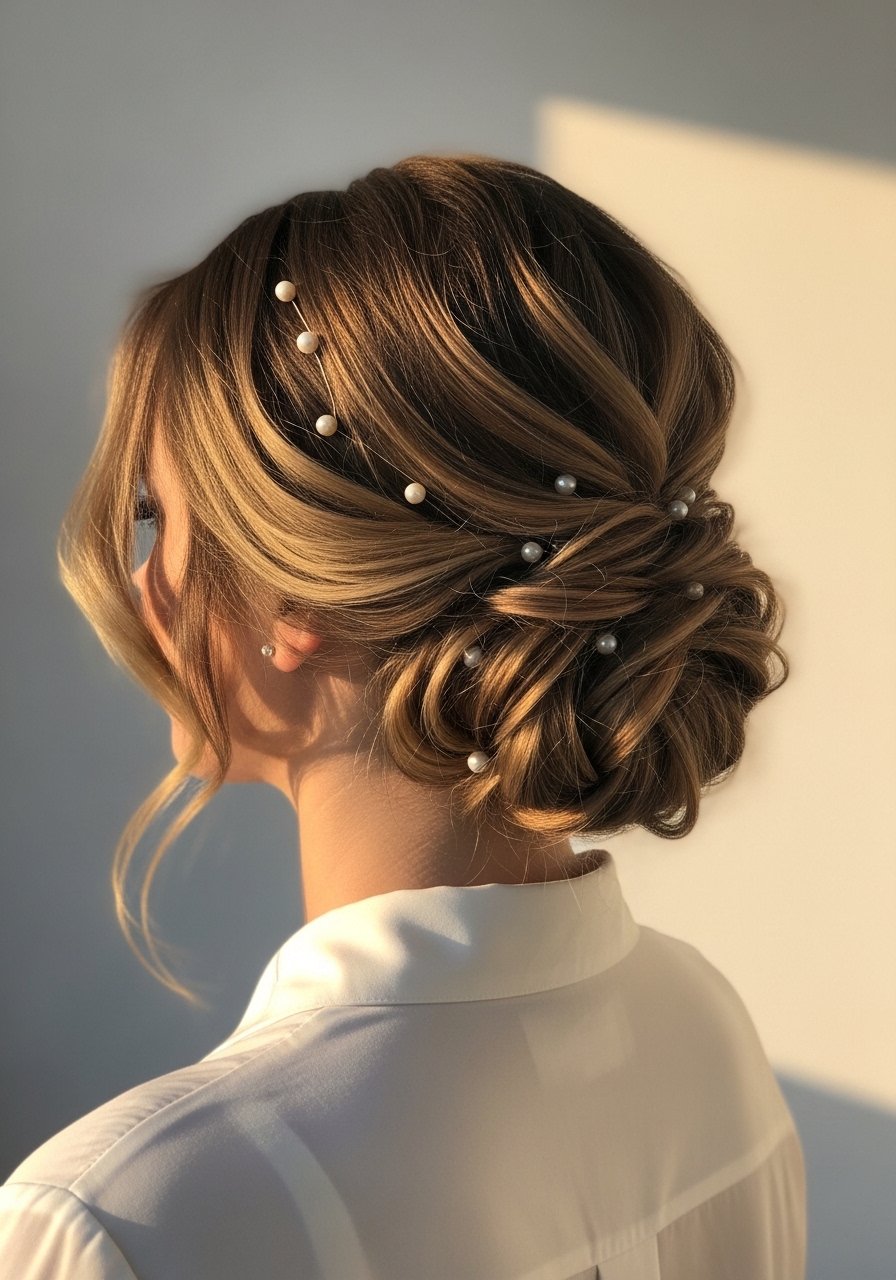
Tiny accessories read better in photos than one big clip. Divide hair into four vertical sections, twist each toward the center of the nape and pin where they meet, then tuck a couple of pearl pins along the seam. The pearls hide pin ends and add sparkle without weight. This method fits 2A to 3B hair, and takes 15 to 25 minutes. For very thick hair, do two larger twists rather than four small ones. A common mistake is sticking pins in randomly, which creates lumps in the silhouette. If you plan to dance, swap decorative pins for sturdier U-pins during the reception and change back for exit photos.
The Little Kit I Always Pack For Wedding Hair
- I bring a tiny emergency bag: extra bobby pins, three U-pins, a handful of clear elastics, and travel-size strong hold spray. Travel-size strong hold hairspray is useful if you need a quick reload.
- For smoothing, a 2.5 ounce anti-frizz serum in a pump works. A smoothing serum in a small pump keeps the bun glossy without making it heavy.
- If padding is needed, a small foam bun maker in black and beige covers most hair colors. A foam bun maker under $8 is worth it.
- For curly touch-ups, a mini curl refresher spray that is water-based. A travel curl refresher spray revives clumps between dances.
- Safety note: for Olaplex and K18, buy from the brand store on Amazon or Sephora to avoid counterfeits.
Low Bun For Shorter Lengths Using A Small Donut
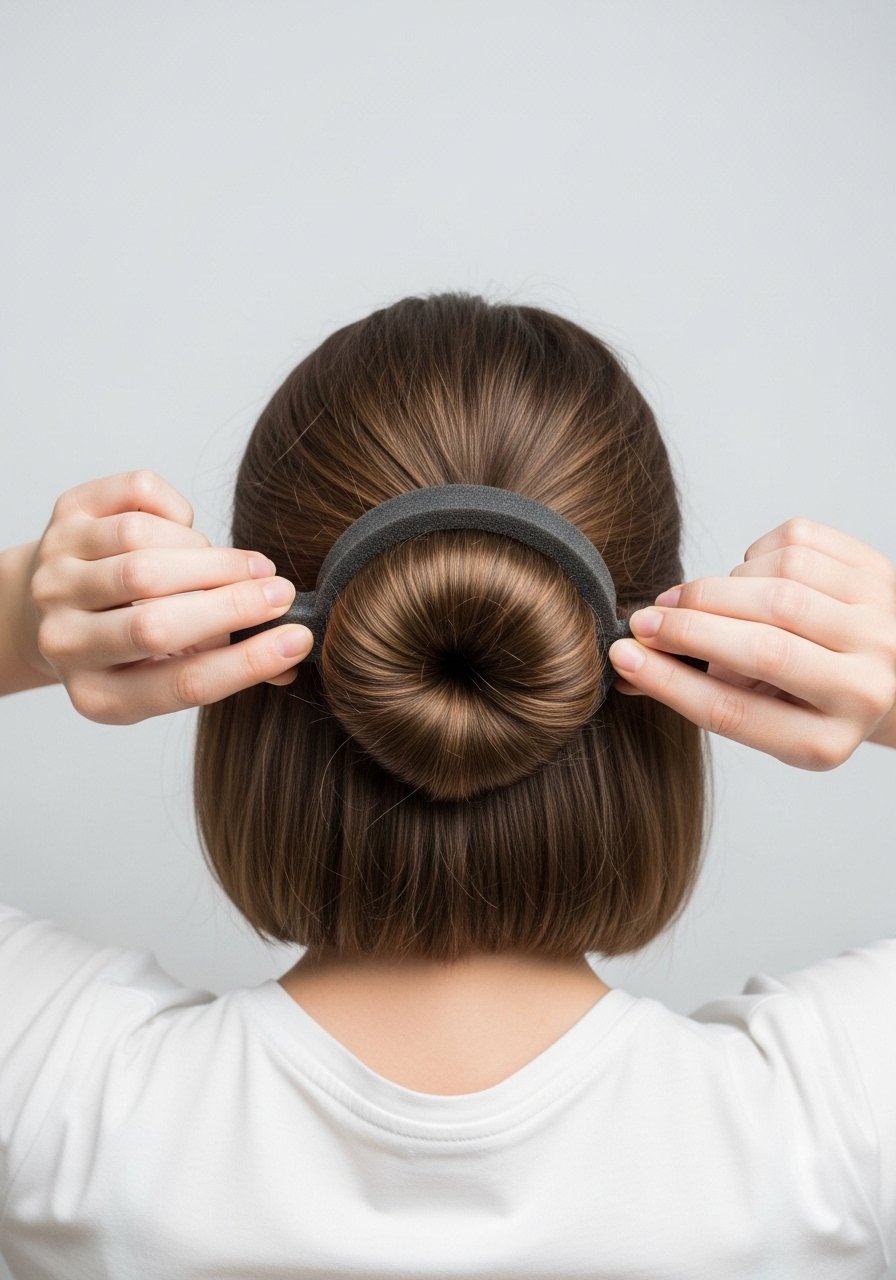
Shorter lengths can still read as a real low bun with the right tool and pin strategy. Use a 2 to 3 inch foam bun maker, place it at the nape, and wrap small sections around it, pinning each into the foam rather than the scalp. This trick works on bobs and collars-length hair that reach the nape. Time is usually 10 to 18 minutes once you get the hang of sectioning. Fine hair needs a little root texturizer before wrapping so the foam holds. Avoid making the bun too tight, which flattens the shape and shows pin ends. Keep a few face-framing pieces loose to sell the look as natural, not stuck-on.
Vintage Low Roll With Finger Wave Accents
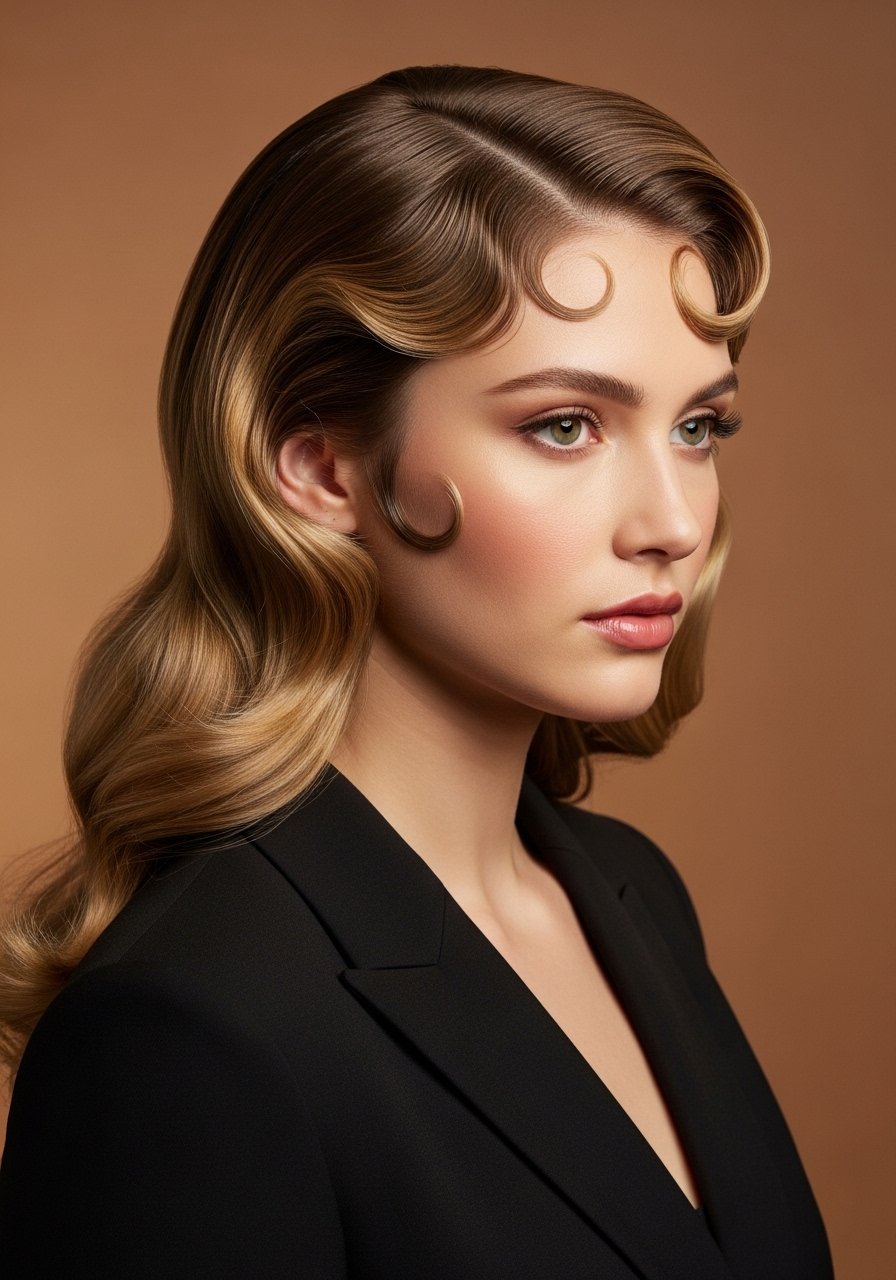
If you want an old Hollywood moment, set 1-inch sections with a Marcel iron or curling iron set to 300F, then brush into soft waves and roll them into a low roll at the nape pinned with long hairpins. Use a cream setting lotion on damp hair to help the waves hold and finish with a sheen spray. This suits 1B to 2C hair and is better executed in the salon unless you have experience with finger waves. The common mistake is overbrushing, which makes waves lose definition. For damaged or chemically treated hair, do a bond builder treatment a few days before heat styling and use the lowest effective heat.
Side-Swept Low Bun For Heart-Shaped Faces
Face shape matters for how the bun balances the silhouette. For heart faces, create a side part and sweep most hair across the crown into a low bun slightly off-center, then leave a longer side piece to taper at the cheek. Use two pins in an X where the bun meets the head to stop droop. This is flattering on 2A through 3C textures and takes about 15 to 25 minutes. Avoid placing the bun dead center, which emphasizes a narrow chin. If you have a fringe that is shorter than the bun, pin a small section behind the ear for cleaner photos.
Half-Up Low Bun For Brides Who Want Both
Want face framing and a low bun without pinning all the length? Gather the top half into a low bun and leave the lower half loose. Use a small elastic and a few pins to anchor the bun into the gathered crown, then spray the bun lightly for hold but not crunch. This is especially good for thick or heavy hair that you do not want fully pinned up. Time is 12 to 20 minutes, and it is super veil-friendly because the lower loose lengths can hide the comb. A mistake I see is securing the bun too loose, which pulls down through the night. Tighten slightly and add 1 to 2 hidden pins for stamina.
Bond Builder Prep For Heavy or Chemically Treated Hair
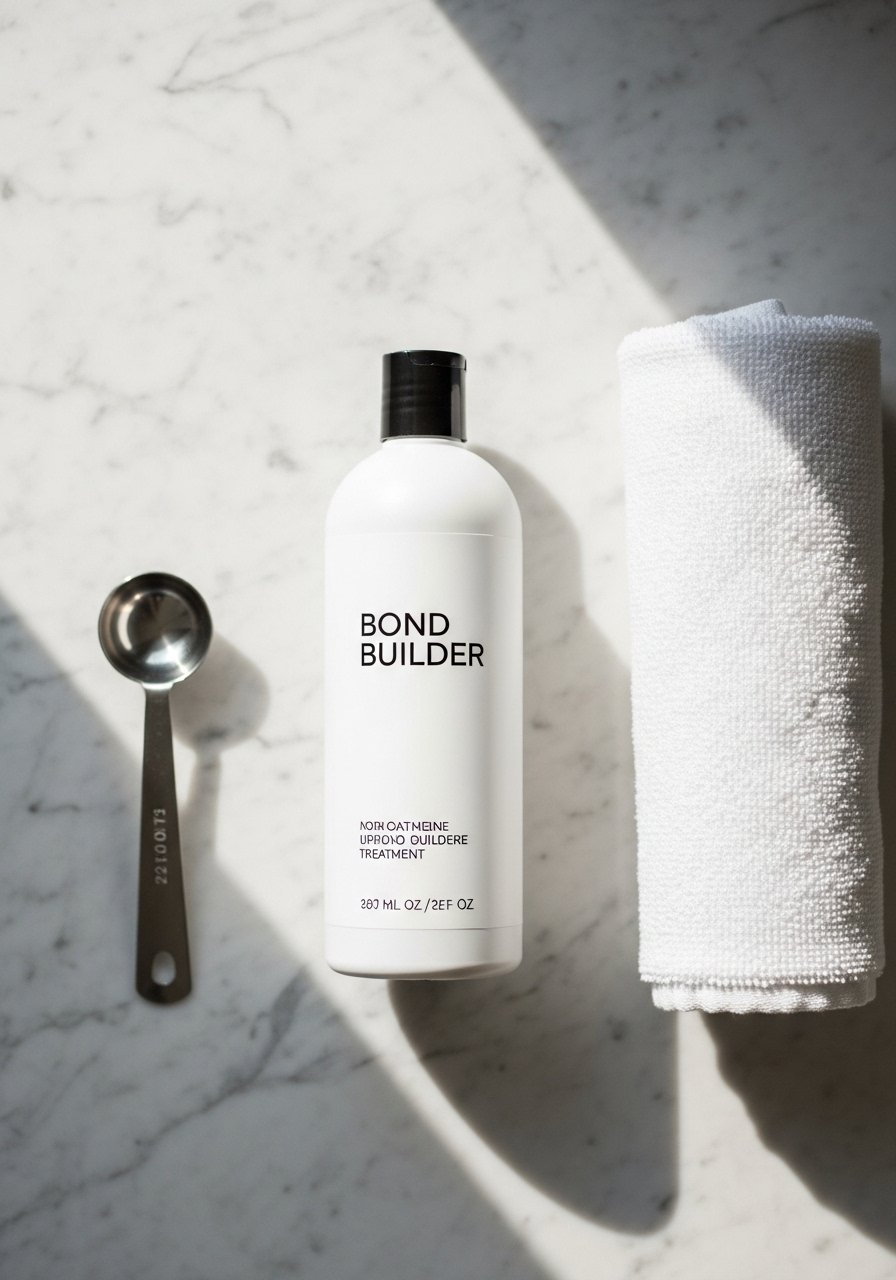
If your hair is color-treated or fragile, schedule a bond builder like Olaplex No. 3 the week before any updo-heavy day. Use a quarter-sized dollop on damp hair, leave 10 to 20 minutes, then rinse. Hair grows about half an inch a month at most, regardless of what biotin gummies promise you, so protecting what you have matters more than chasing faster growth. For extremely damaged hair, multiple sessions spaced a week apart help. Buy Olaplex from the brand store on Amazon or from Sephora to avoid counterfeits. Do not attempt aggressive lightening before a wedding, and consult a salon pro for any lifts over two levels.
What I Learned Putting These Buns Into Practice
- Heat protectant is not optional if you plan to use curling or flat irons at any point over 300F. Spray into damp or just-dried hair so it has time to absorb. A reliable heat protectant makes a big difference.
- Pack a small foam bun maker in two sizes. The smaller one saved a friend with a collar-length bob. A small foam bun maker set is under $10 and folds flat.
- For curly hair, layer a cream under gel. My curls looked great on TikTok and like wet noodles by 11am. Changing the order fixed that for me.
- Buy Olaplex and other premium bond builders from an authorized seller on Amazon or Sephora to avoid counterfeits, especially ahead of any color service.
- If you have scalp sensitivities, do a patch test with any new setting product 48 hours before styling.
Frequently Asked Questions
Q: How do I keep a low bun from drooping during a long reception?
A: Use a braided or teased base for grip, secure the bun with U-pins in an X pattern through the base, and carry a small travel hairspray to touch up. For very heavy hair, add a foam bun maker or a sewn-in hairpiece for extra support.
Q: Can I use Olaplex No. 3 before styling to make the bun look smoother?
A: Yes, Olaplex No. 3 used a few days before styling helps reduce breakage and smooth the hair shaft. Buy from the brand store on Amazon or Sephora to avoid counterfeits. It is not a substitute for a trim if split ends are present.
Q: My pins show in photos, how do I hide them?
A: Use pins that match your hair color, tuck pins into the bun under overlapping sections, and scatter decorative pins on top of the seam rather than directly over it. A soft veil can also hide visible pins if placed after the bun is finished.
Q: Can someone with 4A hair do a low bun, or should they book a stylist?
A: 4A hair can absolutely have a low bun. It helps to work with damp stretched hair or a twist-out base and use small, sturdy pins. If you are planning elaborate smoothing or want vintage waves with very tight curls, a stylist for the day can speed things up.
Q: How many days before the wedding should I do a trial run?
A: Do the full trial, including accessories and veil, at least two weeks before the wedding. That gives you time to tweak product amounts, swap pins, or schedule a bond builder if your hair needs strengthening.

