
I once tried a waterfall braid on fresh second-day hair that slicked down and vanished before lunch. After a year of messing with tension, product layering, and sleeping on silk, I found braid routines that actually hold and do not destroy the edges. These looks work across straight, wavy, curly, and coily textures, some in 10 minutes, some in 30. Most are DIY friendly, a few take a tiny tool splurge, and overall budget sits under $50 unless you want the fancy brush.
Classic Three-Strand Side Braid For Fine To Medium Hair
This is the braid I reach for when my roots are greasy but the ends are fine. It works because you unload tension by starting lower near the ear and pulling each section slightly loose as you go, which makes one braid look fuller without teasing. For fine to medium straight or 2A waves, use two light sprays of Bumble and bumble Surf Spray on damp roots before blow-drying on medium to give grip without crunch. Common mistake is braiding too tightly at the start, which creates a rope effect and shows scalp lines. Time: 7 to 12 minutes. If you want volume, gently pancake each braid segment with your fingertips, not a comb. This is easy DIY, no salon needed.
Messy Dutch Crown Braid For Thick Or Layered Hair
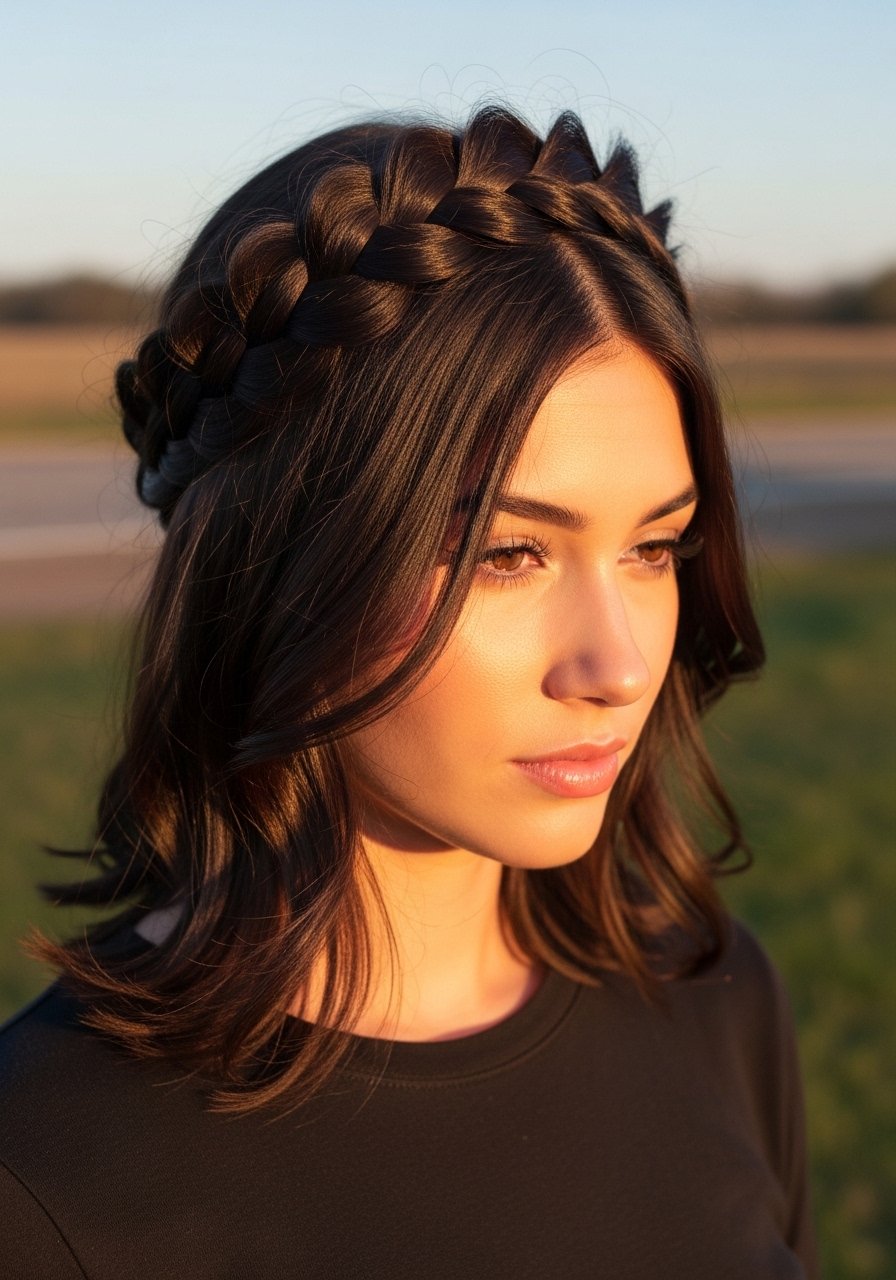
If your hair is dense or layered, Dutch braids hold weight because you add hair under, not over, so the braid sits raised and stays put. Section into three parts for each side, feed in hair every 1.5 inches, and use small clear elastics at the ends. For thickness control, smooth each added section with a pea-size amount of SheaMoisture Curl Enhancing Smoothie even on wavy hair, it tames flyaways without stiff hold. Mistakes I see: pinning the ends too tight at the nape, which makes the crown braid pull and hurt. If your scalp is tender, loosen the tension and switch pins to U-shaped hairpins. Salon vs DIY: doable at home, but a stylist can hide layers better if you have many short pieces.
Fishtail Braid For Long Straight Or Slightly Wavy Hair
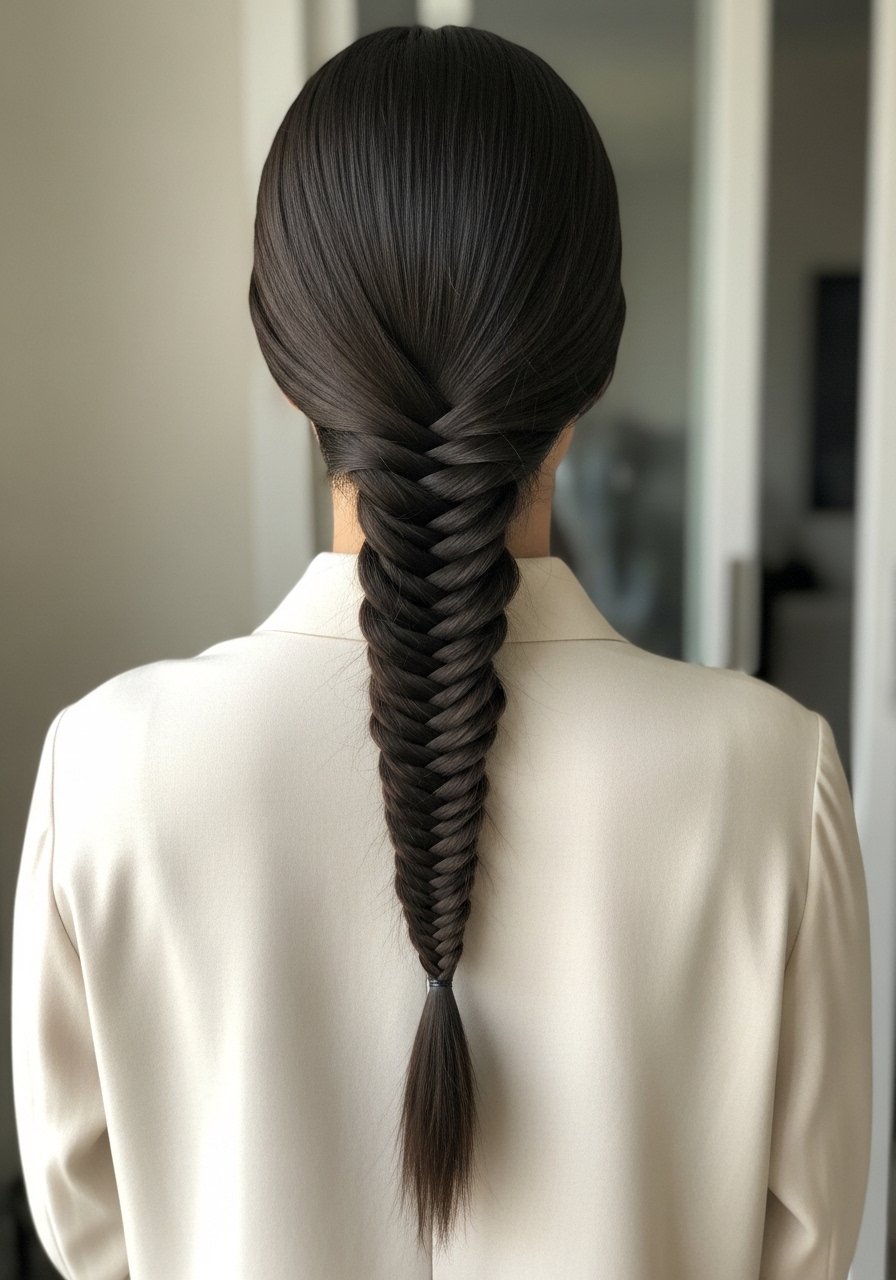
Fishtails look fancy but are a tension trap if you over-firm them. For long straight or 2A hair, split into two equal sections, take a thin slice from the outside of one section and cross it over every 10-12 passes to get that laddered effect. I usually work with a 1-inch section size for a neat finish, and finish with a dab of Moroccanoil Treatment Light to smooth the ends. Budget: under $25. Common mistake: using too-big sections which flattens the texture. If your hair is slippery, spray a touch of salt spray before braiding for grip. This style lasts two days if you sleep on a silk pillowcase.
Two-Strand Rope Braids For Curly And Coily Textures
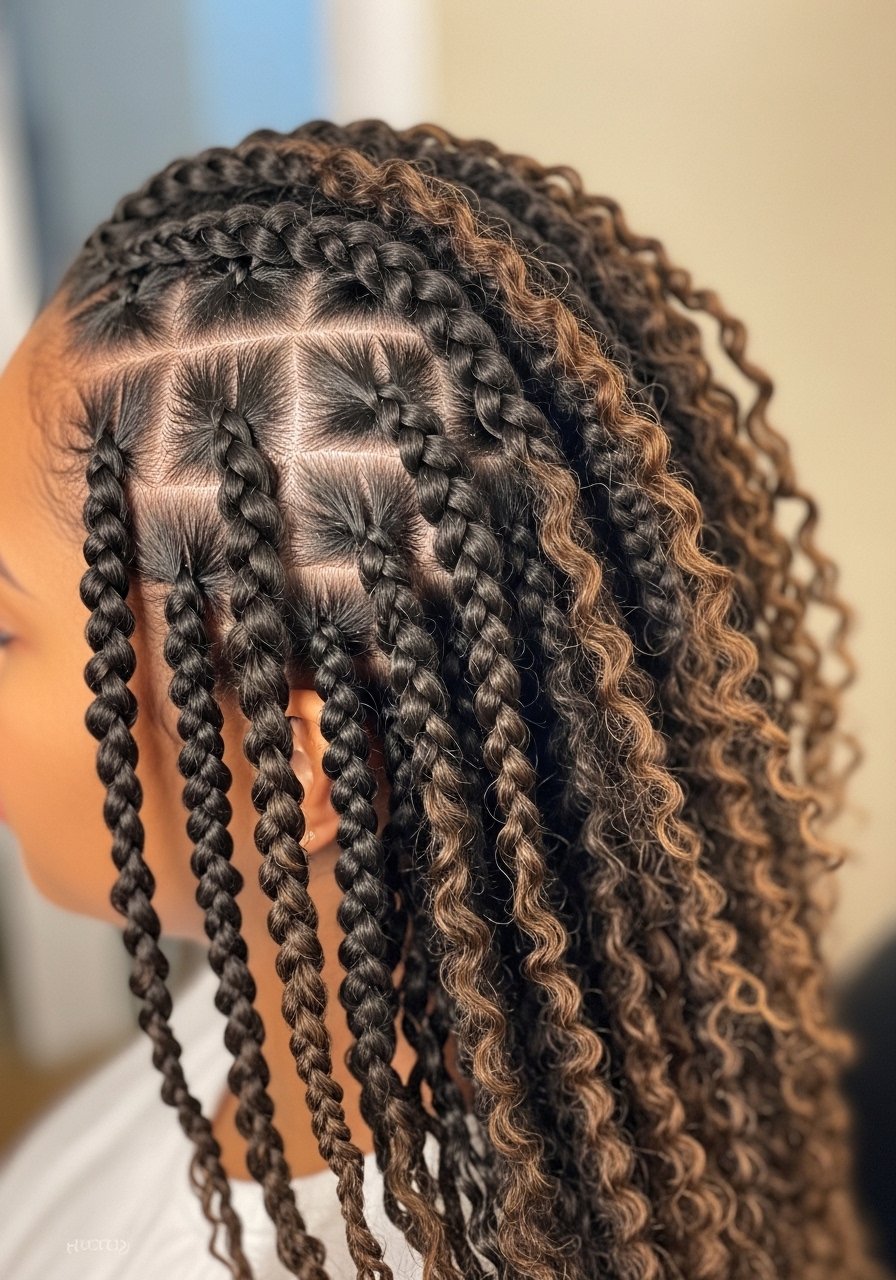
Rope braids are a gentle protective option for 3A to 4A hair because you twist instead of pulling sections across the scalp. Work with damp hair, apply a dime-sized amount of SheaMoisture Coconut & Hibiscus Curl Milk per section to avoid crunch. The trick that most how-tos skip: twist in the same direction for all sections, then wrap two twisted sections in the opposite direction to lock them. Watch for one big problem, tight hair at the root. If it tugs, you are doing it too tight and risking breakage. Sleep with a silk bonnet to preserve the twists. Salon vs DIY: I do these at home while watching a show.
Boxer Braids With Cornrow Roots For Active Days

If you move a lot or sweat at the gym, boxer braids keep hair secure and protect edges when done properly. Start cornrows at the hairline with 1/2-inch sections, and when you reach the crown, switch to regular three-strand braiding down the length. Use a thin layer of Eco Styler Professional Styling Gel on the roots only, and keep the ends softer to avoid the rigid ponytail look. Common mistake: soaking the scalp with product which flakes when dry. Time: 15 to 25 minutes. Safety note: avoid extreme tightness near the temples to reduce traction stress. I do this myself before early morning runs.
Micro Braids Mixed Into Loose Waves For Texture And Longevity
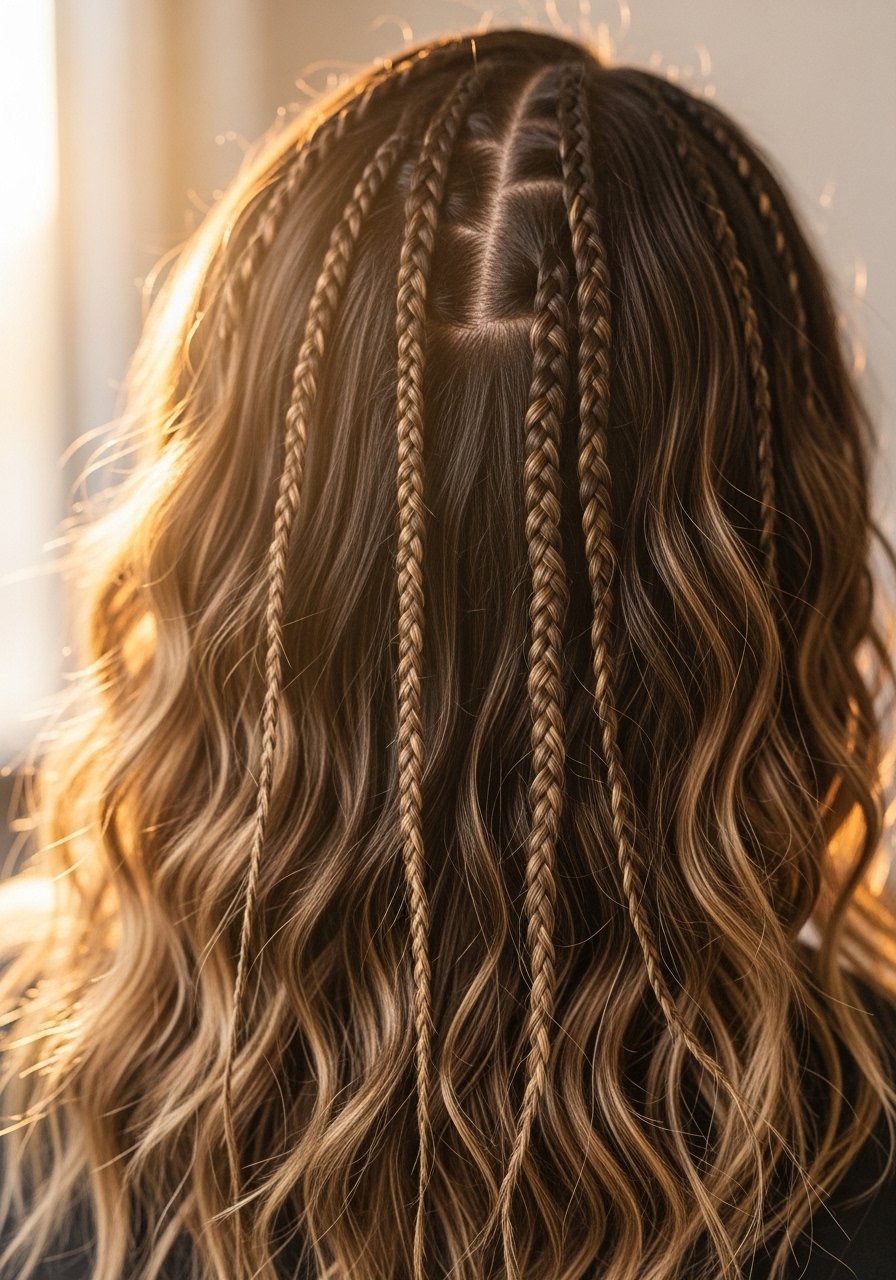
Micro braids add texture without full-on protective styling. I braid small 1/8-inch sections along the front and scatter three or four across the crown, then leave the rest of the hair loose. It makes second and third-day hair look intentional. If you have fine or medium density hair, do no more than 6 to 10 micro braids or the weight will pull. For hold I mist the braids with Oribe Superfine Hair Spray in a light two-spray layer. Salon vs DIY: salons will do tiny, even braids faster, but at home you can achieve the look in 20 to 40 minutes with patience. Common frustration solved: hides greasy roots without needing a full wash.
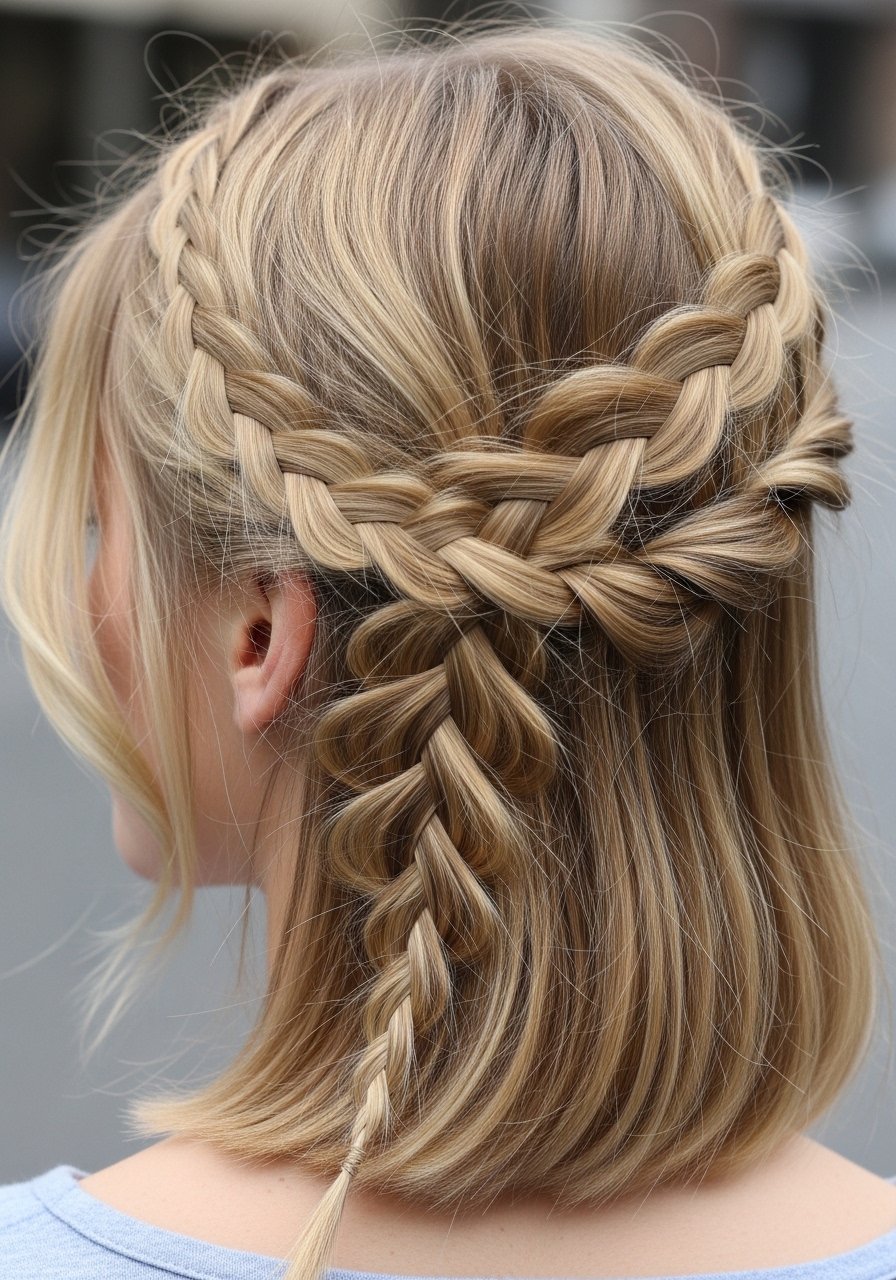
Halo Braid With Face-Framing Pieces For Medium To Long Hair
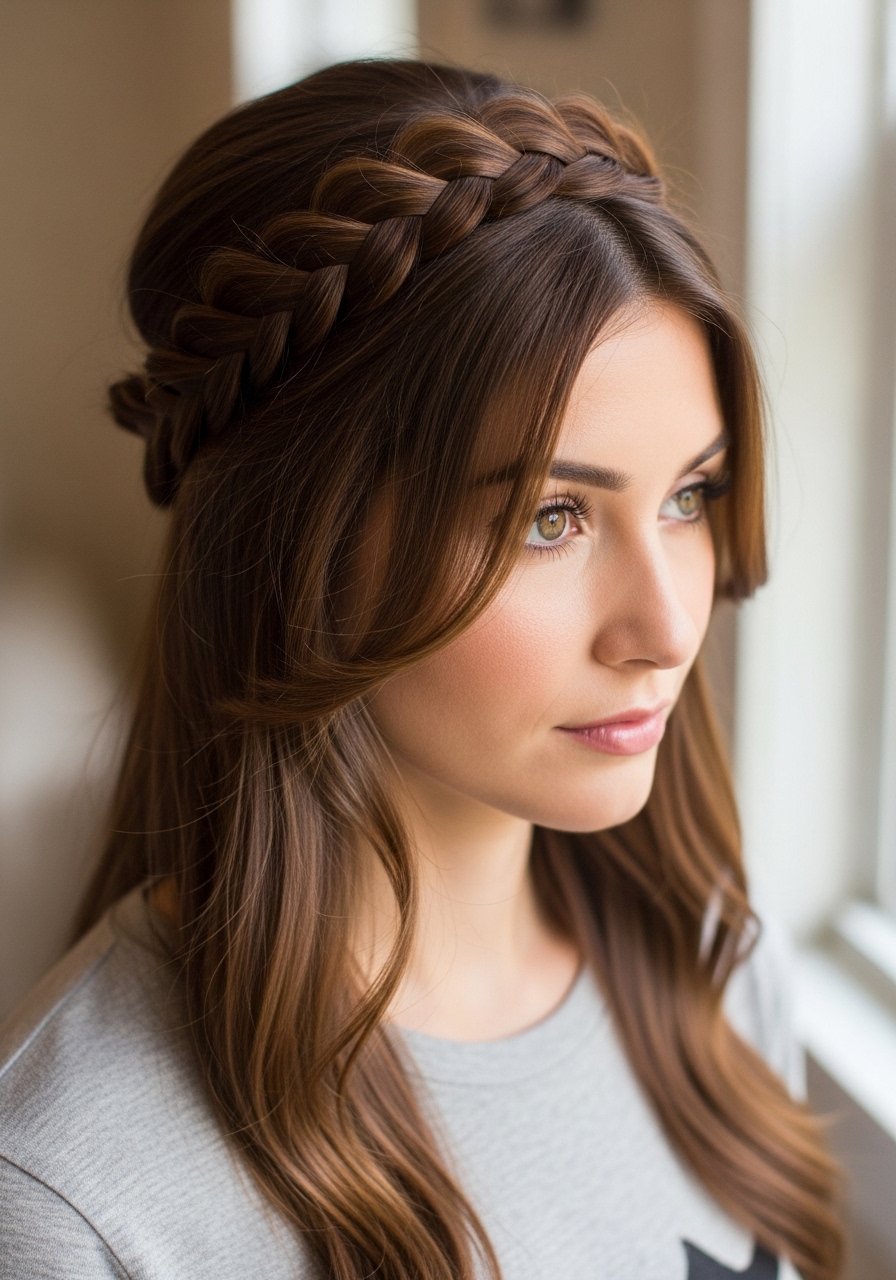
The halo braid is my go-to when I want something pretty but not heavy. Work in two mirrored Dutch braids from behind each ear, then pin them around the head to form the halo. For layered hair, clip shorter front pieces out first and tuck them after pinning to avoid gaps. I use a 1:2 coconut oil to leave-in spritz mix on the braid if your hair tends to frizz, and a single U-pin every 2 to 3 inches to keep it light. Common mistake: pinning too few spots which makes the halo flop forward. Time: 20 to 30 minutes. This pairs well with the silk pillowcase in the shopping list for second-day hold.
What I Actually Pack For A Braid Day
- A cheap rat-tail comb for parting and a wide-tooth comb for detangling.
- Small clear elastics in a pack of 100, they do not snag and are under $5.
- A silk pillowcase queen size. I keep one in my gym bag for overnight stays, it cuts morning frizz.
- Olaplex No. 3 Hair Perfector 3.3 oz. Honest note, buy from the official Olaplex store on Amazon or grab it at Sephora to avoid counterfeits. Use once a week for damaged ends.
- A set of U-shaped hairpins, medium hold, matte finish.
- Eco Styler Professional Styling Gel 32 oz for edge control and root hold on braids.
- A microfiber hair towel. Turns a two-hour dry into 45 minutes on heavier hair.
- A travel-size bottle of lightweight oil such as Moroccanoil Treatment 1.7 oz to smooth ends after styling.
Mini Braids With Beads For Festival Or Statement Looks
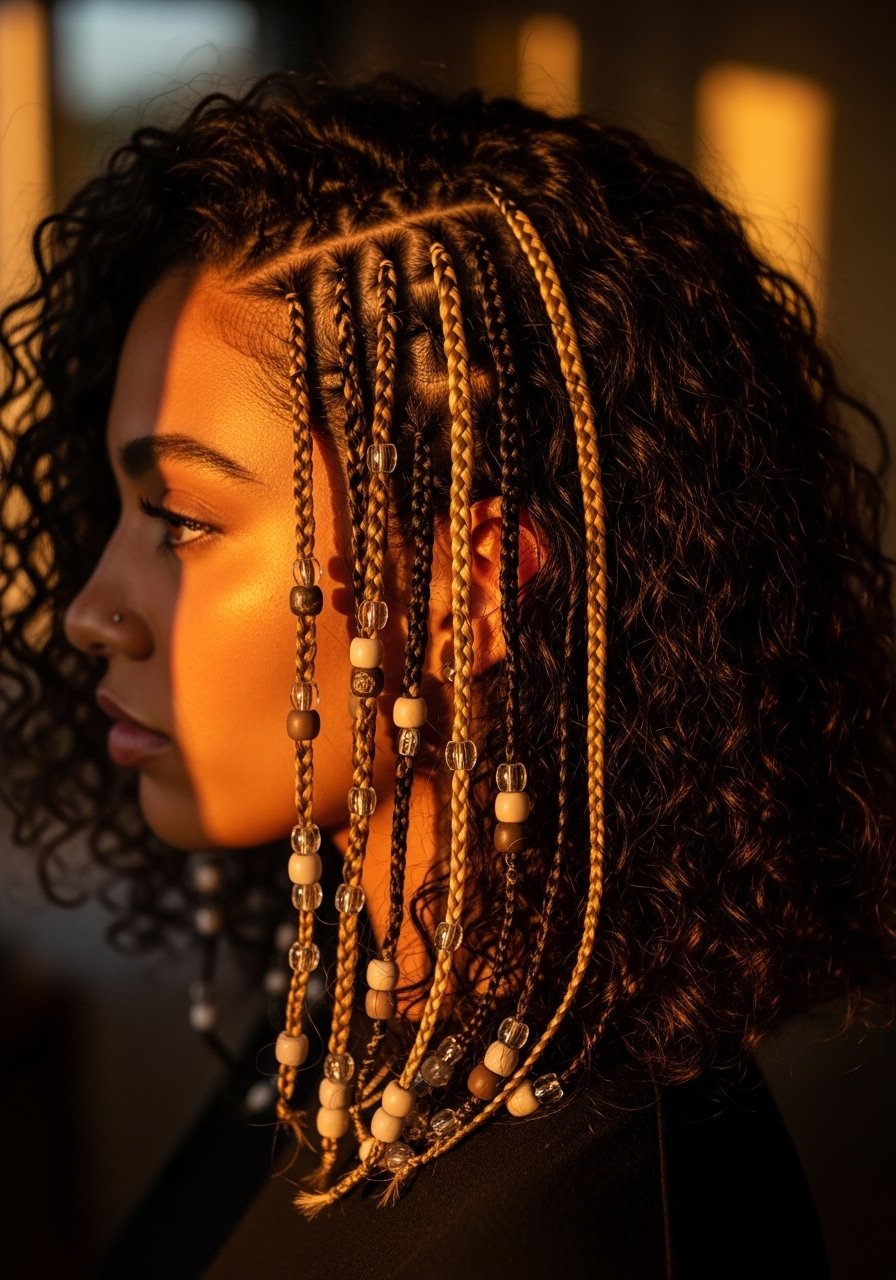
Mini braids and beads are a fun way to make a weekend look feel special. On 3A to 4A textures, keep each braid at about 1/4 inch and braid only halfway down so the weight does not tug the roots. If you add beads, slide them on with a small threading tool and lock with a tiny knot or a dab of water-based glue designed for hair. A mistake I made was using metal beads that rusted in salt air. Use plastic or coated beads. Time: 30 to 60 minutes depending on count. This is more of a salon-level detail but I have done a dozen at home using a simple bead kit.
Pull-Through Braid Illusion For More Volume On Medium Hair
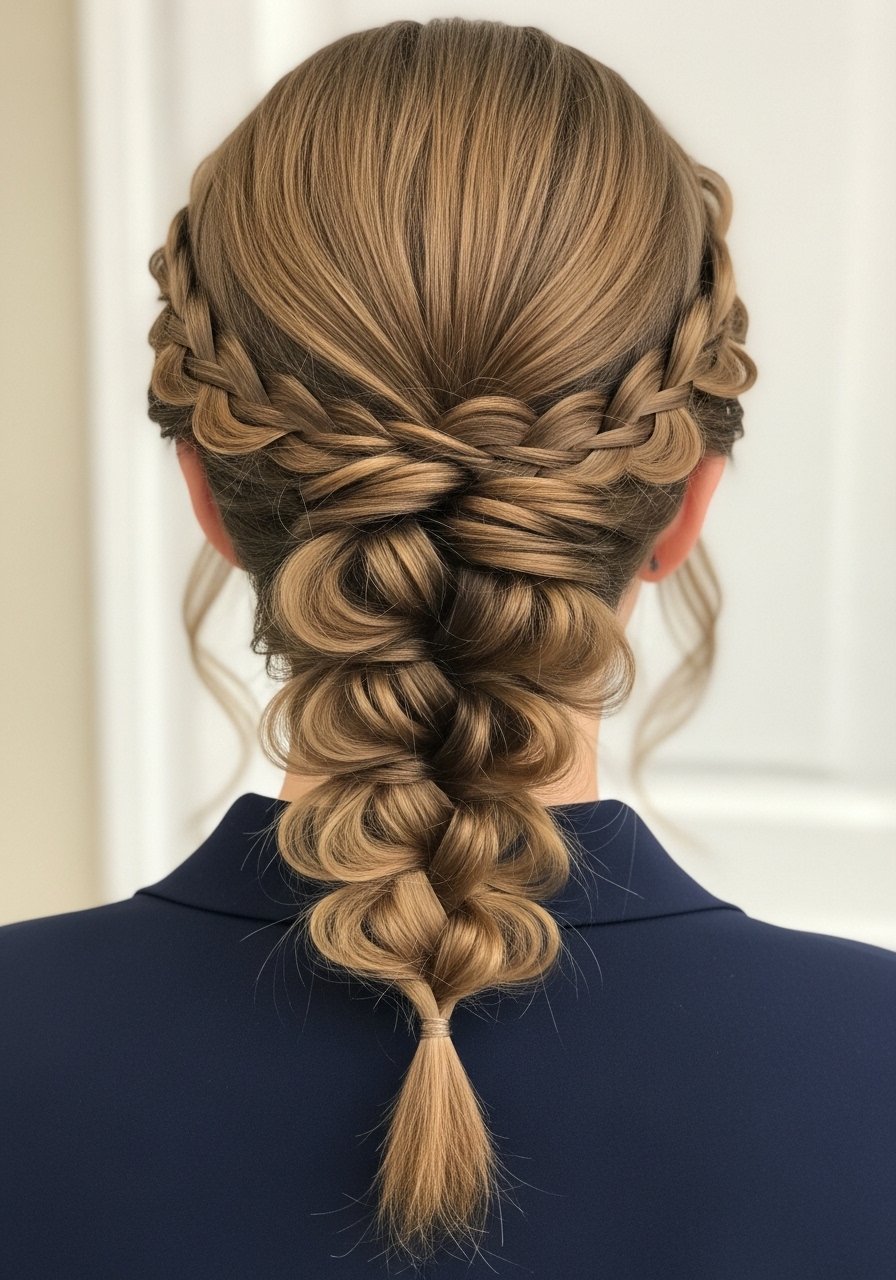
Pull-through braids are the cheat for volume without extensions. You section the hair into three or four horizontal bands, clip the top one, create ponytails and loop them through each other, then pancake each loop to look like a fuller braid. On medium density hair, use 4 bands for the best illusion. Work with a spray of Oribe Royal Blowout Heat Styling Spray before light blow-dry on medium heat to keep the looped sections smooth. Common mistake: leaving elastics visible; hide them by wrapping a thin strand. If you plan to flat-iron any pieces afterwards, remember heat protectant and do not exceed 300F without a guard.
What I Wish Someone Told Me Before I Braided Everything
- Heat protectant goes on damp hair, not dry. The cuticle is more open and the product actually absorbs. This Color Wow heat protectant is what I spritz before any iron work.
- Sleep on a silk pillowcase. Hair grows about half an inch a month at most, regardless of what biotin gummies promise you. The pillowcase cuts breakage from friction. Silk pillowcase queen size under $25 saved my mornings.
- Swap gel-only for layering, a leave-in cream under gel keeps second-day texture from collapsing. I switched to layering and my styles lasted longer. SheaMoisture Curl Enhancing Smoothie under gel changed my braid finishes.
- If your scalp hurts after braiding, loosen up. Tight braids cause traction damage over time. Most stylists suggest leaving at least a finger-width of looseness at the hairline.
- Keep Olaplex level treatments to once a week for compromised hair. Overdoing bond builders gives a gummy feel.
Frequently Asked Questions
Q: How tight should braid tension be to avoid breakage?
A: Tension should feel snug but not painful. If you need to press a fingernail into the scalp to get the braid to sit, it is too tight. For people with fragile edges, aim for a looser start and use pins to secure shape.
Q: Can I use Olaplex No. 3 on non-damaged hair, or will it weigh it down?
A: You can use Olaplex No. 3 on hair that is not visibly damaged, but hair that is fine may feel temporarily heavier if used every wash. Try once every two weeks, see how your hair holds. Buy from the official Olaplex store on Amazon or Sephora to avoid counterfeits. Olaplex No. 3 Hair Perfector 3.3 oz
Q: How do I keep braids from unraveling while I sleep?
A: Sleep in a silk bonnet or on a silk pillowcase and loosely wrap the braids. I also tie a soft scarf over the top which cuts movement. The micro-abrasion from cotton causes most morning frizz.
Q: Will braids cause hair to stop growing?
A: Braids do not stop the follicles from producing hair. They can cause breakage at the root if too tight or left in too long. Change tension, give the scalp breaks between heavy styles, and keep edges moisturized with a light oil.
Q: How often should I wash my scalp with protective braids like boxer or rope styles?
A: Every 10 to 14 days is reasonable for most people. Use a diluted shampoo in an applicator bottle at the roots, rinse gently, then mist the length with conditioner. Overwashing can dry the scalp under braids, but going too long invites buildup.
Q: My curls look great freshly braided but fall flat by day two, what am I doing wrong?
A: My curls looked great on TikTok and like wet noodles by 11am. Usually it is product layering. Add a lightweight cream under your gel, avoid heavy oils before braiding, and sleep on silk. Also try a light refresh spray rather than rewetting fully which collapses the pattern.

